vs backline assassinationGuardian WardGuardian Ward1,600 soulsTier 2ArmorPress+60sCooldown+0.2sCast Delay+1.5Out of Combat Regen+6sBuff Duration+8%Ability Range+8%RadiusBuilds from GritSlowing HexSlowing Hex1,600 soulsTier 2TechPress+29sCooldown+3.5sDuration+0.1sCast Delay+16%Move Speed-26%Dash DistanceDisarming HexDisarming Hex3,200 soulsTier 3TechPress+16sCooldown+4.25sDuration+0.1sCast Delay+75Bonus Health-13%Bullet ResistBuilds from Rusted Barrel
vs gap closers and escapesHigh-Velocity RoundsHigh-Velocity Rounds800 soulsTier 1WeaponPassive+45%Bullet Velocity+8%Weapon DamageMystic ExpansionMystic Expansion800 soulsTier 1TechPassive+20%Ability Range+20%RadiusCold FrontCold Front1,600 soulsTier 2TechInstantCast+25sCooldown+4sDuration+0.6sSpread Duration:+48%Move Speed+6%Spirit Resist
vs dive onto the backlineClose QuartersClose Quarters800 soulsTier 1WeaponPassive+20%Weapon Damage+20%Melee ResistExtra StaminaExtra Stamina800 soulsTier 1ArmorPassive+1Stamina+12%Stamina RecoveryRebuttalRebuttal800 soulsTier 1ArmorPassive+75Bonus Health+1.25sParry Cooldown+6sBuff Duration+30%Bonus Damage+100%Damage Parried as Heal+18%Melee Resist
Hold Hard CC for her — she has zero crowd control and only 1-tier durability, so a single Stun, Root or Knockup that lands outside her ultimate window usually kills her
Do not waste burst or a single-target ultimate during Return to ShadowsReturn to Shadows115s CooldownCalico instantly vanishes into shadow, becoming untargetable and gaining movement speed, damaging enemies around her as she goes.Damage150 base spirit damage per hit (deadlock.one), applied on both entry and…MobilityBonus move speed during the untargetable phase, which she uses to reposition…DefensiveFull untargetability for the duration — it can be used purely to survive a…1-20s cooldown (from a 115s base)2+75 damage and +20% bonus move speed5+450 heal amount and +1s cooldown refund; she is untargetable, so wait out the ~3s and pre-aim the exit point instead
Place area-denial on her likely reappearance point — Dynamo's SingularitySingularity250s CooldownDynamo forms a black hole in his hands that drags nearby enemies toward him, stunning them and burning them with spirit damage for the duration of the channel.Crowd ControlAoE stun plus a continuous vacuum pull for the full channel duration — the…Damage75 spirit damage per second base (deadlock.one) over a ~2.75s channel;Mobilitynone; Dynamo is rooted in place for the channel1+2m vacuum radius2+0.75s channel time5+6% damage per enemy's missing health, Mo & Krill's burrow, McGinnis turrets — rather than trying to react to the exit
Shoot her once while she is in AvaAva30s CooldownCalico dissolves into shadow and takes the form of Ava, gaining movement speed that builds the longer she stays in the form and disappearing from the enemy minimap.MobilityRamping bonus move speed (up to +45% more at Tier 2) and concealment from…DefensiveEscape only through raw speed;1+15s buff duration2+45% maximum bonus move speed and +15 health regeneration5+20% outgoing damage, +8s damage amp duration and +10s build duration form; hero damage resets the ramping speed bonus and locks the form out, which strands her mid-rotation
Ward her jungle routes; minimap concealment is Ava's entire value and direct vision defeats it completely
Punish her 2.60s reload — her 12-round spreadshot clip empties in under half a second, and she has no CC to protect herself while reloading
Return to Shadows lets her enter a fight untargetable, land the exit detonation on your backline, and leave before you can select her as a target — a lone support or sniper is simply dead
Ava keeps her off the minimap while she rotates, so the first warning you get is usually Gloom BombsGloom Bombs14s CooldownCalico lobs a handful of bombs that scatter and blow up after a short fuse, dealing spirit damage in the area they land.Damage45 base spirit damage per bomb (deadlock.one);DefensiveCan be thrown behind her while retreating to deter a chase through a choke.1-3s cooldown (from a 14s base)2-6% melee resist on targets hit and +6s duration5+3 grenades landing at your feet
Gloom Bombs plus Leaping SlashLeaping Slash9m Range13s CooldownCalico lunges forward and then sweeps everything around her with a melee slash.Damage10 impact damage plus 40 heal scaling per Spirit Power at base…MobilityA committed forward dash — good for closing, mediocre for escaping since it…DefensiveHeals on hero hit (+25 at Tier 1), giving her a reason to stay in a fight…1+25 heal amount2+200 bonus gold on kill and +3s bounty duration5+10 damage, +50% cooldown refund and +90 impact damage plus a full 79 DPS spreadshot magazine is a burst sequence that kills anyone under about 1 durability at point-blank range
Once Gloom Bombs hits T3 she clears camps instantly, so she out-farms you in the quiet parts of the game even if she never wins a fight
Ava T3's +20% outgoing damage means a Calico who transformed just before the fight is doing amplified burst from the first shot
Return to Shadows above all — it is simultaneously her dive and her escape. Force her to burn it defensively (feign a collapse, show a Stun) and the next 95-115 seconds she is a fragile no-CC hero you can walk at
Leaping Slash second, because it is both her gap-close and her in-fight heal; sidestep it and she gets neither
Ava third — landing any hero shot resets it, and a Calico who has to rotate on foot is trackable again
Gloom Bombs are not worth baiting; the cooldown is only 14s and walking out of the cluster is free
The instant Return to Shadows ends — she reappears as a targetable, low-durability hero with no CC and her escape on a 95-115s cooldown
Mid-reload: 12 rounds empty in roughly a quarter second and the 2.60s reload leaves her with nothing but a melee swing
While she is in Ava form she cannot shoot or cast at all — catching her here is close to a free kill
Immediately after a whiffed Leaping Slash: she is at close range with no dash, no CC and no heal
Any fight where she is forced to stand and trade in a grouped brawl — she has no teamfight tools and her damage profile wants an isolated target
Keep your distance from Leaping Slash and sidestep it when it comes, since it travels in one straight line and a miss denies her the heal. (Deadlock Item Builder, games.gg)
Fast farming and map mobility: she turns a quiet map into a soul lead
Return to Shadows makes her untargetable on the way in, which takes most of the risk out of a dive
Minimap concealment via Ava makes her rotations genuinely hard to track
High burst against isolated squishies
Sustains herself in skirmishes through Leaping Slash and Ava health regeneration
Weak to
Zero crowd control in the entire kit — she cannot lock anyone down or peel for an ally
Very low durability; she dies instantly to any Hard CC chain that catches her
Poor teamfight presence — her damage is single-target-flavoured and she has nothing to contribute to a grouped brawl
Ava's ramping speed resets on a single hero hit, so she is easy to disrupt while rotating
Her ultimate is both her engage and her escape, so spending it one way removes the other
In lane, good at
Gloom Bombs clears the wave and chips the enemy laner from a safe distance on a short 14s cooldown
Leaping Slash plus the spreadshot's 79 DPS makes any enemy who walks too far forward a real kill threat
Ava lets her leave a losing lane, reset and return without giving away her position
In lane, weak to
She is fragile — she has no CC of her own to defend a bad trade and very little effective health
The 12-round clip empties almost instantly and the 2.60s reload is a large punish window in a duel
Before Return to Shadows unlocks she has no untargetable escape and dies to any decent gank
Return to Shadows unlock — Gives her a dive-and-leave button and turns her from a farmer into a genuine pick threat
Gloom Bombs T3 (+3 grenades) — Camp and wave clear becomes near-instant, which is the foundation of her farming and split-push lead
Leaping Slash T3 — The +50% cooldown refund makes the dash repeatable, effectively giving her a second mobility charge in fights
Ava T3 (late 30min+) — +20% outgoing damage on transformation turns every rotation into a pre-buffed burst window
High-Rate Spreadshot ("Sweetest Lie")
SpreadshotClose Range
78.9DPS
Falloff Range 20m → 58m
A very fast spreadshot firing 4.76 shots a second, each of nine pellets at 1.84, for about 79 DPS, burning a 12-round clip almost instantly and paying for it with a long 2.60s reload. Bullet velocity is a modest 318 m/s and falloff runs 20m to 58m, so it rewards getting close and punishes anyone caught mid-reload.
1.84Bullet Damage
9Pellets per Shot
4.76Bullets per sec
12Ammo
2.60sReload Time
318m/sBullet Velocity
63Light Melee
116Heavy Melee
Vitality and movement
730Health
2Health Regen
6.80m/sMove Speed
1.60m/sSprint Speed
3Stamina
4.50sStamina Cooldown
Base values on patch data. Items and boons change all of these.
The heroes Calico wins most with, against what their two win rates would predict.
GravesGravesControllerSummonerClose rangeHybrid damageMap pressure while away from the fight via Borrowed Decree Ghouls marching at objectivesDurabilitylow (1/3)Burstlow (1/3)Mobilitynone (0/3)Healinglow (1/3)57.0% together+4.0% above expected
BabaBabaControllerMageMid rangeSpirit damageThree kinds of control in one kit: silence, a hex and several slowsDurabilitylow (1/3)Bursthigh (2/3)Mobilityhigh (2/3)Healinglow (1/3)55.2% together+3.2% above expected
KelvinKelvinSupportControllerMid rangeHybrid damageFrozen Shelter is a hard physical barrier that stops ranged damage and ultimates outrightDurabilityhigh (2/3)Burstlow (1/3)Mobilityhigh (2/3)Healingvery high (3/3)54.7% together+2.7% above expected
Deadman DannyDeadman DannySkirmisherInitiatorMid rangeHybrid damageFree flight: he picks his angles and reaches heroes others can'tDurabilitylow (1/3)Bursthigh (2/3)Mobilityvery high (3/3)Healinglow (1/3)53.4% together+1.7% above expected
PaigePaigeSupportControllerMid rangeSpirit damagePeel — Plot Armor is a save and a damage buff on one button.Durabilitylow (1/3)Burstlow (1/3)Mobilitynone (0/3)Healinghigh (2/3)54.1% together+1.4% above expected
HazeHazeAssassinCarryClose rangeBullet damageSingle-target sustained DPS ramps up once Fixation is stackedDurabilitylow (1/3)Bursthigh (2/3)Mobilityhigh (2/3)Healinghigh (2/3)52.6% together+1.4% above expected
Calico wins 48.7% of games overall.
Who counters Calico and who Calico counters: all 43 opponents, from Calico's hardest to easiest, with how far each sits from that average. Calico strugglesCalico does well
Graves and Paige are strong against almost every hero this patch, so they sit near the top here too.
The counters that are about Calico in particular: Kelvin (Calico wins 42.5%).
Pick an ability to see what it does and how to play around it.
Gloom Bombs
Ability 1 · Scattered Cluster Grenades with Delayed Detonation
Calico lobs a handful of bombs that scatter and blow up after a short fuse, dealing Spirit Damage in the area they land. Targets caught by more than one bomb take heavily reduced damage from the extras.
Purpose: Her wave clear, her camp clear and her opening chip damage. The diminishing-returns rule on overlapping bombs means she has to spread them across a group rather than stacking them on one target.
Damage
45 base Spirit Damage per bomb (deadlock.one); enemies hit by multiple bombs take 65% reduced damage on subsequent hits. Tier 3 adds +3 grenades.
Defensive
Can be thrown behind her while retreating to deter a chase through a choke.
How to play against it
The bombs have a visible scatter and a fuse delay — simply walking out of the cluster before detonation avoids nearly all of it
The 65% overlap reduction means bunching up is actually less punishing than it looks; the real cost is the free wave clear she gets
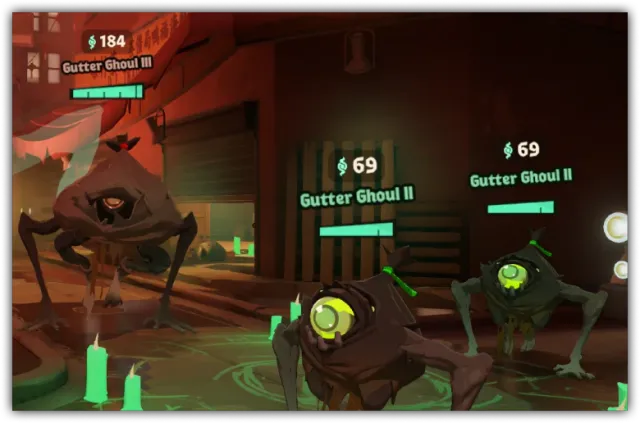
Contest her Haunt campsHaunts Neutral camps Lanes and Districts across the mapHaunts replace the old neutral camps. They are not a reskin: each type behaves differently, and the health bar now shows a camp's soul value and how hard it is, so you can decide whether a camp is worth your time before you start shooting. Three eye colours mark the tier — teal for tier I, yellow for tier II, red for tier III.Souls41/68/181 soulstier I / II / IIIa creep+0.44 / +0.73 / +1.95 a minute; her farming lead is largely built on Gloom Bombs clearing camps instantly
Interactions
Tier 3's +3 grenades is her farming spike — it makes camps and waves disappear in one cast
The 65% reduction on overlapping hits means she gains far more value against a spread group than a single target
Tier 2 applies a melee-resist reduction, which chains directly into Leaping Slash's Melee Damage
Upgrade tiers
T1: -3s cooldown (from a 14s base)
T2: -6% melee resist on targets hit and +6s duration
T3: +3 grenades
Leaping Slash
Ability 2 · Forward Dash into a Radial Melee Strike
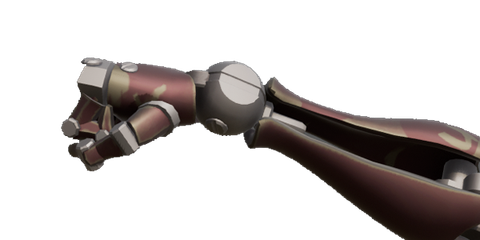
Calico lunges forward and then sweeps everything around her with a melee slash. Connecting with at least one hero returns a small amount of health.
Purpose: Her gap-closer, her in-fight sustain and her combo damage. The Tier 3 cooldown refund is what lets her chain it as a mobility tool rather than a once-per-fight commitment.
Damage
10 impact damage + 40 heal scaling per Spirit Power at base (deadlock.one); Tier 3 adds +10 damage and +90 impact damage.
Mobility
A committed forward dash — good for closing, mediocre for escaping since it only goes one direction.
Defensive
Heals on hero hit (+25 at Tier 1), giving her a reason to stay in a fight one beat longer.
How to play against it
It is a fixed-direction dash with no tracking — sidestepping breaks it and denies her the heal entirely
Deny the hero hit and she gets no health back; the heal only triggers on heroes, not troopers
Once she has dashed in, she is at close range with no CC of her own — that is the moment to Stun her
Interactions
Tier 3's +50% cooldown refund makes it repeatable, effectively giving her a second dash in extended fights
Gloom Bombs T2's melee-resist reduction stacks directly into this ability's Melee Damage
Tier 2's bonus gold on kill is an economy upgrade, not a combat one — it accelerates an already fast farmer
Upgrade tiers
T1: +25 heal amount
T2: +200 bonus gold on kill and +3s bounty duration
T3: +10 damage, +50% cooldown refund and +90 impact damage
Ava
Ability 3 · Transformation into a Non-Combat High-Speed Shadow Form
Calico dissolves into shadow and takes the form of Ava, gaining movement speed that builds the longer she stays in the form and disappearing from the enemy minimap. She cannot attack or cast abilities while transformed, and taking hero damage resets the accumulated speed and briefly locks the form out.
Purpose: Pure map mobility and information denial. It is how she reaches a fight, leaves a lost one, or rotates to an unwarded camp without showing up on the map — it is not a combat ability.
Mobility
Ramping bonus move speed (up to +45% more at Tier 2) and concealment from the minimap.
Defensive
Escape only through raw speed; she is still a targetable, killable body while in the form.
How to play against it
Land a single hero shot on her in Ava form — it resets the speed ramp and puts the form on cooldown, which is usually enough to catch her
Ward the jungle routes rather than watching the minimap; minimap concealment is the whole point of the ability and vision defeats it
If you catch her mid-Ava, she cannot shoot or cast back until she drops the form — collapse immediately
Track her farming pattern; she uses Ava to reach camps, so contesting her camp rotation denies the form's main purpose
Interactions
Hitting her with hero damage resets the ramping speed bonus and puts the form on a brief cooldown — a single connecting shot ruins a rotation
She cannot shoot or cast during Ava, so a Calico in this form is temporarily a non-combatant if you can catch her
Hidden on the minimap is not true invisibility — she is fully visible to anyone actually looking at her
Tier 3's outgoing damage amp makes a pre-fight Ava transformation into a burst enabler rather than just a rotation tool
Upgrade tiers
T1: +15s buff duration
T2: +45% maximum bonus move speed and +15 health regeneration
Ultimate · Untargetable Phase-Out with Damage on Entry and Exit
Calico instantly vanishes into shadow, becoming untargetable and gaining movement speed, damaging enemies around her as she goes. After roughly three seconds she reappears, dealing Spirit Damage again.
Purpose: Simultaneously her burst combo and her escape. It is the ability that lets her dive a backline, take the kill, and leave without ever being a valid target during the dangerous part.
Damage
150 base Spirit Damage per hit (deadlock.one), applied on both entry and exit; Tier 2 adds +75.
Mobility
Bonus move speed during the untargetable phase, which she uses to reposition entirely during the ~3s window.
Defensive
Full untargetability for the duration — it can be used purely to survive a committed burst or to escape a lost fight.
How to play against it
Do not spend a burst combo or a single-target ultimate while she is phased — she is untargetable, not merely hidden, and everything you throw is wasted
Predict the reappearance point instead of chasing the disappearance point; she gets bonus move speed but only about 3 seconds of travel
Pre-place area denial (Dynamo's Singularity, McGinnis turrets, Mo & Krill's burrow) on the likely exit rather than trying to react to it
Force her to use it as an escape earlier in the fight; the same cooldown is both her dive and her survival, and a Calico without it is a 1-durability hero with no CC
Interactions
Because she is untargetable rather than invisible, it dodges projectiles, lock-on effects and single-target ultimates outright
Used offensively it reads as a dive; used defensively it reads as an escape — the same cooldown does both, which is why forcing it early is so valuable
Tier 3 adds a large heal (+450) and a cooldown refund, turning it into a full reset button (an older Dexerto write-up describes a full cooldown reset plus damage amp at max rank, which conflicts with the current deadlock.io listing — treat the exact T3 wording as needing re-verification)
Deadlock.io lists a 115s base cooldown, dropping 20s at Tier 1
Upgrade tiers
T1: -20s cooldown (from a 115s base)
T2: +75 damage and +20% bonus move speed
T3: +450 heal amount and +1s cooldown refund
Calico's win rate by game length
Calico gets stronger the longer the game goes: 45.2% in games under 25 minutes (#33 of 44), 49.7% in games past 40 (#19 of 44). Worth knowing: the tag at the top says "Mid Game", but on this patch the long games are where Calico pulls ahead of other heroes.
above 50%below 50%under 1,000 gameshow many games end then
See the numbers
Minutes
Wins
vs usual
Games
10–15
50.8%
+2.1%
1,003
15–20
47.2%
−1.5%
2,020
20–25
43.4%
−5.3%
5,383
25–30
45.9%
−2.8%
17,672
30–35
47.9%
−0.8%
38,360
35–40
50.0%
+1.3%
43,085
40–45
49.9%
+1.2%
28,856
45–50
49.6%
+0.9%
14,890
50–55
49.3%
+0.6%
6,790
55–60
50.3%
+1.6%
2,582
60+
47.3%
−1.4%
1,278
"vs usual" is against Calico's 48.7% over all these games. Faded rows have under 1,000 games, where a few percent either way is noise; under 300, no win rate is shown.
Each point is how often Calico won games that ended at that length, not the chance of winning at that minute.
Short games are usually one-sided, so the left side is about closing out a lead and the right side about long, close games.
Games under 10 minutes are left out. Every hero by game length →
Sources and confidence for this record
Record confidence: Strong evidence. Compiled for patch 10-30-2026, researched 2026-10-30.
Difficulty rating: Both Deadlock Labs' hero difficulty guide (deadlocklabs.gg/heroes/difficulty/) and Lockbuilds' difficulty tier list independently place Calico at Medium.

























































 Leaping Slash's Melee Damage