
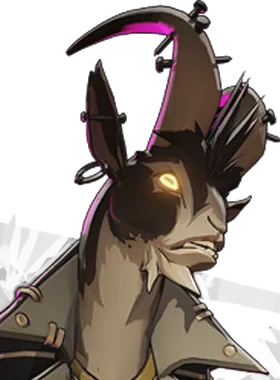
Calico vs Billy
Calico's team wins 48.0% Billy's team wins 52.0%, across 24,196 games
Written for the Calico player. Playing Billy? See Billy vs Calico →
About even
Calico usually wins 48.7% of games. Against Billy that is 0.7% lower, over 24,196 games.
- Whole match 48.0% −0.7% vs usual 24,196 games
- Sharing a lane 47.6% −1.1% vs usual 8,161 games
- Oracle and above 45.9% −4.2% vs usual 814 games
"Sharing a lane" counts only games where both were assigned the same lane — the laning matchup itself. "Oracle and above" counts only matches whose average rank was Oracle and above, against Calico's usual win rate at that rank.
The fight at a glance
If you're Calico
 Bashdown Billy drives his bat into the ground. Crowd Control Pulls airborne enemies downward plus a knockup shockwave on the ground — two… Damage 35 spirit damage scaling with Spirit Power (deadlock.one); Defensive The knockup interrupts an incoming dive or a channelled ability. 1 -10s cooldown (from a 35s base) 2 +1 charge and +2m radius 5 -3s charge time and now deals 50% heavy melee damage
Wait out Bashdown 35s cooldown
ThenForce it against a trooper wave or a non-committal step and his next several seconds have no control.
- Watch out
 Chain Gang Billy chains every nearby enemy to himself. Crowd Control Movement-ability lockout plus heavy slow for the ~2.8s duration, ending in a… Damage 120 spirit damage scaling with Spirit Power on the yank (deadlock.one). Mobility none for Billy 1 +40% spirit and bullet resist 2 -40s cooldown (from a 175s base) 5 +5m range and +1.3s Unstoppable per hero pulled Chain Gang does not slow your escape, it deletes it.
- Your edge
- Calico has more burst damage than Billy.
If you're Billy
 Return to Shadows Calico instantly vanishes into shadow, becoming untargetable and gaining movement speed, damaging enemies around her as she goes. Damage 150 base spirit damage per hit (deadlock.one), applied on both entry and… Mobility Bonus move speed during the untargetable phase, which she uses to reposition… Defensive Full untargetability for the duration — it can be used purely to survive a… 1 -20s cooldown (from a 115s base) 2 +75 damage and +20% bonus move speed 5 +450 heal amount and +1s cooldown refund
Wait out Return to Shadows 115s cooldown
ThenForce her to burn it defensively (feign a collapse, show a Stun) and the next 95-115 seconds she is a fragile no-CC hero you can walk at.
- Watch out
- Return to Shadows lets her enter a fight untargetable, land the exit detonation on your backline, and leave before you can select her as a target.
- Your edge
- Billy has more crowd control than Calico.
- Buy
 Slowing Hex Slowing Hex +29s Cooldown +3.5s Duration +0.1s Cast Delay +16% Move Speed -26% Dash Distance Buy it against Calico's Return to Shadows.
The full plan for Calico, phase by phase, is below. Billy's side in full →
What should I do right now?
Do
- Plan for
 Scourge Scourge +35s Cooldown +10s Duration +0.25s Cast Delay +40% Spirit Resist +100 Bonus Health +20% Debuff Resist — know which tier it sits in so you are not improvising at the shop.
- Know what Bashdown looks like. It is the cooldown this lane revolves around.
Avoid
- Walking to lane on the same path every wave against a hero with Billy's engage range.
Do
- Zero ranged threat — he has no poke whatsoever and cannot contest a laner who stays at distance
- Both Bashdown (35s) and
 Rising Ram Rising Ram Billy lowers his head and charges into an enemy, carrying both himself and them up into the air. Crowd Control Knockup on the target — they are carried airborne alongside Billy. Damage 40 spirit damage scaling with Spirit Power (deadlock.one). Mobility A committed forward charge with a 0.35s cast delay and a short 0.3s… 1 +25% weapon damage for 5s on impact 2 +0.4s charge duration 5 -13s cooldown (from a 32s base) and +15% max health for 20s on hero hit (32s) have long base cooldowns, so a baited cast leaves a large dead window
 Gloom Bombs Gloom Bombs Calico lobs a handful of bombs that scatter and blow up after a short fuse, dealing spirit damage in the area they land. Damage 45 base spirit damage per bomb (deadlock.one); Defensive Can be thrown behind her while retreating to deter a chase through a choke. 1 -3s cooldown (from a 14s base) 2 -6% melee resist on targets hit and +6s duration 5 +3 grenades clears the wave and chips the enemy laner from a safe distance on a short 14s cooldown
Avoid
- The melee-reload loop from
 Blasted Blasted Billy's melee hits refill his gun's ammunition and leave the victim 'wrecked' for several seconds. Crowd Control none (the wrecked status is a damage debuff, not crowd control) Damage 70 melee bonus health scaling with Spirit Power at base (deadlock.one); Mobility Tier 1 grants +2.25 m/s bonus movement speed. 1 +2.25 m/s bonus movement speed 2 +1 Bashdown charge on use and +7% wrecked bullet amplification 5 +50 melee bonus health and improved spirit scaling means he never has to stop shooting to reload in an extended lane trade
- Rising Ram into the sidewalk of a lane converts into a Knockup and a full 74 DPS magazine at point-blank range
Do
- Their first real spike is Bashdown T2 (+1 charge, +2m radius) — respect it from that point, not before.
- Your spike is ult unlock: Return to Shadows gives her a dive-and-leave button and turns her from a farmer into a genuine pick threat
Avoid
- Taking an even fight against Billy on their spike timing when you could take the same fight ten minutes later on yours.
Do
- Watch for Rising Ram. It is a straight-line charge with a 0.35s cast delay — sidestep rather than back up, and the miss costs him the full 32s cooldown instead of 16s
- Break line of sight against Chain Gang — the chain explicitly snaps when he loses sight of you, so putting a pillar, crate Crates Streets, rooftops and tunnels — about 500 of them Ordinary breakables. Each has a 60% chance to drop souls; a Tough Crate always drops, for double. Souls 23 souls a crate, 60% of the time +2 a minute or building corner between you is the intended escape rather than a dash
Avoid
- Spending your own escape before Bashdown is on cooldown.
Billy’s abilities
- Rising Ram Ability 2
The gap-close arrives with control attached — Knockup on the target, they are carried airborne alongside Billy.
- It is a straight-line charge with a 0.35s cast delay — sidestep rather than back up, and the miss costs him the full 32s cooldown instead of 16s
- Fight him in open ground where a missed charge leaves him fully exposed with no follow-up
- Hold a Stun for the charge wind-up; interrupting it denies both the cooldown refund and the Knockup
- Chain Gang Ultimate
Billy's fight-ender: movement-ability lockout plus heavy slow for the ~2.8s duration, ending in a forced displacement toward Billy.
- Break line of sight — the chain explicitly snaps if he loses sight of you for a short period, so ducking behind a pillar or a building corner frees you
- Do not group inside 12m of a Billy with ultimate available; the cast range is short and spreading out means he catches one hero instead of four
- Save a cleanse or CC-immunity item specifically for this rather than for his Bashdown Knockup
- Bashdown Ability 1
Billy decides where you are standing for the next second or two — pulls airborne enemies downward plus a Knockup shockwave on the ground, two distinct control effects in one cast.
- It has a visible slam wind-up and a fixed radius — step out of the circle rather than trying to jump over it, since jumping is exactly what the pull punishes
- Do not use an air-mobility escape while he has Bashdown available; the pull drags you straight back down and wastes your stamina
- Bait the charges — at base he only has one on a 35s cooldown, so a spent Bashdown means several seconds of no control from him
- Blasted Ability 3
The engine of the hero. It converts him from a gun with a 2.90s reload into a melee-shoot loop that never has to stop, and it is why his sustained damage is genuinely top-tier at close range.
- Do not let him land the melee hit that starts the loop — outside melee range the wrecked status never applies and his gun is just a 74 DPS close-range weapon with a 2.90s reload
- The 7s wrecked duration is the window to disengage; breaking away resets his amplification
- Anti-melee itemisation and any effect that keeps you at range defeats the entire mechanic
- 1 Bashdown
Bashdown first — at base he has a single charge on a 35s cooldown, and it is both his interrupt and his anti-air. Force it against a trooper wave or a non-committal step and his next several seconds have no control
- 2 Rising Ram
Rising Ram second — it is his only gap-close, and a miss puts it on the full 32s rather than the halved cooldown. Bait it by standing just inside charge range in open ground and dashing laterally
- 3 Chain Gang
Chain Gang is best denied rather than baited: stay spread and keep geometry between yourself and him so the 175s ultimate catches one target and then breaks on line of sight
The matchup in detail
- No ranged capability at all — he is completely neutralised at distance Strong evidence
- Highly commitment-dependent; a missed Rising Ram or a Chain Gang broken by line of sight leaves him stranded in melee range Strong evidence
- Long base cooldowns (35s Bashdown, 32s Rising Ram, 175s Chain Gang) punish misplays severely Strong evidence
- Chain Gang does not slow your escape, it deletes it — while chained you cannot use Wraith's blink, Calico's
 Leaping Slash Leaping Slash Calico lunges forward and then sweeps everything around her with a melee slash. Damage 10 impact damage plus 40 heal scaling per Spirit Power at base… Mobility A committed forward dash — good for closing, mediocre for escaping since it… Defensive Heals on hero hit (+25 at Tier 1), giving her a reason to stay in a fight… 1 +25 heal amount 2 +200 bonus gold on kill and +3s bounty duration 5 +10 damage, +50% cooldown refund and +90 impact damage , Apollo's
 Disengaging Sigil Disengaging Sigil Apollo inscribes a glowing sigil in the air ahead of him and springs backwards as it bursts, damaging and slowing anyone standing in it. Crowd Control Movement slow on enemies caught in the blast. Damage 85 base damage (deadlock.one). Mobility A backwards leap; at Tier 2 it also restores 1 stamina and resets his air… 1 +25% fire rate and +25% bullet velocity for 8s 2 restores 1 stamina and resets air jump / dash limit on hitting player targets 5 can be recast within 4 seconds or any other movement ability, and pulling against it heavily slows you before the yank Strong evidence
- Bashdown yanks airborne heroes straight to the ground, so air-mobility escapes (Vindicta, Grey Talon, a Calico mid-leap, anyone mid-dash) are actively worse than standing still against him Strong evidence
- Rising Ram launches you into the air alongside him, where you cannot dash and cannot dodge his 74 DPS gun at point-blank range Strong evidence
- Once Blasted's wrecked status is on you, his bullets are amplified for 7 seconds and he never has to reload because melee hits refill his ammunition Strong evidence
- At Chain Gang T3 he gains
 Unstoppable Unstoppable +60s Cooldown +5.5s Duration +125 Bonus Health +25% Debuff Resist Builds from Debuff Reducer scaling per hero pulled, so counter-CC on him stops working exactly when he has caught the most people Strong evidence
- Your mobility is a real advantage here, and Billy's slows exist to delete it. Note that Debuff Resist barely helps against short hard slows because it only trims duration — spacing and cover do more than an item will. Strong evidence
- Break line of sight against Chain Gang — the chain explicitly snaps when he loses sight of you, so putting a pillar, crate Crates Streets, rooftops and tunnels — about 500 of them Ordinary breakables. Each has a 60% chance to drop souls; a Tough Crate always drops, for double. Souls 23 souls a crate, 60% of the time +2 a minute or building corner between you is the intended escape rather than a dash Strong evidence
- Do not stand within 12m of a Billy holding his ultimate; his cast range is short and a spread formation turns a four-man Chain Gang into a one-man one Strong evidence
- Fight him at range. He has literally no ranged tool — kiting outside his gun's effective band makes him a non-factor Strong evidence
- Sidestep Rising Ram rather than backing up; the 0.35s cast delay is readable, and the miss costs him 32s instead of the 16s a hit would Strong evidence
- Deny the melee hit that starts the Blasted loop — no wrecked status means no bullet amplification and he is stuck with a 2.90s reload Strong evidence
- Do not use air mobility to escape him while Bashdown is up; walk out along the ground instead, because the pull punishes exactly the jump you want to make Strong evidence
- Fight in open ground; his entire kit assumes confined space and short distances Strong evidence
-
 Metal Skin Metal Skin +24s Cooldown +5s Duration +12% Bullet Resist -20% Dash Distance +20% Gravity Scale is the right shape of answer to Billy's gun — 5 seconds of complete bullet immunity on a 24-second cooldown — but know its two holes before you rely on it. It does not stop on-bullet build-ups, so their
 Toxic Bullets Toxic Bullets -40% Incoming Healing bleed,
 Silencer Silencer +12% Spirit Resist -25% Spirit Damage Reduction +2.5s Silence Duration +6s Debuff Duration +10s Immunity Duration stacks and slow build-ups keep landing while you are immune, and it costs you −1.5 m/s and −20% dash distance for the duration, which is the wrong trade if you were planning to walk out during it. Use it to win a stand-and-fight window, not to escape one. Documented
- Immediately after a missed Rising Ram — he is at close range, has no gap-close for up to 32s, and pays full cooldown instead of the halved on-hit version Strong evidence
- After Bashdown is spent at base rank: up to 35 seconds with no Knockup, no anti-air pull and no way to start the wrecked loop without a raw melee swing Strong evidence
- The moment Chain Gang breaks on line of sight — he has committed a 175s ultimate, is standing in the middle of your team, and the resist buff runs out Strong evidence
- Any engagement at range: with zero ranged tools, a Billy being kited is contributing nothing at all Strong evidence
- While the wrecked debuff has expired and he has not re-applied it — his bullet amplification is off and his gun is back to a plain 74 DPS with a 2.90s reload Strong evidence
- Billy's pull is the whole matchup. Until it is on cooldown you are playing around it; once it misses you have a window that is worth committing into. Make it the first thing you bait — show a sliver of yourself from behind cover rather than walking a clean line they can lead. Strategic
- Parry is your best tool against Billy's arrival and it is now a commitment rather than a hedge. Since 09-16-2026, parrying during a dash cancels the dash and its momentum, so you cannot both reposition and hold F. The cooldown maths makes the decision for you: a successful parry costs 0.5 seconds and stuns them for 3 with no Debuff Resist reduction possible, while a whiff costs 4.5 seconds — against a hero who arrives on a cooldown, that whiff is the entire window they needed. Documented
- Play this lane looser than the guides say. The 09-16-2026 patch cut nearly all movement slows by about 20% and ground-dash slows by about 10%, so the distance Billy takes off you per application is meaningfully smaller than it was. With mobility as your main advantage, that shifts the break-even point on walking up: exchanges you used to refuse because one slow meant death are now survivable. Test it early rather than assuming the old spacing. Documented
- You get value from moving around the map and Billy does not, but the 09-16-2026 patch made that harder to convert early: tunnel breakables Crates Streets, rooftops and tunnels — about 500 of them Ordinary breakables. Each has a 60% chance to drop souls; a Tough Crate always drops, for double. Souls 23 souls a crate, 60% of the time +2 a minute now spawn and respawn on 5 minutes rather than 3. The off-lane income that used to make a rotation pay for itself is roughly 40% less frequent, so before 6:00 a rotation has to be justified by pressure on Billy or on the Guardian, not by the breakables you pick up on the way. Documented
- The melee-reload loop from Blasted means he never has to stop shooting to reload in an extended lane trade Strong evidence
- Rising Ram into the sidewalk of a lane converts into a Knockup and a full 74 DPS magazine at point-blank range Strong evidence
- Zero ranged threat — he has no poke whatsoever and cannot contest a laner who stays at distance Strong evidence
- Both Bashdown (35s) and Rising Ram (32s) have long base cooldowns, so a baited cast leaves a large dead window Strong evidence
- Gloom Bombs clears the wave and chips the enemy laner from a safe distance on a short 14s cooldown Strong evidence
- Bashdown T2 (+1 charge, +2m radius) — Two charges turn his anti-air pull and Knockup from a single interrupt into continuous area control Strong evidence
- Blasted T2 — The Bashdown charge refund plus +7% wrecked amplification ties his damage engine to his CC and roughly doubles his effective output in a sustained brawl Strong evidence
- Chain Gang unlock — Gives him the ability to switch off enemy escapes entirely, which reframes every fight around whether he gets close Strong evidence
- Chain Gang T3 (late 35min+) — +1.3s Unstoppable per hero pulled makes a multi-target Chain Gang effectively uninterruptible Strong evidence
- Return to Shadows unlock — Gives her a dive-and-leave button and turns her from a farmer into a genuine pick threat Strong evidence
- Gloom Bombs T3 (+3 grenades) — Camp and wave clear becomes near-instant, which is the foundation of her farming and split-push lead Strong evidence
- You have a window where you cannot be hit and Billy does damage that does not need to target you. Untargetability of the
 Ethereal Shift Ethereal Shift +37s Cooldown +4s Duration +5s Buff Duration +30% Spirit Resist +20 Spirit Power kind explicitly does not stop aura-type effects, and the same logic applies to persistent fields: going untargetable inside their zone means you emerge on the other side at the same health, having spent the cooldown for nothing. The window has to be used to leave the area, not to survive standing in it. Strong evidence
- Billy brings enough lockdown that Stun sequencing matters. Community reporting describes Stun diminishing returns of roughly 10% then 30% inside an 8-second window, applying to stuns only and not to silences, slows, disarms or hexes — so their follow-up chain may be shorter than the first one felt. Treat this as unconfirmed, but it is worth knowing before you burn a cleanse on the opening Stun. Uncertain
- Billy decides where you stand, not you. The practical rule is to never hold a position whose failure case is being moved — stand so that being yanked or knocked puts you somewhere survivable rather than inside their whole team. Cover at your back is worth more than cover in front. Strong evidence
- Being knocked up against Billy is worse than being slowed because it removes your inputs and, since 09-16-2026, slows now bite in the air at 35% value so even the landing is compromised. Your mobility is your defence, so position with the airborne failure case in mind: stand where being launched leaves you above your own team rather than above theirs, and keep a dash in reserve for the landing rather than spending both on the approach. Strategic
- Billy wins by choosing where the fight happens. Take your position before the zoning goes down, not after — once the area is committed you are fighting on their terms, and walking in to contest it is exactly the mistake the kit is built to farm. Strategic
- Against Billy's crowd control, understand what Debuff Resist actually buys you: it shortens duration, never magnitude. It is excellent against long disables and close to worthless against a short hard slow. Two things it explicitly does not shorten at all are the parry Stun and the
 Knockdown Knockdown +35s Cooldown +0.1s Cast Delay +2s Stun Delay +0.5s Stun Duration +75 Bonus Health +5% Ability Range +5% Radius item's Stun. Documented
- Scourge (spirit T4) — Buy on supports to harden a focused ally against a caster team while adding pressure damage. What you are answering here: Billy's Bashdown. Documented
-
 Majestic Leap Majestic Leap +45s Cooldown +5s Interrupt Cooldown +100% Air Control +50% Air Control +32% Move Speed +2.5s Slow Duration +8s Barrier Duration (vitality T3) — Buy to escape ground-based lockdown and to rotate across the map quickly. That matters here because of the zoning and area denial from Billy. Documented
-
 Stamina Mastery Stamina Mastery +2 Stamina +18% Stamina Recovery +23% Air Jump/Dash Distance Builds from Extra Stamina (vitality T3) — Billy's Bashdown — that is the stuns and Hard CC this answers. Buy when dodging telegraphed abilities and disengaging is how you survive. Strong evidence
- Your instinct is to jump on Billy's backline the moment you see an opening, and the mistake is not checking what is above you. A Walker's Stomp is 350 damage + 15% of your max health inside 15m with a 2-second Stun on a 7-second cooldown — a 2-second Stun handed to a team with peel is a death. Dive under their Walker only with Unstoppable pre-cast or after the Stomp has just gone off. Strong evidence
Next
Calico’s other hard matchups
All of Billy
Who beats Billy, the items that shut Billy down, and every ability.
Facing more than Billy?
Add the other five enemies: who to focus first and what to buy against the whole team.
Sources and method for this page
Everything on this page is generated for Deadlock patch 10-30-2026 from Billy's current kit, measured match results and a mechanics rule base. Each line carries its own confidence label.
Data-supported Measured: you win 48.0% of these, which is 0.7% below your overall win rate (24,196 matches). The kit-based model reads this as low instead — treat the measured number as primary and the gap as a sign this matchup is more about execution than kit.
Billy's kit and counterplay were compiled from 8 sources, cross-checked for patch 10-30-2026. Threat ratings compare this pairing against Calico's own baseline win rate rather than a flat 50%, because ranking by raw win rate produces the wrong answer for heroes whose overall win rate is not 50%.