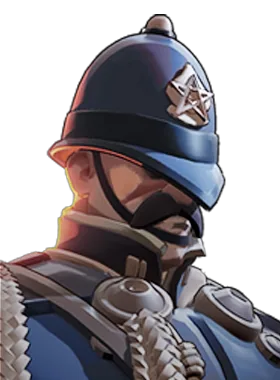

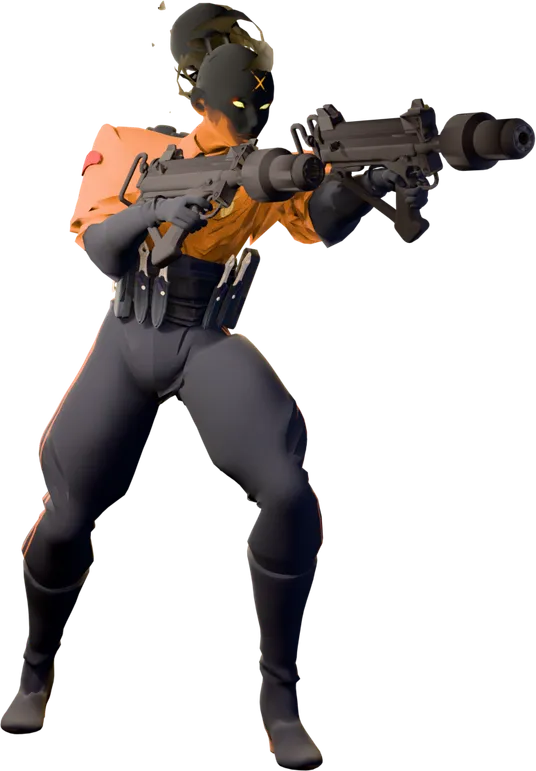
Warden vs Haze
Warden's team wins 47.4% Haze's team wins 52.6%, across 48,047 games
Written for the Warden player. Playing Haze? See Haze vs Warden →
Haze has the edge
Warden usually wins 51.0% of games. Against Haze that is 3.6% lower, over 48,047 games.
- Whole match 47.4% −3.6% vs usual 48,047 games
- Sharing a lane 46.9% −4.1% vs usual 17,574 games
- Oracle and above 49.1% −0.7% vs usual 2,622 games
"Sharing a lane" counts only games where both were assigned the same lane — the laning matchup itself. "Oracle and above" counts only matches whose average rank was Oracle and above, against Warden's usual win rate at that rank.
The fight at a glance
If you're Warden
 Smoke Bomb Vanishes from sight and gains bonus sprint speed. Mobility significant sprint speed bonus while active; Defensive an escape — at tier 3 it also purges non-ultimate debuffs and grants 50%… 1 grants 2 ability charges 2 removes non-ultimate debuffs on cast and grants 50% bullet lifesteal for 5 seconds
Wait out Smoke Bomb 33s cooldown
ThenShow a fake target, make her cloak to reposition, then collapse.
- Watch out
- Haze can throw
 Sleep Dagger Sleep Dagger Throws a dagger that damages the target and puts them to sleep. Crowd Control sleep (hard CC); target wakes roughly 0.1s after taking damage. Tier 2 adds… Damage about 65 at base spirit power (deadlock.one) Defensive sleeping a chaser is her cleanest disengage, and it works from inside Smoke… 1 reduces the target's bullet resist by 10% for 6 seconds on wake-up 2 +1 second sleep duration and applies 15 Fixation stacks 5 about -17s cooldown, plus 40% movement and dash speed slow for 3 seconds after waking while invisible from Smoke Bomb, so you may not see her before you fall asleep.
- Your edge
- Warden has more reach than Haze, so you can trade from range.
- Buy
 Ethereal Shift Ethereal Shift +37s Cooldown +4s Duration +5s Buff Duration +30% Spirit Resist +20 Spirit Power Buy it against the channelled ultimates from Haze.
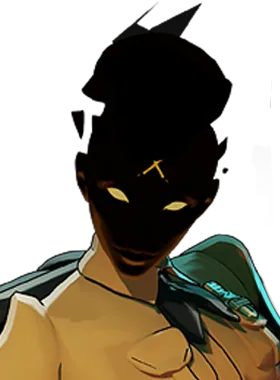
If you're Haze
Has the edge Binding Word Curses a targeted enemy hero. Crowd Control 1.75s immobilise (T2 adds +0.75s, so up to 2.5s) if the target fails the… Damage 110 (about 2.44x spirit scaling) when it lands Defensive Rooting a diver in place is a strong self-peel 1 Warden deals +20% bullet damage to trapped heroes for 5s 2 +0.75s immobilise duration 5 -14s cooldown (34s base) and silences the target until they escape or are immobilised
Wait out Binding Word 34s cooldown
ThenForce it out on a mobile teammate who can clear the check, and for 20-34 seconds he has no way to hold anyone still.
- Watch out
- Binding Word makes you cover 20 metres in 2.8 seconds or take 110 damage and get immobilised for 1.75-2.5s, and at Tier 3 it silences you for that entire window so you cannot cast the escape ability you were relying on.
- Your edge
- Haze has more burst damage than Warden.
- Buy
 Unstoppable Unstoppable +60s Cooldown +5.5s Duration +125 Bonus Health +25% Debuff Resist Buy it against Warden's Binding Word.
The full plan for Warden, phase by phase, is below. Haze's side in full →
What should I do right now?
Do
- Plan for Ethereal Shift Ethereal Shift +37s Cooldown +4s Duration +5s Buff Duration +30% Spirit Resist +20 Spirit Power — know which tier it sits in so you are not improvising at the shop.
- Know what Smoke Bomb looks like. It is the cooldown this lane revolves around.
Avoid
- Walking to lane on the same path every wave against a hero with Haze's engage range.
Do
- Very low base Bullet Damage (about 5.3 per round) leaves her at a disadvantage in short early trades
- No wave-clear ability at all; she farms slowly and depends on raw gun damage
 Alchemical Flask Alchemical Flask Hurls a flask that damages enemies in a small area and leaves them dealing less weapon damage and moving more slowly. Crowd Control -16% movement slow for 3s Damage 60 base (about 0.63x spirit scaling); Defensive The weapon damage reduction is effectively a defensive buff for his whole… 1 enemies hit lose 1 Stamina 2 +35 damage and an additional -25% weapon damage (total -55%) 5 -7s cooldown (12s base) and +2m radius; 's -30% to -55% weapon damage for 7s wins nearly every early weapon trade outright
Avoid
- Smoke Bomb lets her reposition across the lane or rotate out of a losing trade with no cost
- Sleep Dagger from stealth is a guaranteed opener on a laner who steps up to secure a soul orb
Do
- Their first real spike is ult unlock — respect it from that point, not before.
- Your spike is Binding Word unlock: A conditional 1.75s Root on a 34s cooldown is his first real kill threat
Avoid
- Taking an even fight against Haze on their spike timing when you could take the same fight ten minutes later on yours.
Do
- Watch for Sleep Dagger. Have a teammate shoot you — any damage wakes a slept ally in about 0.1s, so a slept target near friends is barely CC'd at all
- Buy
 Metal Skin Metal Skin +24s Cooldown +5s Duration +12% Bullet Resist -20% Dash Distance +20% Gravity Scale and hold it for
 Bullet Dance Bullet Dance Enters a firing flurry, shooting her weapon at nearby enemies with perfect accuracy and added bullet damage. Damage added bullet damage on top of her weapon; Mobility tier 2 adds about +3 m/s move speed and +10% fire rate during the channel Defensive tier 3 grants 40% evasion, which is a substantial survivability window… 1 +10% fire rate and about +3 m/s movement speed 2 40% evasion and about -65s cooldown — bullet immunity turns her ultimate into nothing
Avoid
- Spending your own escape before Smoke Bomb is on cooldown.
Haze’s abilities
- Sleep Dagger Ability 1
If Haze kills you, this is usually what started it: sleep (Hard CC); target wakes roughly 0.1s after taking damage.
- Have a teammate shoot you — any damage wakes a slept ally in about 0.1s, so a slept target near friends is barely CC'd at all
 Dispel Magic Dispel Magic +45s Cooldown +10% Spirit Resist +3s Buff Duration +250 Heal Amount removes the sleep; Unstoppable Unstoppable +60s Cooldown +5.5s Duration +125 Bonus Health +25% Debuff Resist Builds from Debuff Reducer pre-cast makes you immune to it entirely
- It is a thrown projectile with travel time — strafe, and do not stand still on a lane approach where she can dagger from stealth
- Bullet Dance Ultimate
Her teamfight payoff — combined with
 Fixation Fixation Each bullet that lands on a target adds a stack of bonus weapon damage against that specific target; Crowd Control tier 1 applies about 40 spirit damage and a 12% slow for 2s every 20 stacks Damage roughly +0.2 weapon damage per stack at base; 1 every 20 stacks deals about 40 spirit damage and applies a 12% slow for 2 seconds 2 +40 maximum stacks and +5 seconds of stack duration 5 +0.11 damage per stack, and the bonus now scales with her weapon damage stacks and Lifesteal it turns her from a single-target assassin into something that deletes a grouped team, provided nobody interrupts her.
- Interrupt the channel —
 Silence Wave Silence Wave +42s Cooldown +3s Duration +0.1s Cast Delay +90 Bonus Health ,
 Knockdown Knockdown +35s Cooldown +0.1s Cast Delay +2s Stun Delay +0.5s Stun Duration +75 Bonus Health +5% Ability Range +5% Radius , or any hero Stun (
 Guided Owl Guided Owl After a short cast, Grey Talon takes control of a spirit owl and flies it across the map; Crowd Control area stun on detonation Damage about 230 at base spirit power (deadlock.one) Mobility none for Grey Talon — in fact he is locked in place 1 +85 damage 2 -40s cooldown 5 instantly kills enemies below about 22% health and grants permanent Spirit Power per… ,
 Concussive Combustion Concussive Combustion Turns Infernus into a living bomb that detonates after a delay, dealing spirit damage and stunning every nearby enemy. Crowd Control area stun on detonation; Damage about 125 spirit at base (deadlock.one) Defensive uninterruptible, so it functions as a panic button that punishes whoever… 1 +100 damage 2 about -65s cooldown and +100% explosion lifesteal 5 +0.9s stun duration, +10m radius and +0.4 spirit scaling on the damage ,
 Stone Form Stone Form Turns Ivy into impervious stone and slams her into the ground, stunning and damaging nearby enemies and healing her for a portion of her maximum health. Crowd Control area stun on landing; tier 3 extends the stun duration Damage about 75 at base spirit power (deadlock.one); Mobility a downward slam — it repositions her vertically, especially when combined… 1 -25s cooldown 2 increased stun duration and improved damage scaling ,
 Spirit Lasso Spirit Lasso Throws a lasso that deals spirit damage, pulls the target toward her, and stuns them. Crowd Control pull (displacement) plus stun (hard CC) Damage about 80 spirit at base (deadlock.one) Mobility she can relocate while lassoing, dragging the victim with her 1 +80 damage 2 -40s cooldown ) ends it immediately
- Metal Skin makes you bullet-immune for the duration of the burst, which is the single cleanest personal answer
- Ethereal Shift makes you untargetable through the worst of it; Kelvin's
 Frozen Shelter Frozen Shelter Freezes the air around himself or a targeted hero, raising an impenetrable dome. Crowd Control heavy slow on enemies caught inside; Defensive about +90 health regeneration and full protection from outside fire; 1 -30s cooldown (190s base) 2 enemies inside also fire 20% slower 5 purges non-ultimate debuffs and adds about +75 health regeneration with improved spirit… walls her out entirely
- Interrupt the channel —
- Smoke Bomb Ability 2
The button that defines her — it is her approach tool, her escape tool, and her reset tool, and it means she chooses when and where every fight involving her starts.
- Buy a revealer item and place vision on her flank routes — she has to physically walk the approach, invisibility does not teleport her
- Stand near teammates: the proximity reveal means a grouped team simply sees her arrive
- Splash damage flushes her —
 Napalm Napalm Sprays a burning mixture in front of him that deals spirit damage, slows whoever it touches, and leaves them coated in napalm that keeps burning. Crowd Control movement slow on everyone hit Damage about 40 spirit at base plus the napalm coating over time (deadlock.one) Mobility none directly, though the slow effectively closes distance 1 +20% lifesteal 2 applies about +17% Damage Taken and -33% Healing to affected targets ,
 Powder Keg Powder Keg Throws a barrel that detonates after a short delay for spirit damage, applies a burn, and launches anyone caught in the blast into the air. Crowd Control knockup on detonation — hard CC that removes the target's ability to strafe Damage about 80 spirit at base plus burn damage over time; Mobility self-launch: detonating it under her own feet is her primary traversal tool 1 -10s cooldown 2 +40 impact damage, about +13.3 burn damage per second, roughly -5s charge time and… ,
 Entangling Thorns Entangling Thorns Summons a patch of choking thorns that damages and slows every enemy inside its radius. Crowd Control movement slow; tier 3 upgrades the effect to an immobilize Damage about 40 damage per second at base spirit power (deadlock.one) Defensive dropped at her own feet it discourages a melee chase 1 +2m radius and improved spirit scaling on the DPS 2 immobilizes enemies in the patch and
 Arctic Beam Arctic Beam Channels a beam of freezing energy in front of him that damages targets and progressively cuts their movement speed and fire rate the longer it stays on them. Crowd Control ramping movement speed and fire rate reduction; Damage about 45 damage per second at base; Mobility none — it constrains his own movement while he holds it 1 about -20% fire rate and move speed on targets 2 about +20 DPS with improved spirit scaling 5 about -13s cooldown and fires 2 additional beams at targets within 10m all hit a cloaked hero in the area
- Fixation Ability 3
The control here is bought rather than baseline — tier 1 applies about 40 Spirit Damage and a 12% slow for 2s every 20 stacks.
- Break line of sight for a few seconds — stacks decay, and forcing a reset costs her the entire ramp
- Rotate who she is shooting: put a durable body between her and the carry so her stacks build on the target that does not mind
- Bullet Armor and bullet-resist items scale well here because 100% of Fixation's payoff is weapon damage
- 1 Smoke Bomb
Smoke Bomb first — before tier 2 she has one charge, and a Haze without Smoke Bomb has no approach and no escape. Show a fake target, make her cloak to reposition, then collapse
- 2 Sleep Dagger
Sleep Dagger second: force it on a durable frontliner who can be woken instantly by a teammate's chip damage, which wastes both the CC and the 15-stack
Fixation head start - 3 Bullet Dance
Bullet Dance last — bait it with a target who is holding
Ethereal Shift or Metal Skin, so the channel is spent on someone who cannot be hurt by it
The matchup in detail
- Bullet Dance is a channel — one Stun, Silence or knockdown deletes her ultimate Strong evidence
- Metal Skin, Ethereal Shift and Frozen Shelter each individually invalidate her damage window Strong evidence
- Fixation stacks are per-target, so forced target-swapping guts her output Strong evidence
- Haze can throw Sleep Dagger while invisible from Smoke Bomb, so you may not see her before you fall asleep Strong evidence
- Fixation makes her time-to-kill drop the longer you fight her; the exchange you were winning at second two you are losing at second six Strong evidence
- Bullet Dance with perfect accuracy plus stacked Lifesteal means a full-health squishy dies through their own healing if the channel is not interrupted Strong evidence
- Smoke Bomb tier 3 purges your slows and curses on cast, so pre-applied CC does not stick to her Strong evidence
- She picks off anyone who walks a jungle rotation alone — isolated farming is where her entire kill pattern lives Strong evidence
- Haze can break line of sight and come back invisible, and no item in the game reveals invisibility — across the entire 156-item list there is not one reveal effect. You only get a proximity reveal at close range (source-dependent: Haze's Smoke Bomb reveals at 18m,
 Veil Walker Veil Walker +15s Cooldown +16s Duration +0.25s Fade Time +125 Bonus Health +6 Spirit Power +8s Invisibility Duration at 20m) and a reveal when they take damage. Hold ground where the only approach into you passes inside that radius, and throw a cheap area ability into likely approach lanes to force the damage reveal. Documented
- Buy Metal Skin and hold it for Bullet Dance — bullet immunity turns her ultimate into nothing Strong evidence
- Bring one hard interrupt for the channel: Silence Wave, Knockdown, Guided Owl, Concussive Combustion, Stone Form or Spirit Lasso all end Bullet Dance instantly Strong evidence
- Stack Bullet Armor — her entire damage profile including Fixation's bonus is weapon damage, so Bullet Resist is a pure counter, not a partial one Strong evidence
- Group and use the proximity reveal on Smoke Bomb: a team standing together simply sees her arrive and never gives her an isolated target Strong evidence
- Contest her before 15 minutes — she has no wave-clear and very low base Bullet Damage, so early pressure permanently sets back a hero whose whole plan is scaling Strong evidence
- Break line of sight for a few seconds mid-fight to wipe her Fixation stacks and force her to rebuild the ramp Strong evidence
- Metal Skin is the right shape of answer to Haze's gun — 5 seconds of complete bullet immunity on a 24-second cooldown — but know its two holes before you rely on it. It does not stop on-bullet build-ups, so their
 Toxic Bullets Toxic Bullets -40% Incoming Healing bleed,
 Silencer Silencer +12% Spirit Resist -25% Spirit Damage Reduction +2.5s Silence Duration +6s Debuff Duration +10s Immunity Duration stacks and slow build-ups keep landing while you are immune, and it costs you −1.5 m/s and −20% dash distance for the duration, which is the wrong trade if you were planning to walk out during it. Use it to win a stand-and-fight window, not to escape one. Documented
- Haze leaves fights on stamina, not on a single button, which is why slows underperform here and
 Arctic Blast Arctic Blast +24s Cooldown +0.6s Spread Duration: +48% Move Speed +4s Slow Duration +10% Spirit Resist +1s Freeze Duration Builds from Cold Front over-performs: it freezes stamina regeneration, so they cannot dash out of the sequence rather than merely dashing out slower. Layer it with the fact that wall jumping already costs them 25% stamina regeneration for 5 seconds — if you can force a wall-jump exit first, the freeze lands on someone already short of charges. Strong evidence
- The moment Smoke Bomb ends or is broken by her first shot — she is a low-durability hero standing in your line of sight with no escape for the cooldown Strong evidence
- The entire Bullet Dance channel if you have any interrupt: she is committed and the ult goes on full cooldown Strong evidence
- Her 2.35s reload with a 25-round magazine — at 9.5 rounds per second she empties fast and reloads often Strong evidence
- Pre-15 minutes generally: no wave-clear, low base damage, and Fixation not yet upgraded Strong evidence
- Right after a Sleep Dagger is used on a woken-up ally — the dagger has a long cooldown before tier 3, and without it her opener is just walking at you Strong evidence
- Smoke Bomb lets her reposition across the lane or rotate out of a losing trade with no cost Strong evidence
- Sleep Dagger from stealth is a guaranteed opener on a laner who steps up to secure a soul orb Strong evidence
- Very low base Bullet Damage (about 5.3 per round) leaves her at a disadvantage in short early trades Strong evidence
- No wave-clear ability at all; she farms slowly and depends on raw gun damage Strong evidence
- Alchemical Flask's -30% to -55% weapon damage for 7s wins nearly every early weapon trade outright Strong evidence
- There is a hard behavioural change at 20:00 in this matchup: respawn goes from 35 to 38 seconds as of 09-16-2026, and you are the hero Haze can pick off without a fight starting. Three seconds does not sound like much until you price it against the Rift's 7-minute cadence and the Urn at 20 and 25 — a single death now reliably costs you presence at the next objective. Past 20:00, stop taking the solo camp that is one rotation from their side of the map. Documented
- Your kit is built around lockdown and that is worth less on the Mid Boss than on Haze — it carries 35% Debuff Resist as of 03-06-2026, so your disables run roughly two-thirds as long on it. Plan the take around damage and positioning rather than a CC chain, and spend the chain on Haze if they contest. The payoff is worth the trip: 3,000 souls + 50 per minute, two permanent buffs each, and a Rejuvenator crystal giving up to three single-use revives that return a player at full health after 3 seconds, for 3 minutes. Documented
- Bullet Dance unlock — Turns her from a single-pick threat into a fight-winning channel Strong evidence
- Smoke Bomb tier 2 — Two charges means she can approach AND escape in the same fight, which is when her pick pressure becomes constant Strong evidence
- Sleep Dagger tier 2 — The 15 pre-loaded Fixation stacks massively shorten her time-to-kill on an opener Strong evidence
- Late 40min+ — Fixation tier 3's weapon-damage scaling plus stacked Lifesteal items raises her single-target DPS Strong evidence
- Binding Word unlock — A conditional 1.75s Root on a 34s cooldown is his first real kill threat Strong evidence
-
 Last Stand Last Stand After a two-second charge-up, Warden pulses damage in a wide radius around himself twice a second, healing for a large share of the damage he deals. Crowd Control none directly — its power comes from being paired with Binding Word Damage 70 DPS base (about 1.3x spirit scaling) over 6s in a 12m radius; Mobility none, and he is channelling 1 +4m radius (12m base up to 16m) 2 +50 DPS and -40s cooldown (180s base) 5 +4s duration and +30% resists while channelling unlock — Plus Binding Word becomes a guaranteed kill combo on any target that fails the escape check Strong evidence
- Bullet Dance is a channel, which means the fight is decided by whether you can break it. Hold one interrupt — a Stun, a Silence, or a displacement — specifically for that cast rather than spending it on the opening trade. If you have no interrupt, the answer is line of sight: leave the area entirely rather than trying to out-heal it. Strong evidence
- Your Silence may be worth more in a chain than a teammate's Stun. The 03-06-2026 diminishing-returns system reduces subsequent CC by 10% then 30% inside an 8-second window, and community reporting holds it applies to stuns only — not to silences, slows, hexes or disarms. If that is right, sequencing your Silence after an ally's Stun costs you nothing, while a second Stun in the chain is already 10% shorter. Treat it as community-reported rather than confirmed, but order your chain accordingly against Haze. Uncertain
- Stacking a second damage-reduction debuff onto Haze is close to a wasted slot: since 05-22-2026 total damage-reduction debuffs stack diminishingly rather than additively. If someone on your team already brings one, your souls buy more as anti-heal or as resist shred, both of which sit on different multipliers. Coordinate this before the game rather than discovering it in the fight — two players independently buying
 Inhibitor Inhibitor +150 Bonus Health +5s Debuff Duration -30% Damage Penalty +10% Weapon Damage -40% Incoming Healing against their carry is a common and invisible waste. Documented
- You have peel and Haze is the dive threat, so your job in the fight is not damage — it is being in range of whoever they are jumping on. Position between their entry point and your squishiest teammate and hold your peel tool for the moment they commit, not for the moment they appear. Strategic
- Haze heals through damage, so healing reduction is not optional here — but pick the right application route. Anti-heal arrives two ways: bullet-applied (Toxic Bullets, T3) builds up through gunfire, and spirit-applied (
 Healbane Healbane +8s Duration +7 Spirit Power -35% Incoming Healing , T2) lands off Spirit Damage. Buy the one that matches how you actually deal damage, or it will never apply. Documented
- Haze dives, and you do not have an exit in your kit. This is the clearest item priority in the matchup: buy a movement or escape active before you buy your next damage item. A damage item does not help you if the fight starts with you already dead. Strong evidence
- Ethereal Shift (spirit T4) — Buy to survive a telegraphed assassination combo or ultimate — you cannot be hurt for four seconds. That matters here because of the channelled ultimates from Haze. Documented
-
 Cursed Relic Cursed Relic +55s Cooldown +3.25s Duration +0.1s Cast Delay -25% Damage Penalty (spirit T4) — Haze is where this lineup’s channelled ultimates comes from. Buy to shut down one enemy carry or to cancel a game-deciding ultimate outright. Documented
- Knockdown (spirit T3) — Buy whenever an enemy fights from the sky — it answers flying and airborne heroes and channelled aerial ultimates. Relevant here because of Haze. Documented
- The mistake against Haze is following the direction they went. No item in the game reveals invisibility, so chasing a broken line of sight is walking into a fight where you have already given up the information advantage. Hold the angle they must return through instead — proximity reveal is source-dependent (18m from Haze's Smoke Bomb, 20m from Veil Walker) and any damage you land reveals them, so a cheap area ability thrown at the likely re-entry beats a sprint down the corridor. Documented
- Your damage arrives over time and Haze converts damage dealt into health, which makes the natural instinct — stay in the fight, keep the pressure on — the exact thing that loses it. Their sustain scales with how many targets are in front of them and how long the fight runs; yours does not scale at all. Either break contact and force them to re-approach on a cooldown, or bring healing reduction so the long fight stops being their format. Strategic
Next
Warden’s other hard matchups
Facing more than Haze?
Add the other five enemies: who to focus first and what to buy against the whole team.
Sources and method for this page
Everything on this page is generated for Deadlock patch 10-30-2026 from Haze's current kit, measured match results and a mechanics rule base. Each line carries its own confidence label.
Data-supported Measured: you win 47.4% of these, which is 3.6% below your overall win rate (48,047 matches). The kit-based model reads this as moderate instead — treat the measured number as primary and the gap as a sign this matchup is more about execution than kit.
Haze's kit and counterplay were compiled from 8 sources, cross-checked for patch 10-30-2026. Threat ratings compare this pairing against Warden's own baseline win rate rather than a flat 50%, because ranking by raw win rate produces the wrong answer for heroes whose overall win rate is not 50%.