

Paradox vs Calico
Paradox's team wins 47.9% Calico's team wins 52.1%, across 23,107 games
Written for the Paradox player. Playing Calico? See Calico vs Paradox →
About even
Paradox usually wins 47.0% of games. Against Calico that is 0.9% higher, over 23,107 games.
- Whole match 47.9% +0.9% vs usual 23,107 games
- Sharing a lane 47.7% +0.7% vs usual 7,172 games
- Oracle and above 47.3% +0.1% vs usual 1,405 games
"Sharing a lane" counts only games where both were assigned the same lane — the laning matchup itself. "Oracle and above" counts only matches whose average rank was Oracle and above, against Paradox's usual win rate at that rank.
The fight at a glance
If you're Paradox
 Return to Shadows Calico instantly vanishes into shadow, becoming untargetable and gaining movement speed, damaging enemies around her as she goes. Damage 150 base spirit damage per hit (deadlock.one), applied on both entry and… Mobility Bonus move speed during the untargetable phase, which she uses to reposition… Defensive Full untargetability for the duration — it can be used purely to survive a… 1 -20s cooldown (from a 115s base) 2 +75 damage and +20% bonus move speed 5 +450 heal amount and +1s cooldown refund
Wait out Return to Shadows 115s cooldown
ThenForce her to burn it defensively (feign a collapse, show a Stun) and the next 95-115 seconds she is a fragile no-CC hero you can walk at.
- Watch out
- Return to Shadows lets her enter a fight untargetable, land the exit detonation on your backline, and leave before you can select her as a target.
- Your edge
- Paradox has more crowd control than Calico.
- Buy
 Slowing Hex Slowing Hex +29s Cooldown +3.5s Duration +0.1s Cast Delay +16% Move Speed -26% Dash Distance Buy it against Calico's Return to Shadows.
If you're Calico
 Time Wall Paradox raises a wall of warped time that halts every enemy bullet and projectile that touches it, while speeding up and empowering friendly bullets passing through. Crowd Control Brief slow plus a silence on contact (2.3s silence at T2). Damage No direct damage. T2 grants +35% weapon damage to friendly bullets passing… Defensive Stops enemy bullets and projectiles outright — against a projectile-heavy… 1 +3.5s duration, +3m width, +1m height. 2 2.3s silence duration, +35% weapon damage for friendly bullets. 5 +2 ability charges.
Wait out Time Wall 25s cooldown
WhyIt is her anti-dive and her projectile shield; force it with a feint and then commit, because with it down she has no way to stop a gap-close.
- Watch out
 Paradoxical Swap Paradox fires a bolt that, on hitting an enemy hero, trades her position with theirs. Crowd Control The displacement itself is the control effect — there is no stun attached at… Damage 150 damage, scaling with spirit power. Mobility It relocates her to the target's position, which is simultaneously a… 1 200 barrier for 8s (scales with Spirit). 2 -30s cooldown, +13m cast range. 5 swaps all enemies within 7m of the hit target, +10% max health damage. Paradoxical Swap yanks you out of your team and drops you alone next to hers, for 150 spirit-scaling damage, from up to 13m further away at Tier 2 than you expect.
- Your edge
- Calico is more mobile than Paradox, so you choose when to fight.
- Buy
 Indomitable Indomitable +55s Cooldown +10s Duration +10% Bullet Resist +10% Spirit Resist +20s Cooldown On Apply +2 Out of Combat Regen Buy it against Paradox's Time Wall.
The full plan for Paradox, phase by phase, is below. Calico's side in full →
What should I do right now?
Do
- Plan for Slowing Hex Slowing Hex +29s Cooldown +3.5s Duration +0.1s Cast Delay +16% Move Speed -26% Dash Distance — know which tier it sits in so you are not improvising at the shop.
- Know what Return to Shadows looks like. It is the cooldown this lane revolves around.
Avoid
- Walking to lane on the same path every wave against a hero with Calico's engage range.
Do
- She is fragile — she has no CC of her own to defend a bad trade and very little effective health
- The 12-round clip empties almost instantly and the 2.60s reload is a large punish window in a duel
- A 40-round burst-fire clip gives her good lane staying power without frequent reloads.
Avoid
 Gloom Bombs Gloom Bombs Calico lobs a handful of bombs that scatter and blow up after a short fuse, dealing spirit damage in the area they land. Damage 45 base spirit damage per bomb (deadlock.one); Defensive Can be thrown behind her while retreating to deter a chase through a choke. 1 -3s cooldown (from a 14s base) 2 -6% melee resist on targets hit and +6s duration 5 +3 grenades clears the wave and chips the enemy laner from a safe distance on a short 14s cooldown
 Leaping Slash Leaping Slash Calico lunges forward and then sweeps everything around her with a melee slash. Damage 10 impact damage plus 40 heal scaling per Spirit Power at base… Mobility A committed forward dash — good for closing, mediocre for escaping since it… Defensive Heals on hero hit (+25 at Tier 1), giving her a reason to stay in a fight… 1 +25 heal amount 2 +200 bonus gold on kill and +3s bounty duration 5 +10 damage, +50% cooldown refund and +90 impact damage plus the spreadshot's 79 DPS makes any enemy who walks too far forward a real kill threat
Do
- Their first real spike is ult unlock — respect it from that point, not before.
- Your spike is Paradoxical Swap unlock: She gains Paradoxical Swap, a displacement that can create a pick out of nothing.
Avoid
- Taking an even fight against Calico on their spike timing when you could take the same fight ten minutes later on yours.
Do
- Watch for Return to Shadows. Do not spend a burst combo or a single-target ultimate while she is phased — she is untargetable, not merely hidden, and everything you throw is wasted
- Hold Hard CC for her — she has zero crowd control and only 1-tier durability, so a single Stun, Root or Knockup that lands outside her ultimate window usually kills her
Avoid
- Spending your own escape before Return to Shadows is on cooldown.
Calico’s abilities
- Return to Shadows Ultimate
Simultaneously her burst combo and her escape. It is the ability that lets her dive a backline, take the kill, and leave without ever being a valid target during the dangerous part.
- Do not spend a burst combo or a single-target ultimate while she is phased — she is untargetable, not merely hidden, and everything you throw is wasted
- Predict the reappearance point instead of chasing the disappearance point; she gets bonus move speed but only about 3 seconds of travel
- Pre-place area denial (Dynamo's
 Singularity Singularity Dynamo forms a black hole in his hands that drags nearby enemies toward him, stunning them and burning them with spirit damage for the duration of the channel. Crowd Control AoE stun plus a continuous vacuum pull for the full channel duration — the… Damage 75 spirit damage per second base (deadlock.one) over a ~2.75s channel; Mobility none; Dynamo is rooted in place for the channel 1 +2m vacuum radius 2 +0.75s channel time 5 +6% damage per enemy's missing health , McGinnis turrets, Mo & Krill's burrow) on the likely exit rather than trying to react to it
- Leaping Slash Ability 2
Her gap-closer, her in-fight sustain and her combo damage. The Tier 3 cooldown refund is what lets her chain it as a mobility tool rather than a once-per-fight commitment.
- It is a fixed-direction dash with no tracking — sidestepping breaks it and denies her the heal entirely
- Deny the hero hit and she gets no health back; the heal only triggers on heroes, not troopers
- Once she has dashed in, she is at close range with no CC of her own — that is the moment to Stun her
-
 Ava Ava Calico dissolves into shadow and takes the form of Ava, gaining movement speed that builds the longer she stays in the form and disappearing from the enemy minimap. Mobility Ramping bonus move speed (up to +45% more at Tier 2) and concealment from… Defensive Escape only through raw speed; 1 +15s buff duration 2 +45% maximum bonus move speed and +15 health regeneration 5 +20% outgoing damage, +8s damage amp duration and +10s build duration Ability 3
Pure map mobility and information denial. It is how she reaches a fight, leaves a lost one, or rotates to an unwarded camp without showing up on the map — it is not a combat ability.
- Land a single hero shot on her in Ava form — it resets the speed ramp and puts the form on cooldown, which is usually enough to catch her
- Ward the jungle routes rather than watching the minimap; minimap concealment is the whole point of the ability and vision defeats it
- If you catch her mid-Ava, she cannot shoot or cast back until she drops the form — collapse immediately
- Gloom Bombs Ability 1
Her wave clear, her camp clear and her opening chip damage. The diminishing-returns rule on overlapping bombs means she has to spread them across a group rather than stacking them on one target.
- The bombs have a visible scatter and a fuse delay — simply walking out of the cluster before detonation avoids nearly all of it
- The 65% overlap reduction means bunching up is actually less punishing than it looks; the real cost is the free wave clear she gets
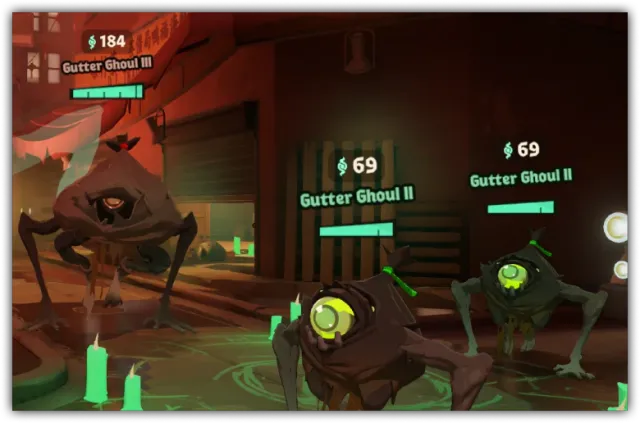
- Contest her Haunt camps Haunts Lanes and Districts across the map Haunts replace the old neutral camps. They are not a reskin: each type behaves differently, and the health bar now shows a camp's soul value and how hard it is, so you can decide whether a camp is worth your time before you start shooting. Three eye colours mark the tier — teal for tier I, yellow for tier II, red for tier III. Souls 4168181 souls tier I / II / III a creep +0.44 / +0.73 / +1.95 a minute ; her farming lead is largely built on Gloom Bombs clearing camps instantly
- 1 Return to Shadows
Return to Shadows above all — it is simultaneously her dive and her escape. Force her to burn it defensively (feign a collapse, show a Stun) and the next 95-115 seconds she is a fragile no-CC hero you can walk at
- 2 Leaping Slash
Leaping Slash second, because it is both her gap-close and her in-fight heal; sidestep it and she gets neither
- 3 Ava
Ava third — landing any hero shot resets it, and a Calico who has to rotate on foot is trackable again
The matchup in detail
- Zero crowd control in the entire kit — she cannot lock anyone down or peel for an ally Strong evidence
- Very low durability; she dies instantly to any Hard CC chain that catches her Strong evidence
- Poor teamfight presence — her damage is single-target-flavoured and she has nothing to contribute to a grouped brawl Strong evidence
- You fight at mid range and Calico has to reach close range, but they have the movement to do it — which means the matchup is not a range advantage, it is a cooldown one. Their gap-closer is the only thing bridging the band, so track it rather than tracking their health. With it up you are in their range and should behave accordingly; with it down you are in a range they cannot reach and every second of that window is free. Strategic
- Return to Shadows lets her enter a fight untargetable, land the exit detonation on your backline, and leave before you can select her as a target — a lone support or sniper is simply dead Strong evidence
- Ava keeps her off the minimap while she rotates, so the first warning you get is usually Gloom Bombs landing at your feet Strong evidence
- Gloom Bombs plus Leaping Slash plus a full 79 DPS spreadshot magazine is a burst sequence that kills anyone under about 1 durability at point-blank range Strong evidence
- Once Gloom Bombs hits T3 she clears camps instantly, so she out-farms you in the quiet parts of the game even if she never wins a fight Strong evidence
- Ava T3's +20% outgoing damage means a Calico who transformed just before the fight is doing amplified burst from the first shot Strong evidence
- Calico can take you from healthy to dead inside one combo, so health-bar management is not a useful frame in this matchup — being visible at all inside their range is the risk. Assume any moment you are in their line of sight at full health is a moment they can kill you. Strong evidence
- Hold Hard CC for her — she has zero crowd control and only 1-tier durability, so a single Stun, Root or Knockup that lands outside her ultimate window usually kills her Strong evidence
- Do not waste burst or a single-target ultimate during Return to Shadows; she is untargetable, so wait out the ~3s and pre-aim the exit point instead Strong evidence
- Place area-denial on her likely reappearance point — Dynamo's Singularity, Mo & Krill's burrow, McGinnis turrets — rather than trying to react to the exit Strong evidence
- Shoot her once while she is in Ava form; hero damage resets the ramping speed bonus and locks the form out, which strands her mid-rotation Strong evidence
- Ward her jungle routes; minimap concealment is Ava's entire value and direct vision defeats it completely Strong evidence
- Punish her 2.60s reload — her 12-round spreadshot clip empties in under half a second, and she has no CC to protect herself while reloading Strong evidence
- Against Calico the item that changes the matchup is Slowing Hex, and not for the slow. It silences movement abilities and movement items — that is their dash, their blink, their
 Warp Stone Warp Stone +16s Cooldown +30% Bullet Resist +6s Buff Duration and their
 Phantom Strike Phantom Strike +35s Cooldown +0.35s Cast Delay +8 Spirit Power +15% Weapon Damage +40% Move Speed +3s Slow Duration all turned off at once — and raises their gravity to 120% on top. At Tier II Spirit for 1,600 it is the cheapest way to convert a mobility advantage into a stationary target, and you deal the Spirit Damage needed to apply the follow-up. Strong evidence
- Calico leaves fights on stamina, not on a single button, which is why slows underperform here and
 Arctic Blast Arctic Blast +24s Cooldown +0.6s Spread Duration: +48% Move Speed +4s Slow Duration +10% Spirit Resist +1s Freeze Duration Builds from Cold Front over-performs: it freezes stamina regeneration, so they cannot dash out of the sequence rather than merely dashing out slower. Layer it with the fact that wall jumping already costs them 25% stamina regeneration for 5 seconds — if you can force a wall-jump exit first, the freeze lands on someone already short of charges. Strong evidence
- The instant Return to Shadows ends — she reappears as a targetable, low-durability hero with no CC and her escape on a 95-115s cooldown Strong evidence
- Mid-reload: 12 rounds empty in roughly a quarter second and the 2.60s reload leaves her with nothing but a melee swing Strong evidence
- While she is in Ava form she cannot shoot or cast at all — catching her here is close to a free kill Strong evidence
- Immediately after a whiffed Leaping Slash: she is at close range with no dash, no CC and no heal Strong evidence
- Any fight where she is forced to stand and trade in a grouped brawl — she has no teamfight tools and her damage profile wants an isolated target Strong evidence
- Calico will shove the wave into your Guardian to push you off souls, and you are not fast enough to walk around it. The thing to protect is the floating orb — the ground orb drops and cannot be denied, so half your income is safe no matter what they do, and the contest is only ever over the other 50. Position on your Guardian's side of the wave so you are already in range of the floating orbs when they pop, and give up the forward orbs rather than crossing for them. Strategic
- Gloom Bombs clears the wave and chips the enemy laner from a safe distance on a short 14s cooldown Strong evidence
- Leaping Slash plus the spreadshot's 79 DPS makes any enemy who walks too far forward a real kill threat Strong evidence
- She is fragile — she has no CC of her own to defend a bad trade and very little effective health Strong evidence
- The 12-round clip empties almost instantly and the 2.60s reload is a large punish window in a duel Strong evidence
- A 40-round burst-fire clip gives her good lane staying power without frequent reloads. Strong evidence
- If you are behind and planning to fight Calico on the Rift point because of the comeback bubble, recheck the number. As of 09-16-2026 the behind-team resist bonus inside the 35m radius is no longer a flat 35% — it is 10% + 1% per minute, capping at 40% only at 30:00, which is roughly 20% at the first Rift. Twenty percent does not turn a losing fight against burst into a winning one. The reduced capture time (floor 6 seconds) is the part of the comeback package that is still worth playing for. Documented
- Calico will be their Urn runner and you are the one who can stop it. The Urn cannot be voluntarily dropped — it comes loose only on melee, a Stun, or death — so chip damage and slows do not deny a delivery, your Hard CC does. Hold it for the carry rather than spending it on the approach fight, and note the favoured team gets +50% Bullet and Spirit Resist in a 60m bubble while carrying and depositing, which is why trying to burst the runner down usually fails. Documented
- Return to Shadows unlock — Gives her a dive-and-leave button and turns her from a farmer into a genuine pick threat Strong evidence
- Gloom Bombs T3 (+3 grenades) — Camp and wave clear becomes near-instant, which is the foundation of her farming and split-push lead Strong evidence
- Leaping Slash T3 — The +50% cooldown refund makes the dash repeatable, effectively giving her a second mobility charge in fights Strong evidence
- Ava T3 (late 30min+) — +20% outgoing damage on transformation turns every rotation into a pre-buffed burst window Strong evidence
- Paradoxical Swap unlock — She gains Paradoxical Swap, a displacement that can create a pick out of nothing. Strong evidence
- Time Wall T2 (mid game) — 2.3s Silence plus +35% friendly weapon damage make the wall an offensive and control tool as well as a defensive one. Strong evidence
- You have peel and Calico is the dive threat, so your job in the fight is not damage — it is being in range of whoever they are jumping on. Position between their entry point and your squishiest teammate and hold your peel tool for the moment they commit, not for the moment they appear. Strategic
- Calico heals through damage, so healing reduction is not optional here — but pick the right application route. Anti-heal arrives two ways: bullet-applied (
 Toxic Bullets Toxic Bullets -40% Incoming Healing , T3) builds up through gunfire, and spirit-applied (
 Healbane Healbane +8s Duration +7 Spirit Power -35% Incoming Healing , T2) lands off Spirit Damage. Buy the one that matches how you actually deal damage, or it will never apply. Documented
- Against Calico's burst, a reactive mitigation active beats flat health. Flat health raises the number they have to hit; a barrier or damage-reduction active on a short cooldown breaks the combo itself, which is what actually saves you. Strong evidence
- Do not assume Calico shrugs off your anti-heal by going immune.
 Unstoppable Unstoppable +60s Cooldown +5.5s Duration +125 Bonus Health +25% Debuff Resist Builds from Debuff Reducer explicitly does not suppress healing reduction — if you have the debuff on them before they pop it, they are still healing at the reduced rate through the whole window. Documented
- Slowing Hex (spirit T2) — Calico's Return to Shadows is what you are buying against here. Buy it when an enemy repeatedly uses a movement ability or item to dash, blink or fly out of your kill window. Documented
-
 Vortex Web Vortex Web +42s Cooldown +4s Duration +0.2s Cast Delay +0.5s Tether Duration +28% Move Speed -36% Dash Distance +8% Ability Range +8% Radius Builds from Slowing Hex (spirit T4) — Calico's Return to Shadows is what you are buying against here. Buy to set up team wipes against scattered, mobile enemies — it groups them and takes away their escapes at once. Documented
-
 Guardian Ward Guardian Ward +60s Cooldown +0.2s Cast Delay +1.5 Out of Combat Regen +6s Buff Duration +8% Ability Range +8% Radius Builds from Grit (vitality T2) — Buy on supports to save a focused ally from a burst window; it is the path to
 Divine Barrier Divine Barrier +55s Cooldown +0.2s Cast Delay +1.5 Out of Combat Regen +6s Buff Duration +600 Barrier +10% Ability Range +10% Radius Builds from Guardian Ward . Aimed at Calico's Return to Shadows in this lineup. Documented
- The wrong instinct in the first six minutes is treating your health bar as a resource you can spend down to trade. Against Calico it is not: they do not need you low, they need you in range once. With no self-sustain you also have no way to convert a survived trade into anything — you just stand there at 40% until the combo comes back. Your first 1,600 should be the item that breaks the combo, not the one that wins the poke war. Strategic
Next
Paradox’s other hard matchups
All of Calico
Who beats Calico, the items that shut Calico down, and every ability.
Facing more than Calico?
Add the other five enemies: who to focus first and what to buy against the whole team.
Sources and method for this page
Everything on this page is generated for Deadlock patch 10-30-2026 from Calico's current kit, measured match results and a mechanics rule base. Each line carries its own confidence label.
Data-supported Measured: you win 47.9% of these, which is 0.9% above your overall win rate (23,107 matches). The kit-based model agrees.
Calico's kit and counterplay were compiled from 9 sources, cross-checked for patch 10-30-2026. Threat ratings compare this pairing against Paradox's own baseline win rate rather than a flat 50%, because ranking by raw win rate produces the wrong answer for heroes whose overall win rate is not 50%.