Zoning and area denial
“I get pushed out of every fight position.”
Start with  Enduring Speed Enduring Speed +25% Slow Resist +2 Out of Combat Regen — the cheapest answer, at 1,600 souls . 10 more below, by tier.
Items that answer this
11 itemsTier 2 1,600 souls each
- Enduring Speed Enduring Speed +25% Slow Resist +2 Out of Combat Regen Buy when enemy slows are what is killing you — it is the dedicated answer, separate from generic debuff resist.
-
 Fleetfoot Fleetfoot +16s Cooldown +5s Duration +100 move speed penalty while shooting reduction +35% Slide Distance +6% Bullet Resist +40% Slow Resist +6% Weapon Damage Buy on gun heroes who strafe while shooting, or when enemy slows keep pinning you in place.
-
 Restorative Locket Restorative Locket +20s Cooldown +0.1s Cast Delay +8% Spirit Resist +25 Max Stacks +3 Max Stamina Restore Buy against ability-spam comps that poke constantly — the more they cast, the bigger your heal. Watch out: Passive abilities and item passives do not generate stacks
Tier 3 3,200 souls each
-
 Alchemical Fire Alchemical Fire +30s Cooldown +5s Duration +0.2s Cast Delay +10 Spirit Power Buy for zone denial, or to punish enemies who must hold a choke.
-
 Dispel Magic Dispel Magic +45s Cooldown +10% Spirit Resist +3s Buff Duration +250 Heal Amount Buy when enemy debuffs — slows, silences, anti-heal, disarms, hexes — are what is killing you rather than raw damage. Watch out: Cannot be used while stunned or asleep
-
 Healing Nova Healing Nova +60s Cooldown +0.25s Cast Delay +2s Regen Duration +8 Spirit Power +5% Ability Range +5% Radius Buy on supports and frontliners to undo chip damage across the team between fights; the heal grows with Spirit Power, so spirit builds get the most from it. Watch out: Heal scaling moved from boons to spirit power on 30 Oct 2026
-
 Majestic Leap Majestic Leap +45s Cooldown +5s Interrupt Cooldown +100% Air Control +50% Air Control +32% Move Speed +2.5s Slow Duration +8s Barrier Duration Buy to escape ground-based lockdown and to rotate across the map quickly. Watch out: Leaves you airborne, which Knockdown punishes with a longer stun and +100% gravity
-
 Stamina Mastery Stamina Mastery +2 Stamina +18% Stamina Recovery +23% Air Jump/Dash Distance Buy when dodging telegraphed abilities and disengaging is how you survive.
-
 Warp Stone Warp Stone +16s Cooldown +30% Bullet Resist +6s Buff Duration Buy when you are repeatedly getting caught and killed out of position, or to close a gap onto a fleeing target. Watch out: Silenced (and therefore unusable) while affected by Slowing Hex
Tier 4 6,400 souls each
-
 Arctic Blast Arctic Blast +24s Cooldown +0.6s Spread Duration: +48% Move Speed +4s Slow Duration +10% Spirit Resist +1s Freeze Duration Buy to lock down a mobile enemy team or to peel a dive off your backline — slowed targets cannot regenerate stamina. Watch out: Slowed targets have their stamina regen frozen
-
 Magic Carpet Magic Carpet +32s Cooldown +12s Duration +0.2s Cast Delay +14 Spirit Power +1.3s Summon Duration +15% Ability Duration +25% Air Control -15% Gravity Scale +125 Bonus Health Buy when map rotations and split-push response are deciding the game, or as an escape from ground-locked fights. Watch out: Flying makes you a prime target for Knockdown's airborne bonus stun and +100% gravity
Hover an item's name for its exact numbers, or open it for the full write-up.
Heroes who cause this
23 heroesIf you are up against one of these, expect to need an item from the list above. Pick a hero for everything else about beating them.
-
 Baba
 Baba Three kinds of control in one kit: silence, a hex and several slows Durability low (1/3) Burst high (2/3) Mobility high (2/3) Healing low (1/3)
-
 Billy
 Billy Anti-mobility — Chain Gang disables movement abilities outright and Bashdown pulls airborne heroes to the floor Durability high (2/3) Burst high (2/3) Mobility high (2/3) Healing low (1/3)
-
 Celeste
 Celeste Very mobile: four stamina charges, an air-control passive, sliding and wall-bouncing movement Durability low (1/3) Burst high (2/3) Mobility very high (3/3) Healing high (2/3)
-
 Dynamo
 Dynamo Singularity is a multi-target hard CC long enough to decide a teamfight outright Durability high (2/3) Burst low (1/3) Mobility high (2/3) Healing very high (3/3)
-
 Graves
 Graves Map pressure while away from the fight via Borrowed Decree Ghouls marching at objectives Durability low (1/3) Burst low (1/3) Mobility none (0/3) Healing low (1/3)
-
 Grey Talon
 Grey Talon Long engagement range — he can dictate whether a fight starts Durability none (0/3) Burst high (2/3) Mobility high (2/3) Healing low (1/3)
-
 Infernus
 Infernus Strong sustained damage that keeps ticking after he leaves line of sight Durability low (1/3) Burst low (1/3) Mobility high (2/3) Healing high (2/3)
-
 Ivy
 Ivy True flight — she can cross terrain and take an ally with her Durability high (2/3) Burst low (1/3) Mobility very high (3/3) Healing high (2/3)
-
 Kelvin
 Kelvin Frozen Shelter is a hard physical barrier that stops ranged damage and ultimates outright Durability high (2/3) Burst low (1/3) Mobility high (2/3) Healing very high (3/3)
-
 McGinnis
 McGinnis Defines zone control: Spectral Wall plus Heavy Barrage can make an entire lane or objective unenterable. Durability high (2/3) Burst low (1/3) Mobility none (0/3) Healing high (2/3)
-
 Nurse Harrow
 Nurse Harrow Strong, aimed ally healing that ignores falloff Durability high (2/3) Burst low (1/3) Mobility low (1/3) Healing very high (3/3)
-
 Paige
 Paige Peel — Plot Armor is a save and a damage buff on one button. Durability low (1/3) Burst low (1/3) Mobility none (0/3) Healing high (2/3)
-
 Paradox
 Paradox Paradoxical Swap exchanges positions with a hit enemy, pulling them out of safety and into her team. Durability low (1/3) Burst high (2/3) Mobility low (1/3) Healing none (0/3)
-
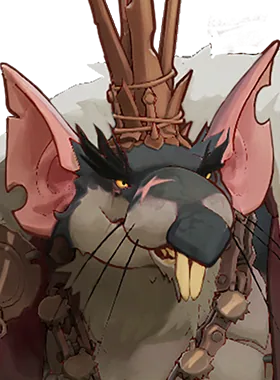 Rat King
 Rat King Makes his whole team's guns better: stacking bullet-resist shred from Rat Swarm Durability high (2/3) Burst high (2/3) Mobility low (1/3) Healing low (1/3)
-
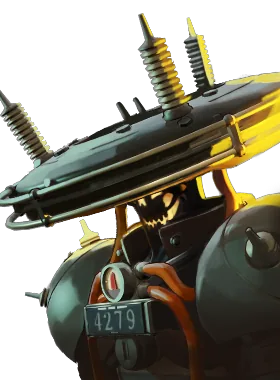 Seven
 Seven Wave and jungle clear through Lightning Ball and Power Surge, which helps him reach item breakpoints sooner Durability low (1/3) Burst high (2/3) Mobility none (0/3) Healing none (0/3)
-
 Solomon
 Solomon Layered control: slows, a root and a stun, all aimed in predictable shapes Durability low (1/3) Burst high (2/3) Mobility low (1/3) Healing none (0/3)
-
 The Doorman
 The Doorman Hotel Guest does not reduce a hero's output, it removes the hero Durability low (1/3) Burst low (1/3) Mobility low (1/3) Healing none (0/3)
-
 Venator
 Venator Layered crowd control from three separate slots: knockback plus wall stun, a 30s-lifetime immobilizing trap, and area denial from burn Durability low (1/3) Burst high (2/3) Mobility low (1/3) Healing none (0/3)
-
 Victor
 Victor Effectively two health bars via Shocking Reanimation, which invalidates the normal 'focus the bruiser' plan Durability very high (3/3) Burst high (2/3) Mobility high (2/3) Healing very high (3/3)
-
 Violet
 Violet Bullets she can steer and a wall that blocks shots give her control over sight lines Durability low (1/3) Burst high (2/3) Mobility high (2/3) Healing low (1/3)
-
 Viscous
 Viscous Single-target save: The Cube is invulnerability, not a shield, so it absorbs any ultimate outright Durability high (2/3) Burst low (1/3) Mobility high (2/3) Healing high (2/3)
-
 Vyper
 Vyper High close-range sustained damage, with effectively infinite ammo while sliding Durability low (1/3) Burst high (2/3) Mobility very high (3/3) Healing none (0/3)
-
 Warden
 Warden Binding Word forces a 20m-in-2.8s escape check and silences you through it at T3 Durability high (2/3) Burst low (1/3) Mobility low (1/3) Healing high (2/3)
Get this answered for your actual game
Which of these is worth a slot depends on how many of the six enemies really press this. The tool works that out from the lineup.
Open the matchup tool