
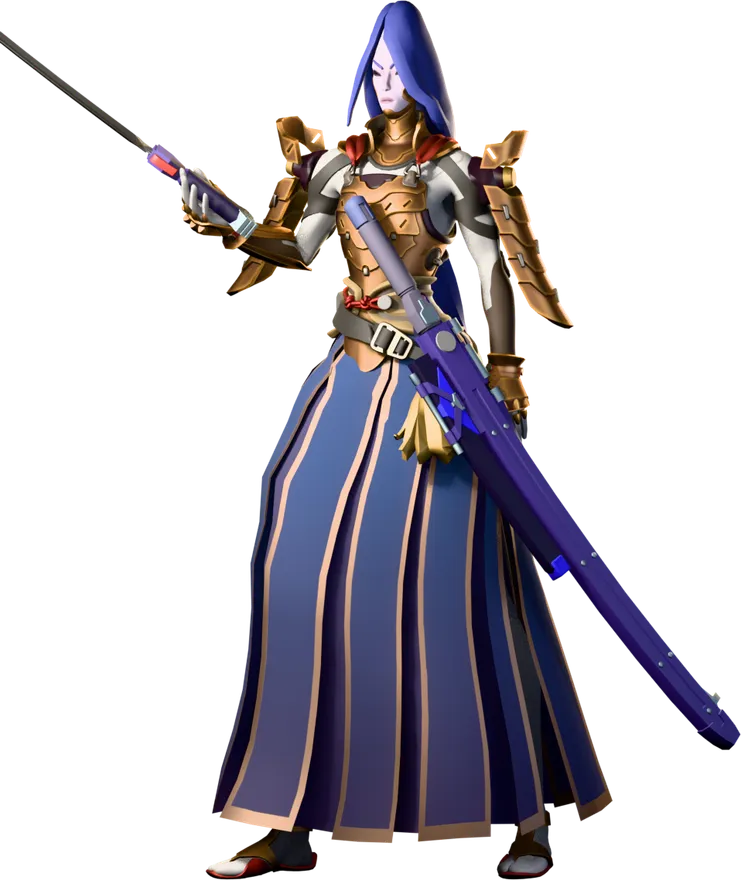
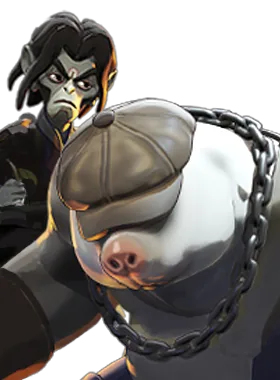
Yamato vs Mo & Krill
Yamato's team wins 51.3% Mo & Krill's team wins 48.7%, across 22,991 games
Written for the Yamato player. Playing Mo & Krill? See Mo & Krill vs Yamato →
Yamato has a big edge
Yamato usually wins 47.2% of games. Against Mo & Krill that is 4.1% higher, over 22,991 games.
- Whole match 51.3% +4.1% vs usual 22,991 games
- Sharing a lane 51.6% +4.4% vs usual 8,200 games
- Oracle and above 56.3% +6.6% vs usual 867 games
"Sharing a lane" counts only games where both were assigned the same lane — the laning matchup itself. "Oracle and above" counts only matches whose average rank was Oracle and above, against Yamato's usual win rate at that rank.
The fight at a glance
If you're Yamato
Has the edge Burrow Mo & Krill dive underground, moving faster and gaining both spirit and bullet armour while submerged. Crowd Control Slow plus a knockup on everyone near the emergence point. Damage Spirit damage on emergence; Mobility Increased move speed while burrowed (+4 m/s at T3) on a base 8 m/s frame. 1 +45 spin DPS while burrowed. 2 +4s burrow time, +2 radius. 5 -20s cooldown, +4 m/s move speed.
Wait out Burrow 40s cooldown
WhyIt is their only engage and their only real escape; force it on a trooper wave or a fake overextend and they are a slow-approaching shotgun hero for the next 20-40 seconds.
- Watch out
- Burrow lets them travel to you underground with bullet and spirit armour, then surface directly under your feet with a Knockup you cannot dash out of.
- Your edge
- Yamato has more reach than Mo & Krill, so you can trade from range.
- Buy
 Unstoppable Unstoppable +60s Cooldown +5.5s Duration +125 Bonus Health +25% Debuff Resist Buy it against Mo & Krill's
 Combo Combo Mo & Krill grab a single enemy, hold them in place stunned while chewing through them for the duration of the channel. Crowd Control Full stun for the 2.4s channel (+0.7s at T3). Damage 35 damage per second over the 2.4s channel; Mobility None — both parties are locked in place, which is the risk. 1 +100% lifesteal. 2 -30s cooldown, +50% bullet resist. 5 +0.7s duration, +35 damage per second with increased scaling. .
If you're Mo & Krill
 Shadow Transformation Yamato transforms with an initial invincible window, refreshes her ability cooldowns, and for the duration casts them much faster while immune to negative status effects and heavily… Damage No direct damage; the power is in refreshed abilities cast 60% faster Mobility T2 adds +4 m/s move speed during the transformation, on top of her already… Defensive Initial invincibility during the 1.5s transformation channel, immunity to… 1 +7 weapon damage 2 +4 m/s move speed and -30s cooldown (160s base) 5 +3s duration (5s base up to 8s) and +30% bullet resist and +30% spirit resist
Wait out Shadow Transformation 160s cooldown
ThenForce it early with a fake commit, disengage, and then fight her in the 130-160 seconds it is down, when she has only her 730 health.
- Watch out
 Flying Slash Throws a grappling hook at an enemy and pulls herself to them, landing a light melee hit and leaving them significantly slowed on arrival. Crowd Control -40% movement slow for 2.5s on the target Damage 66 melee damage Mobility Pulls her to the target from 23m base (T3 adds +8m, up to 31m) 1 -18s cooldown (36s base down to 18s) 2 gain +35 Spirit Power for 6s 5 alt-cast to grapple allies, +8m cast range, and +1 charge Flying Slash reaches 23-31m and lands with a -40% slow for 2.5s, which means once she picks you there is no walking away from
 Power Slash Power Slash Yamato channels for around a second and a half to build up a sword strike, then releases it as a ranged slash. Crowd Control T1 adds a 32% movement slow for 3s Damage 145 spirit at full charge (about 1.96x spirit scaling), with T3 adding +150… Mobility none — she is channelling 1 +32% movement slow for 3s 2 -4s cooldown (12s base) 5 +8m cast range, +150 damage, and increased Spirit Power scaling and
 Crimson Slash Crimson Slash A wide slash in front of her that damages enemies and reduces their rate of fire. Crowd Control none, but -30% fire rate for 4s is a heavy offensive debuff Damage 55 spirit (about 0.37x spirit scaling) Defensive Heals 55 (about 1.04x spirit scaling) on hero hit; 1 on hit, +30% melee damage for 4s 2 on hero hit, additional +6% max health heal 5 -10s cooldown and increased scaling .
- Your edge
- Mo & Krill has more healing than Yamato, so you recover between fights and they do not.
- Buy
 Divine Barrier Divine Barrier +55s Cooldown +0.2s Cast Delay +1.5 Out of Combat Regen +6s Buff Duration +600 Barrier +10% Ability Range +10% Radius Buy it against Yamato's Flying Slash.
The full plan for Yamato, phase by phase, is below. Mo & Krill's side in full →
What should I do right now?
Do
- Plan for Unstoppable Unstoppable +60s Cooldown +5.5s Duration +125 Bonus Health +25% Debuff Resist Builds from Debuff Reducer — know which tier it sits in so you are not improvising at the shop.
- Know what Burrow looks like. It is the cooldown this lane revolves around.
Avoid
- Walking to lane on the same path every wave against a hero with Mo & Krill's engage range.
Do
- Zero ranged presence — 2.8 damage per pellet means they contribute essentially nothing outside a few metres.
- Every one of their damage tools requires being close, so a mid- or long-range laning duo can simply refuse to engage.
- Power Slash charged from behind cover pokes for 145 with a 32% slow at T1, from further away than her gun hits hard
Avoid
- 930 base health gives them a large health pool that is hard to push out of lane.
 Scorn Scorn A burst of damage to everything close by that converts a portion of the damage dealt into healing, with a substantially larger return when the damage lands on enemy heroes. Crowd Control None at base. T3 adds a stacking 15% damage debuff on enemies hit, lasting… Damage 45 damage base, scaling with spirit at 0.675, with a 13s base cooldown. Defensive The heal is the main defensive layer. 1 +30 damage. 2 -5s cooldown, +1m radius. 5 applies a stacking 15% damage debuff to enemies hit for 16s. clears troopers and heals off them simultaneously, so they sustain and farm from the same button.
Do
- Their first real spike is Scorn first two points (laning 0-10min) — respect it from that point, not before.
- Your spike is Flying Slash T1 (-18s cooldown): 18s gap-close turns her from an occasional ganker into a constant roaming threat
Avoid
- Taking an even fight against Mo & Krill on their spike timing when you could take the same fight ten minutes later on yours.
Do
- Watch for Burrow. Shoot the burrow mound. Hero damage directly reduces the speed bonus, so contesting the approach turns a fast dive into a slow one you can walk away from.
- Kite. Their entire damage output requires close range and their spreadshot does 2.8 per pellet — holding 20m+ with a mid- or long-range hero keeps them past the point where their damage starts falling off.
Avoid
- Spending your own escape before Burrow is on cooldown.
Mo & Krill’s abilities
- Burrow Ability 2
It puts you somewhere you did not choose to be — slow plus a Knockup on everyone near the emergence point.
- Shoot the burrow mound. Hero damage directly reduces the speed bonus, so contesting the approach turns a fast dive into a slow one you can walk away from.
- Spread out. The emergence Knockup is AoE, so standing apart means it catches one person instead of three.
- The travel path is visible on the ground — reposition to a spot with no cover for them to surface behind, or back onto high ground they must climb to.
- Combo Ultimate
Once this lands the fight is usually already decided — full Stun for the 2.4s channel (+0.7s at T3).
- Interrupt it. Any Stun, Knockup, Silence or displacement on Mo & Krill breaks the channel and wastes a 150s ultimate.
- Both participants are stationary and grouped for the 2.4s channel — that is a free AoE target for your own ultimate.
- Do not let them finish the kill: a Debuff Remover or a heal on the held target denies the permanent max-health reward entirely, since the target has to actually die.
-
 Sand Blast Sand Blast A spray of sand in a cone ahead that deals damage and disarms everyone it catches, preventing them from using their weapon. Crowd Control Disarm, roughly 2.5s. T2 adds a 28% slow and a 28% dash distance reduction… Damage 35 damage base; T1 adds +45 damage and +5m range. 25m range with a 2.5s… Defensive Disarming the biggest gun in the fight is a defensive cooldown in practice. 1 +45 damage, +5m range. 2 24% slow and 26% dash distance reduction. 5 +1.5s duration, -25s cooldown. Ability 3
More lockdown on its own cooldown — Disarm, roughly 2.5s.
- It is a cone in front of them — strafe wide or get behind them and it applies nothing.
- Disarm blocks weapons, not abilities. If you are ability-based (Paige, Paradox, Pocket) you can keep fighting through it; if you are gun-based, use the window to reposition instead of trying to shoot.
- Debuff Remover clears the Disarm and is worth holding specifically for the moment before they commit Combo.
- Scorn Ability 1
Their sustain and their farming button in one. It lets them sit in a trooper wave and stay topped up.
- Anti-heal (
 Healbane Healbane +8s Duration +7 Spirit Power -35% Incoming Healing /
 Toxic Bullets Toxic Bullets -40% Incoming Healing ) applied before the engage removes the sustain that makes the whole hero work.
- It is a short-radius point-blank pulse — staying more than a few metres away denies it entirely, and their spreadshot cannot punish you at that distance either.
- Do not feed it multiple bodies. Scorn heals per target hit, so a clumped team is what makes them unkillable.
- Anti-heal (
- 1 Burrow
Burrow first. It is their only engage and their only real escape; force it on a trooper wave or a fake overextend and they are a slow-approaching shotgun hero for the next 20-40 seconds.
- 2 Sand Blast
Sand Blast second — bait the Disarm from behind cover or with a summon, then engage when your gun is safe for the next window.
- 3 Scorn
Scorn third: make them use it as wave clear rather than as a heal in a fight, since its cooldown is short and its impact in a brawl is large.
The matchup in detail
- No ranged damage whatsoever; kiting them is a direct counter. Strong evidence
- Combo is a stationary channel that any CC breaks, wasting their ultimate. Strong evidence
- Anti-heal items simultaneously disable Scorn's sustain and Combo T1's Lifesteal. Strong evidence
- You both win by jumping on someone, which means the loser is whoever jumps first. An entry spends mobility, and a hero who has spent their mobility is the ideal target for a hero who has not — so the fight between you is decided before contact, by who can wait longer. The way out of the stalemate is to force it with someone else's engage and arrive second onto a target they have already committed to. Strategic
- Neither of you deletes the other, so this matchup is decided by multipliers rather than damage. Resists stack multiplicatively, which means your fourth resist item buys much less percentage than your first; shred is subtracted from the total afterward, which means it is worth more the tankier they get; and healing reduction stacks multiplicatively too, so a second anti-heal source on top of a first is worth far less than the first. The efficient build against Mo & Krill is one anti-heal, one shred, and damage after that. Strong evidence
- Burrow lets them travel to you underground with bullet and spirit armour, then surface directly under your feet with a Knockup you cannot dash out of. Strong evidence
- Sand Blast disarms you for around 2.5s (longer at T3) in a 25m cone — your gun stops working for the exact seconds they need to set up. Strong evidence
- Combo holds you stunned in place for 2.4 seconds while grinding through your health, with +50% Bullet Resist at T2 so shooting them off is unreliable. Strong evidence
- Scorn heals them off every body in radius, with a stacking 15% damage debuff on you at T3 — the longer the brawl runs, the more the numbers move their way. Strong evidence
- Every kill secured inside Combo permanently raises their max health, so the same hero is harder to kill in minute 40 than in minute 20. Strong evidence
- Your mobility is a real advantage here, and Mo & Krill's slows exist to delete it. Note that Debuff Resist barely helps against short hard slows because it only trims duration — spacing and cover do more than an item will. Strong evidence
- Kite. Their entire damage output requires close range and their spreadshot does 2.8 per pellet — holding 20m+ with a mid- or long-range hero keeps them past the point where their damage starts falling off. Strong evidence
- Shoot the burrow mound as it approaches. Hero damage reduces the Burrow speed bonus directly, so contesting the travel converts their dive into a walk. Strong evidence
- Hold one interrupt specifically for the Combo channel. Any Stun, Silence, Knockup or displacement on them cancels a 150-second ultimate and denies the permanent health stack. Strong evidence
- Buy anti-heal before mid game. Healbane / Toxic Bullets cut Scorn's healing and Combo T1's Lifesteal at the same time. Strong evidence
- Spread out so the Burrow emergence Knockup and Scorn each hit one person instead of three — their sustain scales with the number of bodies in radius. Strong evidence
- Sand Blast is a frontal cone: circle behind them rather than backing straight up, and if you are ability-based, keep fighting through the Disarm since it only blocks weapons. Strong evidence
- You do not have the CC to reliably break Combo out of your own kit, so buy the cheapest thing that does:
 Silence Wave Silence Wave +42s Cooldown +3s Duration +0.1s Cast Delay +90 Bonus Health is the only area Silence in the shop and the standard answer to channelled ultimates. Area matters because you do not have to win the aim duel — you have to cover the spot they cast from. Note the alternative,
 Counterspell Counterspell +23s Cooldown +20 Spirit Power +6s Buff Duration +0.8s Spell Parry Duration +50 Bonus Health +5 Spirit Power , parries a single ability outright but requires a read; Silence Wave forgives a bad read, which is why it is the buy when interrupting is not your specialty. Strong evidence
- You have an immunity window and Mo & Krill has a burst combo, which makes this a timing matchup rather than a damage one. Their combo has a commit point; your window has to cover that point rather than open before it. Using it early is the same as not having it. Strategic
- During the Combo channel — they are stationary, locked to one target, and any Hard CC cancels it. Strong evidence
- While burrowed and being shot: hero damage strips the speed bonus, so a contested approach leaves them arriving late and out of position. Strong evidence
- Immediately after the Burrow emergence Knockup, with Burrow on cooldown — they have no escape and are standing inside your team. Strong evidence
- Any time they are further than ~20m from a target: their spreadshot starts falling off at 20m and Scorn only reaches 9m, so they deal little damage at that range. Strong evidence
- Their 2.82s spreadshot reload at close range, which is a long window for a hero with no ranged fallback. Strong evidence
- Parry is your best tool against Mo & Krill's arrival and it is now a commitment rather than a hedge. Since 09-16-2026, parrying during a dash cancels the dash and its momentum, so you cannot both reposition and hold F. The cooldown maths makes the decision for you: a successful parry costs 0.5 seconds and stuns them for 3 with no Debuff Resist reduction possible, while a whiff costs 4.5 seconds — against a hero who arrives on a cooldown, that whiff is the entire window they needed. Documented
- Play this lane looser than the guides say. The 09-16-2026 patch cut nearly all movement slows by about 20% and ground-dash slows by about 10%, so the distance Mo & Krill takes off you per application is meaningfully smaller than it was. With mobility as your main advantage, that shifts the break-even point on walking up: exchanges you used to refuse because one slow meant death are now survivable. Test it early rather than assuming the old spacing. Documented
- You get value from moving around the map and Mo & Krill does not, but the 09-16-2026 patch made that harder to convert early: tunnel breakables Crates Streets, rooftops and tunnels — about 500 of them Ordinary breakables. Each has a 60% chance to drop souls; a Tough Crate always drops, for double. Souls 23 souls a crate, 60% of the time +2 a minute now spawn and respawn on 5 minutes rather than 3. The off-lane income that used to make a rotation pay for itself is roughly 40% less frequent, so before 6:00 a rotation has to be justified by pressure on Mo & Krill or on the Guardian, not by the breakables you pick up on the way. Documented
- 930 base health gives them a large health pool that is hard to push out of lane. Strong evidence
- Scorn clears troopers and heals off them simultaneously, so they sustain and farm from the same button. Strong evidence
- Zero ranged presence — 2.8 damage per pellet means they contribute essentially nothing outside a few metres. Strong evidence
- Every one of their damage tools requires being close, so a mid- or long-range laning duo can simply refuse to engage. Strong evidence
- Power Slash charged from behind cover pokes for 145 with a 32% slow at T1, from further away than her gun hits hard Strong evidence
- Scorn first two points (laning 0-10min) — The Scorn/Scorn opener front-loads their sustain and wave clear. Strong evidence
- Combo unlock — They gain Combo, a single-target removal, and the permanent max-health stacking mechanic starts. Strong evidence
- Combo T2 (mid game) — -30s cooldown and +50% Bullet Resist make the ultimate both repeatable and much harder to break with gunfire. Strong evidence
- Burrow T3 (late) — -20s cooldown and +4 m/s make them a rotating map threat who can arrive at any fight under armour. Strong evidence
- Flying Slash T1 (-18s cooldown) — 18s gap-close turns her from an occasional ganker into a constant roaming threat Strong evidence
- Shadow Transformation unlock — Gives her an ability refresh, status immunity and an invincible window, which is her first true all-in Strong evidence
- Combo is a channel, which means the fight is decided by whether you can break it. Hold one interrupt — a Stun, a Silence, or a displacement — specifically for that cast rather than spending it on the opening trade. If you have no interrupt, the answer is line of sight: leave the area entirely rather than trying to out-heal it. Strong evidence
- You are not going to kill Mo & Krill in a normal teamfight and trying to is how fights are lost. Treat them as terrain: fight around them, spend your damage on whoever is behind them, and only commit to killing them once anti-heal and shred are actually online. Strategic
- Mo & Krill brings enough lockdown that Stun sequencing matters. Community reporting describes Stun diminishing returns of roughly 10% then 30% inside an 8-second window, applying to stuns only and not to silences, slows, disarms or hexes — so their follow-up chain may be shorter than the first one felt. Treat this as unconfirmed, but it is worth knowing before you burn a cleanse on the opening Stun. Uncertain
- You deal Spirit Damage, so Healbane is the cheaper and more reliable anti-heal against Mo & Krill — it lands off your abilities at T2 rather than asking you to sustain gunfire you are not built for. Strong evidence
- Against Mo & Krill's crowd control, understand what Debuff Resist actually buys you: it shortens duration, never magnitude. It is excellent against long disables and close to worthless against a short hard slow. Two things it explicitly does not shorten at all are the parry Stun and the
 Knockdown Knockdown +35s Cooldown +0.1s Cast Delay +2s Stun Delay +0.5s Stun Duration +75 Bonus Health +5% Ability Range +5% Radius item's Stun. Documented
- Mo & Krill is a durability check, and the maths favours shred over raw damage here. Resistances stack multiplicatively, but shred is pooled and then subtracted from total resist — so the higher their resist climbs, the more each point of shred is worth. Against a stacked tank, resist reduction outperforms another flat damage item. Documented
- Unstoppable (vitality T4) — Buy when enemy lockdown is the reason you lose fights — it lets you walk through a full CC chain and still deal damage. In this game that means Mo & Krill's Combo. Documented
-
 Ethereal Shift Ethereal Shift +37s Cooldown +4s Duration +5s Buff Duration +30% Spirit Resist +20 Spirit Power (spirit T4) — Buy to survive a telegraphed assassination combo or ultimate — you cannot be hurt for four seconds. That matters here because of the channelled ultimates from Mo & Krill. Documented
- Knockdown (spirit T3) — Mo & Krill creates that through Mo & Krill's Burrow. Buy whenever an enemy fights from the sky — it answers flying and airborne heroes and channelled aerial ultimates. Documented
- Anti-heal against Mo & Krill is bought correctly and applied at the wrong moment. Healbane's reduction runs for 8 seconds from your Spirit Damage and Toxic Bullets' runs while the bleed is up — both are windows, and re-applying the same source before it expires does not stack a second instance. The mistake is opening the fight clean and reaching for anti-heal once they start healing; by then you have spent the fight. Land it before they commit, then keep the window refreshed rather than re-triggering it. Strong evidence
- The reflex buy against a hero who keeps deleting you is
 Metal Skin Metal Skin +24s Cooldown +5s Duration +12% Bullet Resist -20% Dash Distance +20% Gravity Scale , and against Mo & Krill it does nothing. Metal Skin is bullet-damage immunity only — Spirit Damage, abilities and every status effect pass straight through it, and you pay −1.5 m/s move speed and −20% dash distance for the privilege. The three big defensive actives are deliberately orthogonal: Metal Skin stops bullets, Unstoppable stops statuses, Ethereal Shift stops everything but disables you. Mo & Krill is a spirit threat, so it is the last two you are choosing between. Documented
- If you learned to play this matchup before 09-16-2026 you probably dash away from Mo & Krill and parry on the way out. That no longer works: parrying during a regular dash now cancels the dash and its momentum, so you parry standing still exactly where they wanted you. Parry first and dash second, or accept that the parry is a commitment to hold ground. Note also that a whiffed parry is a 4.5-second cooldown against a hero who only needs one window. Documented
- Your damage comes through melee and Mo & Krill fights at the range where parry is live, so the mistake that decides this matchup is throwing the heavy melee into a held F. Parry counters both light and heavy melee, stuns you for 3 seconds, and that Stun is one of the two disables Debuff Resist explicitly does not shorten. Bait the parry — the whiff costs them 4.5 seconds of cooldown, a success only costs them 0.5. Strong evidence
- The finishing heavy melee on Mo & Krill is worse than it feels. Melee Damage is mitigated twice — once by Bullet Resist and again by Melee Resist — so it is the single worst damage channel to point at a stacked-resist target, and the wind-up is long enough for a parry that stuns you for 3 seconds with no Debuff Resist reduction available. Finish with your gun or an ability, not with melee. Strong evidence
- Players buy
 Dispel Magic Dispel Magic +45s Cooldown +10% Spirit Resist +3s Buff Duration +250 Heal Amount for Mo & Krill and then discover it does nothing about Combo. Dispel Magic purges non-ultimate negative effects only — anything sourced from an ultimate is outside its scope entirely. Work out which of Mo & Krill's disables come off abilities and which come off the ult before you spend 3,200: the ability-sourced ones are purgeable, the ult is not, and for the ult you need either Unstoppable pre-cast or the discipline not to be there. Documented
- Your instinct is to jump on Mo & Krill's backline the moment you see an opening, and the mistake is not checking what is above you. A Walker's Stomp is 350 damage + 15% of your max health inside 15m with a 2-second Stun on a 7-second cooldown — a 2-second Stun handed to a team with peel is a death. Dive under their Walker only with Unstoppable pre-cast or after the Stomp has just gone off. Strong evidence
Next
Yamato’s other hard matchups
All of Mo & Krill
Who beats Mo & Krill, the items that shut Mo & Krill down, and every ability.
Facing more than Mo & Krill?
Add the other five enemies: who to focus first and what to buy against the whole team.
Sources and method for this page
Everything on this page is generated for Deadlock patch 10-30-2026 from Mo & Krill's current kit, measured match results and a mechanics rule base. Each line carries its own confidence label.
Data-supported Measured: you win 51.3% of these, which is 4.1% above your overall win rate (22,991 matches). The kit-based model reads this as moderate instead — treat the measured number as primary and the gap as a sign this matchup is more about execution than kit.
Mo & Krill's kit and counterplay were compiled from 7 sources, cross-checked for patch 10-30-2026. Threat ratings compare this pairing against Yamato's own baseline win rate rather than a flat 50%, because ranking by raw win rate produces the wrong answer for heroes whose overall win rate is not 50%.
- https://deadlock.one/en/heroes/mo-krill
- https://metabot.gg/en/deadlock/hero/18/abilities
- https://deadlocklabs.gg/heroes/mo-and-krill/
- https://deadlock.io/en/heroes/mo-and-krill
- https://dramalock.org/guides/mo-and-krill-deadlock-guide-build-abilities/
- https://tracklock.gg/articles/deadlock-update-09-16-26-patch-notes