


Yamato vs Graves
Yamato's team wins 39.7% Graves's team wins 60.3%, across 57,995 games
Written for the Yamato player. Playing Graves? See Graves vs Yamato →
Graves has a big edge
Yamato usually wins 47.2% of games. Against Graves that is 7.5% lower, over 57,995 games.
- Whole match 39.7% −7.5% vs usual 57,995 games
- Sharing a lane 39.7% −7.5% vs usual 19,033 games
- Oracle and above 44.0% −5.7% vs usual 1,158 games
"Sharing a lane" counts only games where both were assigned the same lane — the laning matchup itself. "Oracle and above" counts only matches whose average rank was Oracle and above, against Yamato's usual win rate at that rank.
The fight at a glance

If you're Yamato
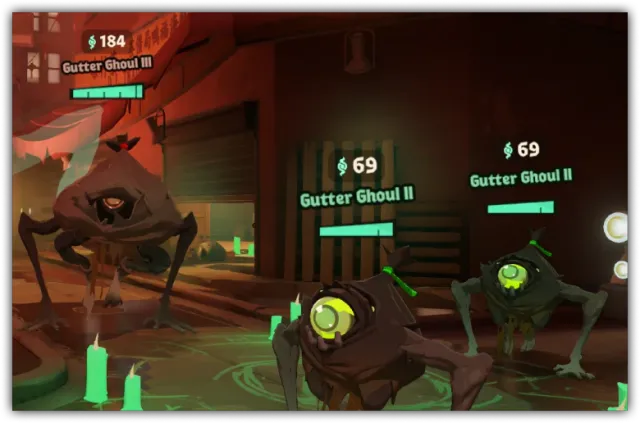
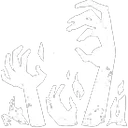 Grasping Hands Raises a line of undead hands out of the ground, after a 0.8s deploy, that damages and immobilizes anyone passing through at ground level, spawns a Ghoul, and leaves a lingering rift behind. Crowd Control immobilize (root) on enemies who pass through; Damage roughly 90 spirit at base, +90 more at tier 2 (metabot.gg, deadlock.one) Mobility none for Graves 1 +90 damage and +10m wall length 2 +1 Ghoul, about -14s cooldown and +0.75s immobilize
Wait out Grasping Hands 34s cooldown
ThenFake an approach down a chokepoint, let her place the wall, then commit from a different angle.
- Watch out
- Grasping Hands across a doorway or stair roots you in place while Deadheads and Ghouls grind you down.
- Your edge
- Yamato is more mobile than Graves, so you choose when to fight.
- Buy
 Monster Rounds Monster Rounds +25% Weapon Damage vs. NPCs +1 Out of Combat Regen +25% Bullet Resist vs. NPCs Buy it against the objective pressure from Graves.
If you're Graves
Has the edge Shadow Transformation Yamato transforms with an initial invincible window, refreshes her ability cooldowns, and for the duration casts them much faster while immune to negative status effects and heavily… Damage No direct damage; the power is in refreshed abilities cast 60% faster Mobility T2 adds +4 m/s move speed during the transformation, on top of her already… Defensive Initial invincibility during the 1.5s transformation channel, immunity to… 1 +7 weapon damage 2 +4 m/s move speed and -30s cooldown (160s base) 5 +3s duration (5s base up to 8s) and +30% bullet resist and +30% spirit resist
Wait out Shadow Transformation 160s cooldown
ThenForce it early with a fake commit, disengage, and then fight her in the 130-160 seconds it is down, when she has only her 730 health.
- Watch out
 Flying Slash Throws a grappling hook at an enemy and pulls herself to them, landing a light melee hit and leaving them significantly slowed on arrival. Crowd Control -40% movement slow for 2.5s on the target Damage 66 melee damage Mobility Pulls her to the target from 23m base (T3 adds +8m, up to 31m) 1 -18s cooldown (36s base down to 18s) 2 gain +35 Spirit Power for 6s 5 alt-cast to grapple allies, +8m cast range, and +1 charge Flying Slash reaches 23-31m and lands with a -40% slow for 2.5s, which means once she picks you there is no walking away from
 Power Slash Power Slash Yamato channels for around a second and a half to build up a sword strike, then releases it as a ranged slash. Crowd Control T1 adds a 32% movement slow for 3s Damage 145 spirit at full charge (about 1.96x spirit scaling), with T3 adding +150… Mobility none — she is channelling 1 +32% movement slow for 3s 2 -4s cooldown (12s base) 5 +8m cast range, +150 damage, and increased Spirit Power scaling and
 Crimson Slash Crimson Slash A wide slash in front of her that damages enemies and reduces their rate of fire. Crowd Control none, but -30% fire rate for 4s is a heavy offensive debuff Damage 55 spirit (about 0.37x spirit scaling) Defensive Heals 55 (about 1.04x spirit scaling) on hero hit; 1 on hit, +30% melee damage for 4s 2 on hero hit, additional +6% max health heal 5 -10s cooldown and increased scaling .
- Your edge
- Graves has more sustained damage than Yamato, so longer fights favour you.
- Buy
 Divine Barrier Divine Barrier +55s Cooldown +0.2s Cast Delay +1.5 Out of Combat Regen +6s Buff Duration +600 Barrier +10% Ability Range +10% Radius Buy it against Yamato's Flying Slash.
The full plan for Yamato, phase by phase, is below. Graves's side in full →
What should I do right now?
Do
- Plan for Monster Rounds Monster Rounds +25% Weapon Damage vs. NPCs +1 Out of Combat Regen +25% Bullet Resist vs. NPCs — know which tier it sits in so you are not improvising at the shop.
- Know what Grasping Hands looks like. It is the cooldown this lane revolves around.
Avoid
- Walking to lane on the same path every wave against a hero with Graves's engage range.
Do
- No dash, no vertical mobility and no escape beyond Grasping Hands — a lane bully with a gap-close simply walks onto her
- Her gun only reaches 20m, so she has to walk into range before it does any damage
- Power Slash charged from behind cover pokes for 145 with a 32% slow at T1, from further away than her gun hits hard
Avoid
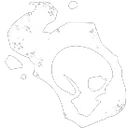 Jar of Dead Jar of Dead Passively banks a charge whenever something dies near Graves. Crowd Control none at base; the tier-2 upgrade adds roughly a 30% movement slow for about… Damage roughly 16 spirit per Deadhead hit at base spirit power (deadlock.one, patch… Defensive tier-1 upgrade returns a small heal (about 5 health) when a death is… 1 heals Graves a small amount for each death collected 2 Deadhead hits apply roughly a 30% slow for about 1 second 5 +2 additional Deadheads and +4 seconds of lifetime charges off every creep death, so a lane Graves is winning snowballs the ability's uptime
- Grasping Hands across the lane chokepoint denies a safe approach to the soul orbs and punishes anyone who steps up to secure
Do
- Their first real spike is ult unlock — respect it from that point, not before.
- Your spike is Flying Slash T1 (-18s cooldown): 18s gap-close turns her from an occasional ganker into a constant roaming threat
Avoid
- Taking an even fight against Graves on their spike timing when you could take the same fight ten minutes later on yours.
Do
- Watch for
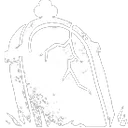 Borrowed Decree Borrowed Decree Plants a gravestone that spawns Ghouls over time. Crowd Control area slow on Ghoul detonation Damage roughly 115 spirit on Ghoul detonation and about 40 melee per upgrade tier; Defensive a gravestone placed on your own walker or guardian turns a defensive hold… 1 +25% Ghoul move speed and about -15s cooldown 2 +10s duration 5 Ghouls deal roughly +5% of the target's current health as damage when they die, and… . Two heavy melees kill the gravestone — walk to it and delete it instead of fighting the Ghoul stream forever
- Fight her past 20m — her gun stops there, so Grey Talon, Vindicta or any mid-range poke makes
 Essence Theft Essence Theft Graves's bullets siphon weapon damage and spirit resist from whoever they hit, transferring it to Graves up to a per-target cap. Damage no direct damage of its own; Defensive indirectly defensive — a carry with stolen weapon damage kills Graves more… 1 +1 maximum steal target, and all Graves's summons apply Essence Theft impossible to build
Avoid
- Spending your own escape before Grasping Hands is on cooldown.
Graves’s abilities
- Borrowed Decree Ultimate
This will not kill you on its own — it makes sure you cannot leave while the rest of Graves's kit does. Area slow on Ghoul detonation.
- Two heavy melees kill the gravestone — walk to it and delete it instead of fighting the Ghoul stream forever
- Ghouls have only around 180 health; any wave-clear ability (McGinnis turrets,
 Charged Shot Charged Shot Draws back a heavy shot that can be held at full charge and pierces straight through everything it hits. Damage about 80 at base spirit power, +54 at tier 2 (deadlock.one, metabot.gg) 1 +54 damage and -2s charge delay 2 the shot bounces once off a wall (it cannot hit the same target twice), plus improved… ,
 Powder Keg Powder Keg Throws a barrel that detonates after a short delay for spirit damage, applies a burn, and launches anyone caught in the blast into the air. Crowd Control knockup on detonation — hard CC that removes the target's ability to strafe Damage about 80 spirit at base plus burn damage over time; Mobility self-launch: detonating it under her own feet is her primary traversal tool 1 -10s cooldown 2 +40 impact damage, about +13.3 burn damage per second, roughly -5s charge time and… ,
 Napalm Napalm Sprays a burning mixture in front of him that deals spirit damage, slows whoever it touches, and leaves them coated in napalm that keeps burning. Crowd Control movement slow on everyone hit Damage about 40 spirit at base plus the napalm coating over time (deadlock.one) Mobility none directly, though the slow effectively closes distance 1 +20% lifesteal 2 applies about +17% Damage Taken and -33% Healing to affected targets ) erases a wave of them
- Fight away from the gravestone — its value is entirely positional and it cannot be moved once placed
- Jar of Dead Ability 1
No control at base; the upgrade is what changes that — the tier-2 upgrade adds roughly a 30% movement slow for about 1s on hit.
- Deadheads are short-lived and stationary-ish: leave the jar's area rather than trading inside it, since walking out ends the damage entirely
- Deny the passive by not dying near Graves and by contesting the wave so Graves is not the one soaking every creep death
- Spirit Resist items (Spirit Armor line) blunt the per-tick damage, which is small and resist-sensitive
- Grasping Hands Ability 2
Another window where you do not get to answer: immobilize (Root) on enemies who pass through.
- It is a Root, not a Stun — keep shooting and keep using items;
 Dispel Magic Dispel Magic +45s Cooldown +10% Spirit Resist +3s Buff Duration +250 Heal Amount clears it outright
- Watch the cast and strafe around the end of the line rather than dashing through it; the wall has finite length even at tier 2
- Air time beats it: a double jump,
 Bounce Pad Bounce Pad Drops a pad that launches any hero who touches it high into the air. Crowd Control tier 3 adds about +0.7s stun to the landing stomp Damage about 60 stomp damage on landing (deadlock.one) Mobility very large vertical launch for Holliday and all allies who step on it 1 about -10s cooldown 2 she and allies gain roughly +4 m/s movement speed for 4 seconds on landing 5 about +0.7s stun on the landing stomp ,
 Rain of Arrows Rain of Arrows Launches Grey Talon high into the air and lets him glide down slowly, gaining bonus weapon damage and firing multiple arrows per shot while airborne. Crowd Control tier-1 upgrade adds roughly a 24% movement slow to his arrows while airborne Damage no direct damage; tier 1 adds about +3 weapon damage and a 24% movement slow… Mobility high vertical displacement plus a slow controlled glide 1 +3 weapon damage and a 24% movement slow applied by his shots 2 -12s cooldown 5 +30% bullet lifesteal, +30% spirit lifesteal and +30% bullet evasion or any vertical mobility crosses over the hands
- It is a Root, not a Stun — keep shooting and keep using items;
- Essence Theft Ability 3
Rewards long, grinding gunfights: the longer Graves holds the trigger on a target, the weaker that target's gun gets and the softer they become to her Spirit Damage.
- Break line of sight early — the steal accumulates per sustained hit, so a 2-second trade costs almost nothing while a 6-second one is devastating
- Spirit Armor mitigates the payoff of the stolen Spirit Resist since her damage is mostly spirit
- At tier 3 you also have to kill or walk away from her Ghouls and Deadheads, not just from Graves
- 1 Grasping Hands
Grasping Hands first — it is her only defensive tool, has a long cooldown before tier 3, and once it is on cooldown she has no answer to a dive. Fake an approach down a chokepoint, let her place the wall, then commit from a different angle
- 2 Jar of Dead
Then Jar of Dead, since a jar spent on a creep wave is a jar that is not slowing you during the dive (tier 2 onward)
- 3 Borrowed Decree
Borrowed Decree is worth baiting only when you can immediately break the gravestone with heavy melees — otherwise let her use it in a bad spot and simply fight elsewhere
The matchup in detail
- No dash, blink or climbing tool of her own, so where she stands is decided before the fight starts Strong evidence
- Her very short gun forces her into the range band where divers want her Strong evidence
- Both her summons and her gravestone are destructible and can be cleared by any AoE Strong evidence
- Grasping Hands across a doorway or stair roots you in place while Deadheads and Ghouls grind you down — the Root itself is what kills you, not the wall damage Strong evidence
- Essence Theft quietly strips up to about 25% of your weapon damage over a long fight; the carry who committed to a drawn-out duel with Graves loses it slowly and never notices why Strong evidence
- Borrowed Decree gravestones sit on your walker and chip the objective while your team is forced to rotate back and clear Ghouls Strong evidence
- Jar of Dead tier 2 slows stack with the Ghoul detonation slow, so walking out of her zone gets harder the deeper you are in it Strong evidence
- She snowballs on contested lanes — every kill or creep death near her refunds Jar of Dead charges, so a losing lane gives her more ability uptime, not less Strong evidence
- Your mobility is a real advantage here, and Graves's slows exist to delete it. Note that Debuff Resist barely helps against short hard slows because it only trims duration — spacing and cover do more than an item will. Strong evidence
- Fight her past 20m — her gun stops there, so Grey Talon, Vindicta or any mid-range poke makes Essence Theft impossible to build Strong evidence
- Dive her: she has no dash and no escape once Grasping Hands is down, so a gap-closer (
 Phantom Strike Phantom Strike +35s Cooldown +0.35s Cast Delay +8 Spirit Power +15% Weapon Damage +40% Move Speed +3s Slow Duration , Abrams charge, Shiv dash) deletes her Strong evidence
- Carry Dispel Magic specifically for the Grasping Hands immobilize — it is a Root, so you keep shooting and items keep working while you clear it Strong evidence
- Kill the gravestone with two heavy melees rather than fighting the Ghoul stream; the ult's entire value is the object surviving Strong evidence
- Bring one wave-clear ability into the fight (Napalm, Charged Shot, Powder Keg,
 Arctic Beam Arctic Beam Channels a beam of freezing energy in front of him that damages targets and progressively cuts their movement speed and fire rate the longer it stays on them. Crowd Control ramping movement speed and fire rate reduction; Damage about 45 damage per second at base; Mobility none — it constrains his own movement while he holds it 1 about -20% fire rate and move speed on targets 2 about +20 DPS with improved spirit scaling 5 about -13s cooldown and fires 2 additional beams at targets within 10m ) — Ghouls have roughly 180 health and evaporate to any AoE Strong evidence
- Never take a long stationary gunfight inside 17m; two-second trades cost her the entire Essence Theft payoff Strong evidence
- Graves does a lot of damage through summons rather than in person. Do not spend single-target cooldowns clearing them — Area Damage handles the summons while you keep your burst for the hero. Check whether the summons are what is actually killing you before you commit to fighting the hero at all. Strategic
- The moment Grasping Hands is placed and rotated — the cast has a visible tell and she is stationary during it Strong evidence
- Any time she is holding a sustained gun angle inside 20m, because she is standing still to build Essence Theft stacks Strong evidence
- Immediately after Borrowed Decree is planted — she is committed to a location that you now know, and the gravestone is a two-heavy-melee object Strong evidence
- When her Jar of Dead charges are empty after a big wave clear, she has no chip damage and no slow for the next several seconds Strong evidence
- Any fight she enters without Grasping Hands available — with zero mobility that is a free kill for any diver Strong evidence
- Confirming and denying a soul orb is a hit-check, not a damage-check — one bullet or one pellet takes it regardless of how much damage it does. That is good news for you in the abstract and bad news against Graves specifically, because their bullets fly more than twice as fast as yours. On the contested floating orb you have to pre-fire: start the shot before the trooper dies and lead the orb's spawn point, because if you both react at the same instant their bullet arrives first. Strong evidence
- Play this lane looser than the guides say. The 09-16-2026 patch cut nearly all movement slows by about 20% and ground-dash slows by about 10%, so the distance Graves takes off you per application is meaningfully smaller than it was. With mobility as your main advantage, that shifts the break-even point on walking up: exchanges you used to refuse because one slow meant death are now survivable. Test it early rather than assuming the old spacing. Documented
- Jar of Dead charges off every creep death, so a lane Graves is winning snowballs the ability's uptime Strong evidence
- Grasping Hands across the lane chokepoint denies a safe approach to the soul orbs and punishes anyone who steps up to secure Strong evidence
- No dash, no vertical mobility and no escape beyond Grasping Hands — a lane bully with a gap-close simply walks onto her Strong evidence
- Her gun only reaches 20m, so she has to walk into range before it does any damage Strong evidence
- Power Slash charged from behind cover pokes for 145 with a 32% slow at T1, from further away than her gun hits hard Strong evidence
- Urn spawns at 10, 15, 20 and 25 minutes, and you are the correct carrier in this matchup. Two changes make that stronger than old guides suggest: the runner is no longer revealed, and is no longer disarmed or silenced — you keep your whole kit while carrying. Graves cannot match your speed, so the only way they take it off you is melee, a Stun, or a kill. Route around their Stun range, not around their vision, and remember the bounty starts decaying after 45 seconds of carry. Documented
- Graves trades map for fights, and the reason that is more dangerous than it looks is item slots. Walker kills are reported to unlock an extra item slot for the destroying team, which means every structure they take while you win a fight elsewhere buys their whole team build flexibility you do not have. Count Walkers, not kills, when deciding whether a split is going your way. The slot mechanic is single-sourced — treat the direction as sound and the exact rule as unconfirmed. Uncertain
- Borrowed Decree unlock — Converts her into permanent lane and objective pressure even while she is elsewhere on the map Strong evidence
- Grasping Hands tier 2 — +10m wall length turns it from a spot-block into a lane-wide cut, which is when her zoning starts controlling teamfights Strong evidence
- Essence Theft tier 3 — Summons begin applying the steal, so Ghouls and Deadheads debuff targets Graves never shoots Strong evidence
- Mid 20-35min — Objective phase — gravestones on walkers plus wall zoning is where her kit is built to work; her scaling is space, not raw damage Strong evidence
- Flying Slash T1 (-18s cooldown) — 18s gap-close turns her from an occasional ganker into a constant roaming threat Strong evidence
- Shadow Transformation unlock — Gives her an ability refresh, status immunity and an invincible window, which is her first true all-in Strong evidence
- Graves wins by choosing where the fight happens. Take your position before the zoning goes down, not after — once the area is committed you are fighting on their terms, and walking in to contest it is exactly the mistake the kit is built to farm. Strategic
- Monster Rounds (weapon T1) — Buy when you need to clear Haunt camps Haunts Lanes and Districts across the map Haunts replace the old neutral camps. They are not a reskin: each type behaves differently, and the health bar now shows a camp's soul value and how hard it is, so you can decide whether a camp is worth your time before you start shooting. Three eye colours mark the tier — teal for tier I, yellow for tier II, red for tier III. Souls 4168181 souls tier I / II / III a creep +0.44 / +0.73 / +1.95 a minute and waves quickly. That matters here because of the objective pressure from Graves. Strong evidence
-
 Split Shot Split Shot +27s Cooldown +5 Weapon Multishot +12s Bonus Duration +8% Weapon Damage per Stack +5 Max Stacks (weapon T2) — Buy when enemies fight bunched together, or for faster wave clear. In this game that means Graves' Borrowed Decree. Strong evidence
-
 Alchemical Fire Alchemical Fire +30s Cooldown +5s Duration +0.2s Cast Delay +10 Spirit Power (weapon T3) — Buy for zone denial, or to punish enemies who must hold a choke. Aimed at Graves' Grasping Hands in this lineup. Strong evidence
- Your damage comes through melee and Graves fights at the range where parry is live, so the mistake that decides this matchup is throwing the heavy melee into a held F. Parry counters both light and heavy melee, stuns you for 3 seconds, and that Stun is one of the two disables Debuff Resist explicitly does not shorten. Bait the parry — the whiff costs them 4.5 seconds of cooldown, a success only costs them 0.5. Strong evidence
- Your instinct is to jump on Graves's backline the moment you see an opening, and the mistake is not checking what is above you. A Walker's Stomp is 350 damage + 15% of your max health inside 15m with a 2-second Stun on a 7-second cooldown — a 2-second Stun handed to a team with peel is a death. Dive under their Walker only with
 Unstoppable Unstoppable +60s Cooldown +5.5s Duration +125 Bonus Health +25% Debuff Resist Builds from Debuff Reducer pre-cast or after the Stomp has just gone off. Strong evidence
Next
Yamato’s other hard matchups
All of Graves
Who beats Graves, the items that shut Graves down, and every ability.
Facing more than Graves?
Add the other five enemies: who to focus first and what to buy against the whole team.
Sources and method for this page
Everything on this page is generated for Deadlock patch 10-30-2026 from Graves's current kit, measured match results and a mechanics rule base. Each line carries its own confidence label.
Data-supported Measured: you win 39.7% of these, which is 7.5% below your overall win rate (57,995 matches). The kit-based model reads this as low instead — treat the measured number as primary and the gap as a sign this matchup is more about execution than kit.
Graves's kit and counterplay were compiled from 8 sources, cross-checked for patch 10-30-2026. Threat ratings compare this pairing against Yamato's own baseline win rate rather than a flat 50%, because ranking by raw win rate produces the wrong answer for heroes whose overall win rate is not 50%.
- https://deadlock.one/en/heroes/graves
- https://metabot.gg/en/deadlock/hero/76/abilities
- https://deadlock.one/en/news/graves-hero-reveal-deadlock-january-30-2026
- https://deadlocklabs.gg/heroes/graves/
- https://tracklock.gg/articles/deadlock-update-09-16-26-patch-notes
- https://www.dtgre.com/2026/02/deadlock-graves-2026-guide-abilities-builds-strategies.html