
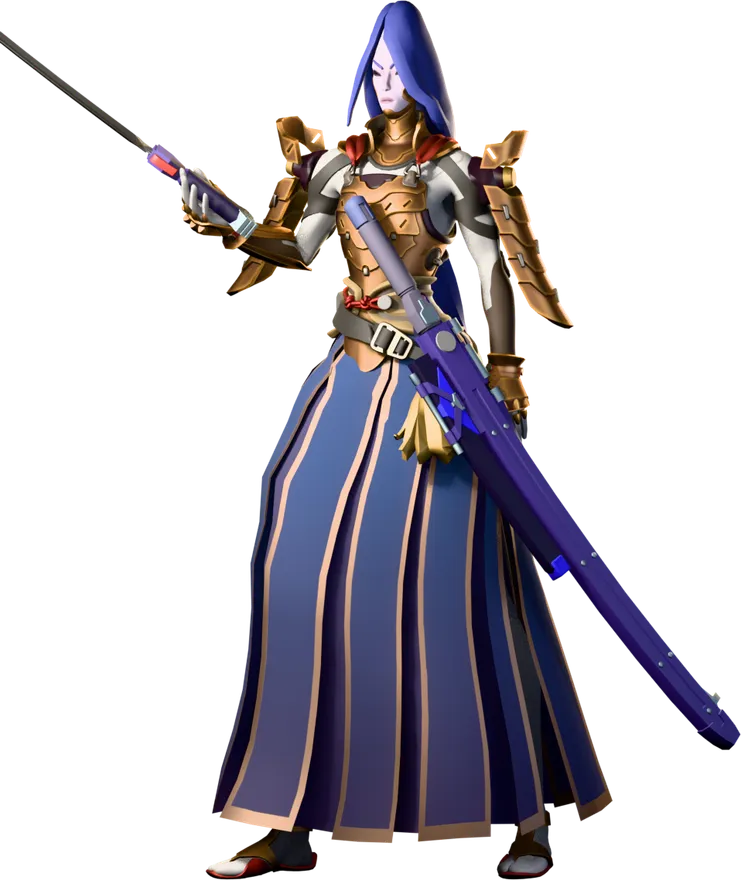
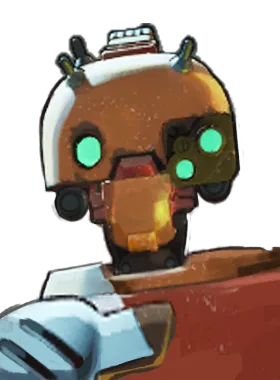
Yamato vs Bebop
Yamato's team wins 48.9% Bebop's team wins 51.1%, across 56,136 games
Written for the Yamato player. Playing Bebop? See Bebop vs Yamato →
Yamato has the edge
Yamato usually wins 47.2% of games. Against Bebop that is 1.7% higher, over 56,136 games.
- Whole match 48.9% +1.7% vs usual 56,136 games
- Sharing a lane 49.0% +1.8% vs usual 20,847 games
- Oracle and above 51.8% +2.1% vs usual 2,508 games
"Sharing a lane" counts only games where both were assigned the same lane — the laning matchup itself. "Oracle and above" counts only matches whose average rank was Oracle and above, against Yamato's usual win rate at that rank.
The fight at a glance
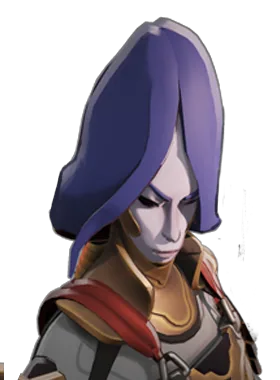
If you're Yamato
Has the edge Grapple Arm Bebop fires a mechanical hand along a line; Crowd Control Hard displacement — the target is pulled through the air with no control for… Damage No direct damage listed; Mobility Moves the target, not Bebop. 1 hooked target takes +20 bullet damage amplification for 6s 2 +30m cast range (roughly doubling his threat radius) 5 roughly -11.5s cooldown from the ~23s base
Wait out Grapple Arm 23s cooldown
ThenWalk into hook range behind a trooper or with a dash held, force the cast, then play the next 11-23 seconds aggressively because he has no pick and no escape.
- Watch out
- Grapple Arm reaches roughly 60m once upgraded.
- Your edge
- Yamato is more mobile than Bebop, so you choose when to fight.
- Buy
 Cursed Relic Cursed Relic +55s Cooldown +3.25s Duration +0.1s Cast Delay -25% Damage Penalty Buy it against the channelled ultimates from Bebop.
If you're Bebop
 Shadow Transformation Yamato transforms with an initial invincible window, refreshes her ability cooldowns, and for the duration casts them much faster while immune to negative status effects and heavily… Damage No direct damage; the power is in refreshed abilities cast 60% faster Mobility T2 adds +4 m/s move speed during the transformation, on top of her already… Defensive Initial invincibility during the 1.5s transformation channel, immunity to… 1 +7 weapon damage 2 +4 m/s move speed and -30s cooldown (160s base) 5 +3s duration (5s base up to 8s) and +30% bullet resist and +30% spirit resist
Wait out Shadow Transformation 160s cooldown
ThenForce it early with a fake commit, disengage, and then fight her in the 130-160 seconds it is down, when she has only her 730 health.
- Watch out
 Flying Slash Throws a grappling hook at an enemy and pulls herself to them, landing a light melee hit and leaving them significantly slowed on arrival. Crowd Control -40% movement slow for 2.5s on the target Damage 66 melee damage Mobility Pulls her to the target from 23m base (T3 adds +8m, up to 31m) 1 -18s cooldown (36s base down to 18s) 2 gain +35 Spirit Power for 6s 5 alt-cast to grapple allies, +8m cast range, and +1 charge Flying Slash reaches 23-31m and lands with a -40% slow for 2.5s, which means once she picks you there is no walking away from
 Power Slash Power Slash Yamato channels for around a second and a half to build up a sword strike, then releases it as a ranged slash. Crowd Control T1 adds a 32% movement slow for 3s Damage 145 spirit at full charge (about 1.96x spirit scaling), with T3 adding +150… Mobility none — she is channelling 1 +32% movement slow for 3s 2 -4s cooldown (12s base) 5 +8m cast range, +150 damage, and increased Spirit Power scaling and
 Crimson Slash Crimson Slash A wide slash in front of her that damages enemies and reduces their rate of fire. Crowd Control none, but -30% fire rate for 4s is a heavy offensive debuff Damage 55 spirit (about 0.37x spirit scaling) Defensive Heals 55 (about 1.04x spirit scaling) on hero hit; 1 on hit, +30% melee damage for 4s 2 on hero hit, additional +6% max health heal 5 -10s cooldown and increased scaling .
- Your edge
- Bebop has more crowd control than Yamato.
- Buy
 Divine Barrier Divine Barrier +55s Cooldown +0.2s Cast Delay +1.5 Out of Combat Regen +6s Buff Duration +600 Barrier +10% Ability Range +10% Radius Buy it against Yamato's Flying Slash.
The full plan for Yamato, phase by phase, is below. Bebop's side in full →
What should I do right now?
Do
- Plan for Cursed Relic Cursed Relic +55s Cooldown +3.25s Duration +0.1s Cast Delay -25% Damage Penalty — know which tier it sits in so you are not improvising at the shop.
- Know what Grapple Arm looks like. It is the cooldown this lane revolves around.
Avoid
- Walking to lane on the same path every wave against a hero with Bebop's engage range.
Do
- A Bebop with hook on cooldown is close to a non-threat; his lane pressure is entirely cooldown-gated
- He has no escape whatsoever — a gank on his side of the lane usually kills him
- Power Slash charged from behind cover pokes for 145 with a 32% slow at T1, from further away than her gun hits hard
Avoid
- The beam weapon's huge 66-round clip and steady stream of fast shots make last-hitting and denying orbs easier
- Grapple Arm converts any moment of bad positioning near the lane's side walls into a kill
Do
- Their first real spike is Grapple Arm T2 (roughly 3-5k souls) — respect it from that point, not before.
- Your spike is Flying Slash T1 (-18s cooldown): 18s gap-close turns her from an occasional ganker into a constant roaming threat
Avoid
- Taking an even fight against Bebop on their spike timing when you could take the same fight ten minutes later on yours.
Do
- Watch for
 Hyper Beam Hyper Beam Bebop channels an enormous beam of energy that deals heavy spirit damage over time and slows anything it touches. Crowd Control Applies a movement slow to everything hit. Damage Tier 2 adds +108 DPS. Channel lasts about 11s with a 1s cast delay.… Mobility Bebop is slowed and locked into the channel; 1 roughly -20s cooldown from the 120s base 2 +108 damage per second 5 heals for 65% of hero damage dealt and 20% of non-hero damage . Break line of sight — the beam is a straight line and stepping behind any pillar or corner ends your exposure instantly
- Put a body between you and him — Grapple Arm stops on the first character it hits, so walking behind your own troopers or your frontline makes you literally unhookable
Avoid
- Spending your own escape before Grapple Arm is on cooldown.
Bebop’s abilities
- Hyper Beam Ultimate
Sticking power rather than damage: applies a movement slow to everything hit.
- Break line of sight — the beam is a straight line and stepping behind any pillar or corner ends your exposure instantly
- Stun, Silence or knock him during the 1s cast delay and the entire 120s ultimate is gone
- Never contest an objective in a straight open lane against a Bebop with ultimate up; force the fight around geometry
- Grapple Arm Ability 3
Position is the thing this takes from you: hard displacement — the target is pulled through the air with no control for the duration of the reel-in.
- It is blocked by the first body it touches — walk behind troopers or a frontline teammate and the hook physically cannot reach you
- Never stand in a straight open line to a Bebop who has hook up; break the line with pillars, crates Crates Streets, rooftops and tunnels — about 500 of them Ordinary breakables. Each has a 60% chance to drop souls; a Tough Crate always drops, for double. Souls 23 souls a crate, 60% of the time +2 a minute and building corners
- The projectile has travel time; strafing perpendicular to him, especially while sliding or dashing, beats it at long range
-
 Exploding Uppercut Exploding Uppercut Bebop swings upward, knocking back everyone close to him. Crowd Control Knockback/knockup on the initial hit, plus a fire-rate reduction applied by… Damage Not sourced as a single figure on current pages; Mobility none for Bebop himself; 1 roughly -11s cooldown (base is about 22s) 2 +9 uppercut hit buff and +30% weapon damage 5 on hero hit, resets Grapple Arm's cooldown and restores about +18% of his missing health Ability 1
It puts you somewhere you did not choose to be — knockback/Knockup on the initial hit, plus a fire-rate reduction applied by the landing detonation.
- Do not stand in melee range of a Bebop who has hook available — the uppercut is the back half of the combo, so denying the hook denies this too
- If you are hooked, spend a dash the instant you land rather than the instant you are grabbed; the uppercut lands during the reel-in
 Unstoppable Unstoppable +60s Cooldown +5.5s Duration +125 Bonus Health +25% Debuff Resist Builds from Debuff Reducer or CC-immunity effects prevent the knockback and the whole combo falls apart
-
 Sticky Bomb Sticky Bomb Bebop sticks a bomb to a target or surface; Damage Tier 2 alone adds +85 damage. Defensive Tier 3 gives +5 m/s move speed and +25% debuff resistance for 6s on cast… 1 roughly -8s cooldown from the ~18s base 2 +85 damage 5 on cast, +5 m/s move speed and +25% debuff resistance for 6s Ability 2
His scaling damage source and the bulk of his burst. The stacking mechanic means an unpunished Bebop's bomb gets meaningfully stronger across a match, so denying stacks in lane matters for the whole game.
- Break away from your allies the moment a bomb lands on you — the explosion is an area effect and clustering turns one bomb into four hits of stacks for him
- Deny stacks in lane by refusing to eat free bomb hits; his late-game burst is literally a function of how many times he hit you early
- Debuff-cleanse items remove the bomb before detonation, which is the cleanest hard answer
- 1 Grapple Arm
Grapple Arm above everything — it is the hero. Walk into hook range behind a trooper or with a dash held, force the cast, then play the next 11-23 seconds aggressively because he has no pick and no escape
- 2 Exploding Uppercut
Exploding Uppercut second, because its T3 resets the hook; if he burns the uppercut on a trooper wave or a non-lethal target, the chain-pick is off the table
- 3 Sticky Bomb
Sticky Bomb is the lowest priority to bait — it is short cooldown and cheap for him to throw; just do not cluster when it lands
The matchup in detail
- Almost no mobility and no escape; he dies to any collapse he does not see coming Strong evidence
- Entirely cooldown-dependent — with hook down he contributes little Strong evidence
- Hook is blocked by the first body it touches, including troopers Strong evidence
- Bebop threatens you two ways at once — a combo that kills and a disable that makes the combo land — and the three big defensive actives are deliberately orthogonal, so you have to decide which half you are answering.
 Metal Skin Metal Skin +24s Cooldown +5s Duration +12% Bullet Resist -20% Dash Distance +20% Gravity Scale blocks Bullet Damage and no statuses; Unstoppable blocks statuses and no damage;
 Ethereal Shift Ethereal Shift +37s Cooldown +4s Duration +5s Buff Duration +30% Spirit Resist +20 Spirit Power blocks everything but takes you out of the fight and cancels your own channels. Buying two is the honest answer if you have the souls; buying the wrong one is the same as buying nothing. Strong evidence
- Read this matchup as one where the early deficit sticks. Bebop is a top-tier laner, and the 09-16-2026 patch removed the fixed bonus souls for being modestly behind in net worth on both hero kill bounties and Rift bounties, with the notes explicitly naming early-to-mid game as the most affected window. What is left is a redistribution inside your own team, not a handout. The practical consequence is that a lane you lose 0-6 minutes no longer self-corrects — you have to not lose it, or take the game somewhere else quickly. Documented
- Neither of you deletes the other, so this matchup is decided by multipliers rather than damage. Resists stack multiplicatively, which means your fourth resist item buys much less percentage than your first; shred is subtracted from the total afterward, which means it is worth more the tankier they get; and healing reduction stacks multiplicatively too, so a second anti-heal source on top of a first is worth far less than the first. The efficient build against Bebop is one anti-heal, one shred, and damage after that. Strong evidence
- Grapple Arm reaches roughly 60m once upgraded — if you can see a Bebop down a straight lane, you are already inside his kill range Documented
- The hook-into-Sticky-Bomb-into-Exploding-Uppercut sequence is a full combo that can kill squishies outright once his bomb has stacks Documented
- With Exploding Uppercut T3 he resets his own hook on a hero hit, so surviving the first pick does not mean the chain is over Documented
- Hyper Beam deletes Guardians and Walkers in seconds — a free channel on an objective costs you the lane, not just the fight Documented
- Exploding Uppercut can throw you off a bridge or out of your team's formation even when he is not going for damage Documented
- Your mobility is a real advantage here, and Bebop's slows exist to delete it. Note that Debuff Resist barely helps against short hard slows because it only trims duration — spacing and cover do more than an item will. Strong evidence
- Put a body between you and him — Grapple Arm stops on the first character it hits, so walking behind your own troopers or your frontline makes you literally unhookable Strong evidence
- Route through cover: hug pillars, crates Crates Streets, rooftops and tunnels — about 500 of them Ordinary breakables. Each has a 60% chance to drop souls; a Tough Crate always drops, for double. Souls 23 souls a crate, 60% of the time +2 a minute and building corners so no straight line ever exists from him to you, especially in the 30-60m band Strong evidence
- Carry a cleanse or debuff-removal item to strip Sticky Bomb before it detonates, and spread out the instant you see one land on a teammate Strong evidence
- Hold a Stun for the 1s Hyper Beam cast delay; cancelling the channel removes a 120s cooldown from the fight Strong evidence
- Play high-stamina, high-mobility heroes into him where possible and strafe perpendicular at range — the hook is a travelling projectile Strong evidence
- Deny Sticky Bomb stacks in lane; his late-game burst is a direct function of how many free bomb hits you gave him early Strong evidence
- You do not have the CC to reliably break Hyper Beam out of your own kit, so buy the cheapest thing that does:
 Silence Wave Silence Wave +42s Cooldown +3s Duration +0.1s Cast Delay +90 Bonus Health is the only area Silence in the shop and the standard answer to channelled ultimates. Area matters because you do not have to win the aim duel — you have to cover the spot they cast from. Note the alternative,
 Counterspell Counterspell +23s Cooldown +20 Spirit Power +6s Buff Duration +0.8s Spell Parry Duration +50 Bonus Health +5 Spirit Power , parries a single ability outright but requires a read; Silence Wave forgives a bad read, which is why it is the buy when interrupting is not your specialty. Strong evidence
- You have an immunity window and Bebop has a burst combo, which makes this a timing matchup rather than a damage one. Their combo has a commit point; your window has to cover that point rather than open before it. Using it early is the same as not having it. Strategic
- Any time Grapple Arm is on cooldown (up to 23s base, ~11.5s upgraded) he has no gap-close, no escape and no pick — this is the window to walk at him Documented
- During the 1s cast delay and the full ~11s channel of Hyper Beam he is slowed and locked in place; a dive here is usually free Documented
- Immediately after a missed hook — the projectile animation and cooldown leave him standing still with only a beam weapon Documented
- While he is channelling Hyper Beam into an objective, his team is effectively playing a man down on the map Documented
- Anywhere in open ground with no walls or pillars: without geometry to hook you behind, his whole combo loses its follow-up Documented
- Bebop's pull is the whole matchup. Until it is on cooldown you are playing around it; once it misses you have a window that is worth committing into. Make it the first thing you bait — show a sliver of yourself from behind cover rather than walking a clean line they can lead. Strategic
- Bebop is one of the strongest laners in the game and the standard build order will lose to them. Tier I is 800 and Tier II is 1,600, so your first meaningful decision comes fast: against this hero the 1,600 that answers their specific threat (
 Healbane Healbane +8s Duration +7 Spirit Power -35% Incoming Healing if they out-sustain you,
 Debuff Reducer Debuff Reducer +25% Debuff Resist +90 Bonus Health if they out-lock you,
 Battle Vest Battle Vest +18% Bullet Resist +3 Out of Combat Regen +65% Life Threshold +22% Weapon Damage +7% Fire Rate at +18% if they out-gun you) is worth more than the damage item that wins you a lane you are not going to win anyway. Strategic
- Play this lane looser than the guides say. The 09-16-2026 patch cut nearly all movement slows by about 20% and ground-dash slows by about 10%, so the distance Bebop takes off you per application is meaningfully smaller than it was. With mobility as your main advantage, that shifts the break-even point on walking up: exchanges you used to refuse because one slow meant death are now survivable. Test it early rather than assuming the old spacing. Documented
- You get value from moving around the map and Bebop does not, but the 09-16-2026 patch made that harder to convert early: tunnel breakables Crates Streets, rooftops and tunnels — about 500 of them Ordinary breakables. Each has a 60% chance to drop souls; a Tough Crate always drops, for double. Souls 23 souls a crate, 60% of the time +2 a minute now spawn and respawn on 5 minutes rather than 3. The off-lane income that used to make a rotation pay for itself is roughly 40% less frequent, so before 6:00 a rotation has to be justified by pressure on Bebop or on the Guardian, not by the breakables you pick up on the way. Documented
- The beam weapon's huge 66-round clip and steady stream of fast shots make last-hitting and denying orbs easier Strong evidence
- Grapple Arm converts any moment of bad positioning near the lane's side walls into a kill Strong evidence
- A Bebop with hook on cooldown is close to a non-threat; his lane pressure is entirely cooldown-gated Strong evidence
- He has no escape whatsoever — a gank on his side of the lane usually kills him Strong evidence
- Power Slash charged from behind cover pokes for 145 with a 32% slow at T1, from further away than her gun hits hard Strong evidence
- If you are behind and planning to fight Bebop on the Rift point because of the comeback bubble, recheck the number. As of 09-16-2026 the behind-team resist bonus inside the 35m radius is no longer a flat 35% — it is 10% + 1% per minute, capping at 40% only at 30:00, which is roughly 20% at the first Rift. Twenty percent does not turn a losing fight against burst into a winning one. The reduced capture time (floor 6 seconds) is the part of the comeback package that is still worth playing for. Documented
- Urn spawns at 10, 15, 20 and 25 minutes, and you are the correct carrier in this matchup. Two changes make that stronger than old guides suggest: the runner is no longer revealed, and is no longer disarmed or silenced — you keep your whole kit while carrying. Bebop cannot match your speed, so the only way they take it off you is melee, a Stun, or a kill. Route around their Stun range, not around their vision, and remember the bounty starts decaying after 45 seconds of carry. Documented
- Grapple Arm T2 (roughly 3-5k souls) — +30m cast range roughly doubles his hook threat radius and makes lanes and chokes unwalkable Documented
- Exploding Uppercut T3 — Hook resets on uppercut hit, enabling chained picks and taking two heroes out of a fight Documented
- Hyper Beam unlock — Gives him objective-melting power and teamfight damage he otherwise lacks Documented
- Late 30min+ with high Sticky Bomb stacks — An unpunished bomb becomes a genuine one-shot on squishies after hook Documented
- Flying Slash T1 (-18s cooldown) — 18s gap-close turns her from an occasional ganker into a constant roaming threat Strong evidence
- Shadow Transformation unlock — Gives her an ability refresh, status immunity and an invincible window, which is her first true all-in Strong evidence
- Hyper Beam is a channel, which means the fight is decided by whether you can break it. Hold one interrupt — a Stun, a Silence, or a displacement — specifically for that cast rather than spending it on the opening trade. If you have no interrupt, the answer is line of sight: leave the area entirely rather than trying to out-heal it. Strong evidence
- Bebop brings enough lockdown that Stun sequencing matters. Community reporting describes Stun diminishing returns of roughly 10% then 30% inside an 8-second window, applying to stuns only and not to silences, slows, disarms or hexes — so their follow-up chain may be shorter than the first one felt. Treat this as unconfirmed, but it is worth knowing before you burn a cleanse on the opening Stun. Uncertain
- Bebop decides where you stand, not you. The practical rule is to never hold a position whose failure case is being moved — stand so that being yanked or knocked puts you somewhere survivable rather than inside their whole team. Cover at your back is worth more than cover in front. Strong evidence
- Against Bebop's crowd control, understand what Debuff Resist actually buys you: it shortens duration, never magnitude. It is excellent against long disables and close to worthless against a short hard slow. Two things it explicitly does not shorten at all are the parry Stun and the
 Knockdown Knockdown +35s Cooldown +0.1s Cast Delay +2s Stun Delay +0.5s Stun Duration +75 Bonus Health +5% Ability Range +5% Radius item's Stun. Documented
- Cursed Relic (spirit T4) — Bebop is where this lineup’s channelled ultimates comes from. Buy to shut down one enemy carry or to cancel a game-deciding ultimate outright. Documented
- Ethereal Shift (spirit T4) — Buy to survive a telegraphed assassination combo or ultimate — you cannot be hurt for four seconds. That matters here because of the channelled ultimates from Bebop. Documented
-
 Focus Lens Focus Lens +40s Cooldown +4.5s Duration +0.1s Cast Delay +35% Damage On Expire +10% Fire Rate -9% Spirit Resist -30 Spirit Power +12s Resist Reduction Duration Builds from Spirit Sap (spirit T4) — This lineup gets its channelled ultimates from Bebop. Buy to take one enemy caster out of the fight — it silences them for four and a half seconds. Documented
- Your instinct is to jump on Bebop's backline the moment you see an opening, and the mistake is not checking what is above you. A Walker's Stomp is 350 damage + 15% of your max health inside 15m with a 2-second Stun on a 7-second cooldown — a 2-second Stun handed to a team with peel is a death. Dive under their Walker only with Unstoppable pre-cast or after the Stomp has just gone off. Strong evidence
Next
Yamato’s other hard matchups
All of Bebop
Who beats Bebop, the items that shut Bebop down, and every ability.
Facing more than Bebop?
Add the other five enemies: who to focus first and what to buy against the whole team.
Sources and method for this page
Everything on this page is generated for Deadlock patch 10-30-2026 from Bebop's current kit, measured match results and a mechanics rule base. Each line carries its own confidence label.
Data-supported Measured: you win 48.9% of these, which is 1.7% above your overall win rate (56,136 matches). The kit-based model reads this as moderate instead — treat the measured number as primary and the gap as a sign this matchup is more about execution than kit.
Bebop's kit and counterplay were compiled from 8 sources, cross-checked for patch 10-30-2026. Threat ratings compare this pairing against Yamato's own baseline win rate rather than a flat 50%, because ranking by raw win rate produces the wrong answer for heroes whose overall win rate is not 50%.