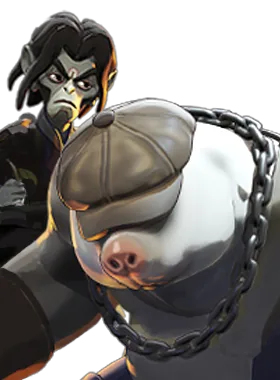
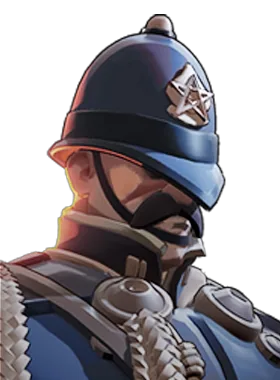
Mo & Krill vs Warden
Mo & Krill's team wins 45.9% Warden's team wins 54.1%, across 18,010 games
Written for the Mo & Krill player. Playing Warden? See Warden vs Mo & Krill →
About even
Mo & Krill usually wins 46.4% of games. Against Warden that is 0.5% lower, over 18,010 games.
- Whole match 45.9% −0.5% vs usual 18,010 games
- Sharing a lane 47.6% +1.2% vs usual 5,861 games
- Oracle and above 46.7% +1.7% vs usual 825 games
"Sharing a lane" counts only games where both were assigned the same lane — the laning matchup itself. "Oracle and above" counts only matches whose average rank was Oracle and above, against Mo & Krill's usual win rate at that rank.
The fight at a glance
If you're Mo & Krill
 Binding Word Curses a targeted enemy hero. Crowd Control 1.75s immobilise (T2 adds +0.75s, so up to 2.5s) if the target fails the… Damage 110 (about 2.44x spirit scaling) when it lands Defensive Rooting a diver in place is a strong self-peel 1 Warden deals +20% bullet damage to trapped heroes for 5s 2 +0.75s immobilise duration 5 -14s cooldown (34s base) and silences the target until they escape or are immobilised
Wait out Binding Word 34s cooldown
ThenForce it out on a mobile teammate who can clear the check, and for 20-34 seconds he has no way to hold anyone still.
- Watch out
- Binding Word makes you cover 20 metres in 2.8 seconds or take 110 damage and get immobilised for 1.75-2.5s, and at Tier 3 it silences you for that entire window so you cannot cast the escape ability you were relying on.
- Your edge
- Mo & Krill has more burst damage than Warden.
- Buy
 Unstoppable Unstoppable +60s Cooldown +5.5s Duration +125 Bonus Health +25% Debuff Resist Buy it against Warden's Binding Word.
If you're Warden
 Burrow Mo & Krill dive underground, moving faster and gaining both spirit and bullet armour while submerged. Crowd Control Slow plus a knockup on everyone near the emergence point. Damage Spirit damage on emergence; Mobility Increased move speed while burrowed (+4 m/s at T3) on a base 8 m/s frame. 1 +45 spin DPS while burrowed. 2 +4s burrow time, +2 radius. 5 -20s cooldown, +4 m/s move speed.
Wait out Burrow 40s cooldown
WhyIt is their only engage and their only real escape; force it on a trooper wave or a fake overextend and they are a slow-approaching shotgun hero for the next 20-40 seconds.
- Watch out
- Burrow lets them travel to you underground with bullet and spirit armour, then surface directly under your feet with a Knockup you cannot dash out of.
- Your edge
- Warden has more reach than Mo & Krill, so you can trade from range.
- Buy
- Unstoppable Unstoppable +60s Cooldown +5.5s Duration +125 Bonus Health +25% Debuff Resist Buy it against Mo & Krill's
 Combo Combo Mo & Krill grab a single enemy, hold them in place stunned while chewing through them for the duration of the channel. Crowd Control Full stun for the 2.4s channel (+0.7s at T3). Damage 35 damage per second over the 2.4s channel; Mobility None — both parties are locked in place, which is the risk. 1 +100% lifesteal. 2 -30s cooldown, +50% bullet resist. 5 +0.7s duration, +35 damage per second with increased scaling. .
The full plan for Mo & Krill, phase by phase, is below. Warden's side in full →
What should I do right now?
Do
- Plan for Unstoppable Unstoppable +60s Cooldown +5.5s Duration +125 Bonus Health +25% Debuff Resist Builds from Debuff Reducer — know which tier it sits in so you are not improvising at the shop.
- Know what Binding Word looks like. It is the cooldown this lane revolves around.
Avoid
- Walking to lane on the same path every wave against a hero with Warden's engage range.
Do
- 6.3 m/s base speed, so he cannot rotate to other lanes or escape a collapse
- The 09-16-2026 patch cut Flask's projectile range and speed by 30%, making his safest laning tool much harder to land
- 930 base health gives them a large health pool that is hard to push out of lane.
Avoid
 Alchemical Flask Alchemical Flask Hurls a flask that damages enemies in a small area and leaves them dealing less weapon damage and moving more slowly. Crowd Control -16% movement slow for 3s Damage 60 base (about 0.63x spirit scaling); Defensive The weapon damage reduction is effectively a defensive buff for his whole… 1 enemies hit lose 1 Stamina 2 +35 damage and an additional -25% weapon damage (total -55%) 5 -7s cooldown (12s base) and +2m radius; 's -30% to -55% weapon damage for 7s wins nearly every early weapon trade outright
- 805 base health plus a 125+
 Willpower Willpower Warden shields himself with a temporary barrier and moves noticeably faster for a few seconds. Mobility +20% move speed (T1 adds +20%, so up to +40%) for 5s (T2 adds +2s) Defensive 125 barrier (about 0.8x spirit scaling); 1 +20% move speed bonus 2 -24s cooldown (40s base down to 16s) and +2s duration 5 +30% debuff resistance and improved barrier scaling barrier lets him survive commits
Do
- Their first real spike is Binding Word unlock — respect it from that point, not before.
- Your spike is
 Scorn Scorn A burst of damage to everything close by that converts a portion of the damage dealt into healing, with a substantially larger return when the damage lands on enemy heroes. Crowd Control None at base. T3 adds a stacking 15% damage debuff on enemies hit, lasting… Damage 45 damage base, scaling with spirit at 0.675, with a 13s base cooldown. Defensive The heal is the main defensive layer. 1 +30 damage. 2 -5s cooldown, +1m radius. 5 applies a stacking 15% damage debuff to enemies hit for 16s. first two points (laning 0-10min): The Scorn/Scorn opener front-loads their sustain and wave clear.
Avoid
- Taking an even fight against Warden on their spike timing when you could take the same fight ten minutes later on yours.
Do
- Watch for Alchemical Flask. The flask flies 40% faster since 30 October 2026, but its range is still the short one the 09-16-2026 patch gave it — sidestep the visible arc, and simply standing further back often makes it unthrowable
- Bank your Stamina. Entering a fight with Warden at full stamina is the entire counterplay to Binding Word: two dashes plus sprint clears the 20m check comfortably
Avoid
- Spending your own escape before Binding Word is on cooldown.
Warden’s abilities
- Alchemical Flask Ability 1
Sticking power rather than damage: -16% movement slow for 3s.
- The flask flies 40% faster since 30 October 2026, but its range is still the short one the 09-16-2026 patch gave it — sidestep the visible arc, and simply standing further back often makes it unthrowable
- Spirit-damage heroes (Victor, Yamato, Viscous) largely ignore it, because the debuff hits weapon damage and fire rate, not Spirit Damage
- Hold your Stamina: T1 drains one charge, so entering the Flask radius with full stamina leaves you enough dashes to clear a following Binding Word
- Binding Word Ability 3
The other half of Warden's control: 1.75s immobilise (T2 adds +0.75s, so up to 2.5s) if the target fails the check.
- Run IMMEDIATELY and in a straight line — you need 20m of separation within 2.8s, and hesitating for even half a second is what loses the check
- Hold Stamina specifically for this: two dashes plus sprint clears 20m comfortably, which is why you should not enter Flask range with your stamina already spent
- Once he has T3, the Silence means you cannot cast an escape ability during the window — you must clear it with Stamina and raw movement speed alone, so buy movement items rather than relying on
 Project Mind Project Mind After a brief channel, Wraith teleports to a chosen location at range. Mobility Teleport up to 25m (T1 adds +15m, so up to 40m) after a 1s interruptible… Defensive T2 grants a 300 barrier for 5s on arrival, scaling with Spirit Power 1 +15m cast range (25m base up to 40m) 2 300 barrier for 5s on arrival, scaling with Spirit Power 5 -32s cooldown (50s base down to 18s) ,
 Flight Flight Vindicta lifts off and flies freely for an extended duration. Damage +10 spirit damage per bullet while airborne (T3 adds +10 more with improved… Mobility 13s of free flight on a 42s cooldown; Defensive Being airborne dodges most ground-targeted abilities and puts her out of… 1 +50% base ammo capacity during Flight 2 +10s duration (13s base up to 23s) 5 hero kills refresh Flight's duration; or
 Flying Slash Flying Slash Throws a grappling hook at an enemy and pulls herself to them, landing a light melee hit and leaving them significantly slowed on arrival. Crowd Control -40% movement slow for 2.5s on the target Damage 66 melee damage Mobility Pulls her to the target from 23m base (T3 adds +8m, up to 31m) 1 -18s cooldown (36s base down to 18s) 2 gain +35 Spirit Power for 6s 5 alt-cast to grapple allies, +8m cast range, and +1 charge
- Willpower Ability 2
His engage enabler. With a 6.3 m/s base movement speed, Willpower is the only way he closes the distance to land Flask and
Binding Word, and the barrier is what lets him survive the approach.- Strip the 125+ barrier before committing burst — the barrier is a flat pool, so a cheap ability chunk removes it and your real damage then lands on health
- The duration is only 5-7s; kiting out the window is often better than trading into it
- Even at +35% he is starting from 6.3 m/s, so a genuinely mobile hero (Yamato at 8.2, Vindicta at 7.9, Vyper sliding) still outruns him
-
 Last Stand Last Stand After a two-second charge-up, Warden pulses damage in a wide radius around himself twice a second, healing for a large share of the damage he deals. Crowd Control none directly — its power comes from being paired with Binding Word Damage 70 DPS base (about 1.3x spirit scaling) over 6s in a 12m radius; Mobility none, and he is channelling 1 +4m radius (12m base up to 16m) 2 +50 DPS and -40s cooldown (180s base) 5 +4s duration and +30% resists while channelling Ultimate
His teamfight win condition and his objective-holding tool. A rooted enemy inside Last Stand is dead; an enemy team that stays to fight it feeds him health directly.
- Leave the radius. He heals 75% of the damage he does to heroes, so every second you spend inside is health transferred to him — walking out is strictly better than trading
- Interrupt the 2s charge-up: any Stun, Knockup or displacement (Viscous's
 Puddle Punch Puddle Punch Materialises a fist at a chosen point up to a long distance away, punching everyone in a small area upward. Crowd Control Knockup on everyone in the 4m radius plus a -24% movement slow for 3s Damage 20 damage base plus about 0.6x melee scaling; Mobility Grants Viscous and allies increased air control when caught in it 1 +1 charge and +20 damage 2 +1.5m radius and +60% lifesteal 5 -14s cooldown and deals Heavy Melee damage , Wraith's
 Telekinesis Telekinesis Lifts one enemy hero into the air, holding them helpless for a couple of seconds, then slams them toward a location Wraith chooses. Crowd Control stunned during the 1.25s channel, then the target is airborne and unable to… Damage 100 spirit base (about 1.0x spirit scaling); Mobility none for Wraith — she channels for 1.25s while aiming the throw 1 +100 damage 2 -45s cooldown (150s base down to 105s) 5 +1.5s debuff duration and +6m throw and cast range , Vyper's
 Petrifying Bola Petrifying Bola Throws an explosive bola. Crowd Control 2.2s petrify on a direct hit (T3 adds +1s, up to 3.2s); Damage 50 area damage (about 0.74x spirit scaling); Defensive Petrifying an incoming diver removes them from the fight for over two… 1 +49.5 petrify damage 2 -20s cooldown 5 +1s petrify duration and petrifies all enemies in the area, not just direct hits , Venator's
 Gutshot Gutshot A point-blank shotgun burst within about 10m that shoves everyone hit backwards. Crowd Control knockback on everyone hit; Damage 60 base (about 0.7x weapon scaling) plus 30 bonus (about 0.8x scaling) when… Mobility none for Venator himself 1 +25 damage 2 -10s cooldown (23s base) and +0.4s stun duration 5 after a wall stun, Venator's next heavy melee becomes blessed wall Stun) cancels it
- Once he has T3 the channel lasts 10s with +30% more resists, so disengage and re-engage after it rather than trading into it
- 1 Binding Word
Binding Word first and most importantly — it is the whole hero. Force it out on a mobile teammate who can clear the check, and for 20-34 seconds he has no way to hold anyone still
- 2 Alchemical Flask
Alchemical Flask second: it is the stamina drain and slow that makes
Binding Word land, so eating a Flask on a tank instead of your carry breaks the combo before it starts - 3 Willpower
Willpower third: it is his only engage and his only barrier. Force him to use it defensively and, pre-T2 (40s cooldown), he cannot reach you at all for the next rotation
The matchup in detail
- Base movement of 6.3 m/s; everything depends on Willpower being available Strong evidence
- Binding Word is a check, not a guaranteed Root — a mobile hero with stamina banked simply walks out of it Strong evidence
- Nerfed in the 09-16-2026 patch across three lines: Flask projectile range and speed -30%, Bullet Damage per boon 0.28 to 0.25, and Willpower T3 scaling and debuff resistance both cut Strong evidence
- Neither of you deletes the other, so this matchup is decided by multipliers rather than damage. Resists stack multiplicatively, which means your fourth resist item buys much less percentage than your first; shred is subtracted from the total afterward, which means it is worth more the tankier they get; and healing reduction stacks multiplicatively too, so a second anti-heal source on top of a first is worth far less than the first. The efficient build against Warden is one anti-heal, one shred, and damage after that. Strong evidence
- Binding Word makes you cover 20 metres in 2.8 seconds or take 110 damage and get immobilised for 1.75-2.5s, and at T3 it silences you for that entire window so you cannot cast the escape ability you were relying on Strong evidence
- Alchemical Flask cuts your weapon damage by 30-55% and your fire rate by 30% for 7 seconds while also draining a Stamina charge — the stamina loss is specifically designed to make the Binding Word check fail Strong evidence
- Last Stand pulses 70-120 DPS twice a second in a 12-16m radius while he heals 75% of that damage back and has 50-80% bullet and Spirit Resist Strong evidence
- Stun him during Last Stand's 2s charge-up; once it is running at T3 it lasts 10s with +30% more resists, so leave the area rather than trading into it Strong evidence
- The full chain — Flask to drain stamina and slow, Binding Word to Root, Last Stand on top — is a scripted kill on any hero without a banked escape Strong evidence
- Warden can Silence, which means your escape is only real if it is already active. Pre-empt rather than react: if you are walking into a position where the Silence lands, your defensive cooldown should be spent getting out of that position, not saved for after. Strong evidence
- Bank your Stamina. Entering a fight with Warden at full stamina is the entire counterplay to Binding Word: two dashes plus sprint clears the 20m check comfortably Strong evidence
- Avoid the Alchemical Flask arc — its range is still short (cut 30% in the 09-16-2026 patch), though it has flown 40% faster since 30 October 2026, so simply holding further back denies the stamina drain that makes the Root land Strong evidence
- Once Binding Word is cast, run in a straight line immediately, and use verticality (zipline, mantle, a ledge drop) which covers 20m faster than ground movement Strong evidence
- Do not fight inside Last Stand's 12-16m radius; he lifesteals 75% off heroes, so trading into it heals him. Walk out and re-engage after the 6-10s channel Strong evidence
- Bring Spirit Damage: Flask's debuff only touches weapon damage and fire rate, so Victor, Yamato and Viscous are barely affected by his signature anti-carry tool Strong evidence
- Outrun him — his base speed is 6.3 m/s, and once Willpower's 5-7s window expires he cannot chase anyone Strong evidence
- Warden adds barrier, not health, and barriers behave differently enough to change how you spend your combo. Resists apply before the barrier depletes, so a barrier multiplies with their resist rather than bypassing it — and it decays on its own. Overflow damage carries straight through to health, so one large hit does not stop at the barrier boundary. That argues for landing your whole burst in one window rather than chipping: chip is exactly what a decaying pool is designed to absorb. Strong evidence
- The 2-second Last Stand charge-up, before he has T3 — any Stun, Knockup or displacement cancels the whole ultimate Strong evidence
- The 20-34s after Binding Word is spent: he has no Hard CC and is a slow, short-range bruiser Strong evidence
- The 16-40s after Willpower expires — at 6.3 m/s with no barrier he cannot initiate or retreat Strong evidence
- Any fight at long range, where his abilities cannot reach and his rifle gets weaker past 18m until it is at its weakest by 47m Strong evidence
- Immediately after a whiffed Alchemical Flask (harder to force since 30 October 2026, when the projectile got 40% faster) — the Binding Word that follows is much easier to escape Strong evidence
- When Warden puts up a barrier, do not reset the trade and wait for it to drop. Overflow damage carries through to health, so a single large hit spends the barrier and keeps going in one action — there is no wasted remainder. What does get wasted is chip, because barriers decay on their own and small hits are exactly what a temporary pool absorbs for free. Either commit your burst through it or disengage entirely; the middle option gives them a free absorb. Strong evidence
- Alchemical Flask's -30% to -55% weapon damage for 7s wins nearly every early weapon trade outright Strong evidence
- 805 base health plus a 125+ Willpower barrier lets him survive commits Strong evidence
- 6.3 m/s base speed, so he cannot rotate to other lanes or escape a collapse Strong evidence
- The 09-16-2026 patch cut Flask's projectile range and speed by 30%, making his safest laning tool much harder to land Strong evidence
- 930 base health gives them a large health pool that is hard to push out of lane. Strong evidence
- The first Unstable Rift lands around 11:00 and then every 7 minutes, and Warden beats you in exactly the fight it creates. Use the telegraph: a world-only visual appears on a random side-lane bridge roughly 60 seconds before the global announcement and map marker, which is the single biggest piece of free information in the mid game. Spend those 60 seconds either grouping or deliberately taking something elsewhere — the one thing you cannot afford is arriving at a Rift bridge late and alone. Strong evidence
- Your kit is built around lockdown and that is worth less on the Mid Boss than on Warden — it carries 35% Debuff Resist as of 03-06-2026, so your disables run roughly two-thirds as long on it. Plan the take around damage and positioning rather than a CC chain, and spend the chain on Warden if they contest. The payoff is worth the trip: 3,000 souls + 50 per minute, two permanent buffs each, and a Rejuvenator crystal giving up to three single-use revives that return a player at full health after 3 seconds, for 3 minutes. Documented
- Binding Word unlock — A conditional 1.75s Root on a 34s cooldown is his first real kill threat Strong evidence
- Last Stand unlock — Plus Binding Word becomes a guaranteed kill combo on any target that fails the escape check Strong evidence
- Alchemical Flask T2 (-55% weapon damage) — He becomes a hard counter to bullet carries, more than halving their output for 7 seconds at a time Strong evidence
- Binding Word T3 + Last Stand T3 — The Silence on the escape check plus a 10s channel with +30% more resists makes the combo very hard to escape or outtrade — this is his peak Strong evidence
- Last Stand is a channel, which means the fight is decided by whether you can break it. Hold one interrupt — a Stun, a Silence, or a displacement — specifically for that cast rather than spending it on the opening trade. If you have no interrupt, the answer is line of sight: leave the area entirely rather than trying to out-heal it. Strong evidence
- Warden brings enough lockdown that Stun sequencing matters. Community reporting describes Stun diminishing returns of roughly 10% then 30% inside an 8-second window, applying to stuns only and not to silences, slows, disarms or hexes — so their follow-up chain may be shorter than the first one felt. Treat this as unconfirmed, but it is worth knowing before you burn a cleanse on the opening Stun. Uncertain
- Warden wins by choosing where the fight happens. Take your position before the zoning goes down, not after — once the area is committed you are fighting on their terms, and walking in to contest it is exactly the mistake the kit is built to farm. Strategic
- You deal Spirit Damage, so
 Healbane Healbane +8s Duration +7 Spirit Power -35% Incoming Healing is the cheaper and more reliable anti-heal against Warden — it lands off your abilities at T2 rather than asking you to sustain gunfire you are not built for. Strong evidence
- Against Warden's crowd control, understand what Debuff Resist actually buys you: it shortens duration, never magnitude. It is excellent against long disables and close to worthless against a short hard slow. Two things it explicitly does not shorten at all are the parry Stun and the
 Knockdown Knockdown +35s Cooldown +0.1s Cast Delay +2s Stun Delay +0.5s Stun Duration +75 Bonus Health +5% Ability Range +5% Radius item's Stun. Documented
- Your escape is a big part of why you survive fights, and Warden can turn it off. Debuff Resist shortens the lockout, and a cleanse removes it outright — one of the two is worth a slot specifically because of this hero. Strategic
- Unstoppable (vitality T4) — Buy when enemy lockdown is the reason you lose fights — it lets you walk through a full CC chain and still deal damage. In this game that means Warden's Binding Word. Documented
-
 Debuff Reducer Debuff Reducer +25% Debuff Resist +90 Bonus Health (vitality T2) — Warden creates that through Warden's Binding Word. The standard early buy when the enemy team chains crowd control; it is also the component for
 Spellbreaker Spellbreaker +9s Cooldown +18% Spirit Resist +25% Debuff Resist +175 Damage Threshold +65% Spirit Damage Reduction +90 Bonus Health Builds from Debuff Reducer and Unstoppable. Documented
-
 Dispel Magic Dispel Magic +45s Cooldown +10% Spirit Resist +3s Buff Duration +250 Heal Amount (vitality T3) — Warden is where this lineup’s silences and ability denial comes from. Buy when enemy debuffs — slows, silences, anti-heal, disarms, hexes — are what is killing you rather than raw damage. Documented
- Players buy Dispel Magic for Warden and then discover it does nothing about Last Stand. Dispel Magic purges non-ultimate negative effects only — anything sourced from an ultimate is outside its scope entirely. Work out which of Warden's disables come off abilities and which come off the ult before you spend 3,200: the ability-sourced ones are purgeable, the ult is not, and for the ult you need either Unstoppable pre-cast or the discipline not to be there. Documented
- Your instinct is to jump on Warden's backline the moment you see an opening, and the mistake is not checking what is above you. A Walker's Stomp is 350 damage + 15% of your max health inside 15m with a 2-second Stun on a 7-second cooldown — a 2-second Stun handed to a team with peel is a death. Dive under their Walker only with Unstoppable pre-cast or after the Stomp has just gone off. Strong evidence
- The Unstable Rift capture point is a 20m circle on a bridge, capture only progresses when no enemy is inside it, and everyone standing in it is revealed on the minimap. That is a purpose-built trap for Warden. The mistake is treating the circle as the objective: you do not need to stand in it, you need them not to. Contest from outside the radius, deny with a single body at the edge, and let their Area Damage land on empty bridge. Strategic
Next
Mo & Krill’s other hard matchups
All of Warden
Who beats Warden, the items that shut Warden down, and every ability.
Facing more than Warden?
Add the other five enemies: who to focus first and what to buy against the whole team.
Sources and method for this page
Everything on this page is generated for Deadlock patch 10-30-2026 from Warden's current kit, measured match results and a mechanics rule base. Each line carries its own confidence label.
Data-supported Measured: you win 45.9% of these, which is 0.5% below your overall win rate (18,010 matches). The kit-based model reads this as low instead — treat the measured number as primary and the gap as a sign this matchup is more about execution than kit.
Warden's kit and counterplay were compiled from 7 sources, cross-checked for patch 10-30-2026. Threat ratings compare this pairing against Mo & Krill's own baseline win rate rather than a flat 50%, because ranking by raw win rate produces the wrong answer for heroes whose overall win rate is not 50%.