Healing and lifesteal
“They keep healing back everything I do to them.”
Start with  Healbane Healbane +8s Duration +7 Spirit Power -35% Incoming Healing — the cheapest answer, at 1,600 souls . 5 more below, by tier.
Items that answer this
6 itemsTier 2 1,600 souls each
- Healbane Healbane +8s Duration +7 Spirit Power -35% Incoming Healing The cheapest anti-heal item: take it the moment an enemy's Lifesteal or a support's healing is out-pacing your damage. Watch out: Only applies through spirit damage, not plain bullet damage
Tier 3 3,200 souls each
-
 Decay Decay +30s Cooldown +12s Duration +0.1s Cast Delay +8 Spirit Power -55% Incoming Healing +65 Bonus Health Buy when an enemy is healing through your damage and you want a point-and-click answer that does not rely on landing bullets. Watch out: Healing reduction raised -45% -> -50% on 6 Mar 2026
-
 Toxic Bullets Toxic Bullets -40% Incoming Healing The gun-hero answer to enemy Lifesteal and big-health frontliners — buy it when an enemy is out-healing your damage. Watch out: Bleed does not build from melee attacks
Tier 4 6,400 souls each
-
 Crippling Headshot Crippling Headshot +125 Bonus Health -16% Bullet Resist -16% Spirit Resist -40% Incoming Healing +12s Debuff Duration Buy when one durable, self-healing enemy is the focus of every fight and you can land headshots. Watch out: The triggering headshot itself is dealt before the resist reduction applies
-
 Inhibitor Inhibitor +150 Bonus Health +5s Debuff Duration -30% Damage Penalty +10% Weapon Damage -40% Incoming Healing Buy on a gun hero when one enemy is both out-damaging and out-healing your team — it hits both problems at once. Watch out: The damage penalty does not apply to spirit damage from an enemy with Unstoppable active; the healing reduction always applies
-
 Spirit Burn Spirit Burn +6% Ability Range +6% Radius +500 Damage Threshold +50 Explosion Damage +8s Debuff Duration -70% Incoming Healing +20s Immunity Duration Buy on a heavy burst caster against an enemy whose Lifesteal or healing is the win condition. Watch out: 20s immunity per target means you cannot reapply it repeatedly to the same enemy
Hover an item's name for its exact numbers, or open it for the full write-up.
Heroes who cause this
26 heroesIf you are up against one of these, expect to need an item from the list above. Pick a hero for everything else about beating them.
-
 Abrams
 Abrams Heals himself through Siphon Life and Infernal Resilience's regeneration Durability very high (3/3) Burst low (1/3) Mobility low (1/3) Healing very high (3/3)
-
 Apollo
 Apollo Strong in duels, and Riposte punishes heroes who dive him Durability low (1/3) Burst very high (3/3) Mobility very high (3/3) Healing low (1/3)
-
 Bebop
 Bebop Pick potential — a landed Grapple Arm sets up his Sticky Bomb and Exploding Uppercut combo Durability high (2/3) Burst very high (3/3) Mobility low (1/3) Healing low (1/3)
-
 Calico
 Calico Fast farming and map mobility: she turns a quiet map into a soul lead Durability low (1/3) Burst very high (3/3) Mobility very high (3/3) Healing high (2/3)
-
 Celeste
 Celeste Very mobile: four stamina charges, an air-control passive, sliding and wall-bouncing movement Durability low (1/3) Burst high (2/3) Mobility very high (3/3) Healing high (2/3)
-
 Dynamo
 Dynamo Singularity is a multi-target hard CC long enough to decide a teamfight outright Durability high (2/3) Burst low (1/3) Mobility high (2/3) Healing very high (3/3)
-
 Graves
 Graves Map pressure while away from the fight via Borrowed Decree Ghouls marching at objectives Durability low (1/3) Burst low (1/3) Mobility none (0/3) Healing low (1/3)
-
 Haze
 Haze Single-target sustained DPS ramps up once Fixation is stacked Durability low (1/3) Burst high (2/3) Mobility high (2/3) Healing high (2/3)
-
 Infernus
 Infernus Strong sustained damage that keeps ticking after he leaves line of sight Durability low (1/3) Burst low (1/3) Mobility high (2/3) Healing high (2/3)
-
 Ivy
 Ivy True flight — she can cross terrain and take an ally with her Durability high (2/3) Burst low (1/3) Mobility very high (3/3) Healing high (2/3)
-
 Kelvin
 Kelvin Frozen Shelter is a hard physical barrier that stops ranged damage and ultimates outright Durability high (2/3) Burst low (1/3) Mobility high (2/3) Healing very high (3/3)
-
 Lady Geist
 Lady Geist Personal sustain between 100% Life Drain conversion and lifesteal itemisation Durability high (2/3) Burst high (2/3) Mobility low (1/3) Healing very high (3/3)
-
 Lash
 Lash Vertical engage: he converts altitude into damage and pickups. Durability high (2/3) Burst high (2/3) Mobility very high (3/3) Healing high (2/3)
-
 McGinnis
 McGinnis Defines zone control: Spectral Wall plus Heavy Barrage can make an entire lane or objective unenterable. Durability high (2/3) Burst low (1/3) Mobility none (0/3) Healing high (2/3)
-
 Mina
 Mina Two untargetable hops with recasts make committing to kill her risky. Durability none (0/3) Burst high (2/3) Mobility very high (3/3) Healing low (1/3)
-
 Mirage
 Mirage Global-teleport split pressure: Traveler means he is rarely out of position on the macro map. Durability low (1/3) Burst high (2/3) Mobility high (2/3) Healing very high (3/3)
-
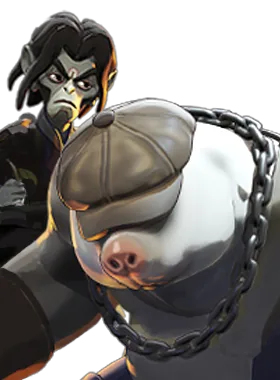 Mo & Krill
 Mo & Krill A layered single-target lockdown package: Sand Blast disarm into Burrow knockup into a multi-second Combo stun. Durability very high (3/3) Burst high (2/3) Mobility high (2/3) Healing very high (3/3)
-
 Nurse Harrow
 Nurse Harrow Strong, aimed ally healing that ignores falloff Durability high (2/3) Burst low (1/3) Mobility low (1/3) Healing very high (3/3)
-
 Paige
 Paige Peel — Plot Armor is a save and a damage buff on one button. Durability low (1/3) Burst low (1/3) Mobility none (0/3) Healing high (2/3)
-
 Rem
 Rem Tag Along's healing scales with how badly the ally is losing the fight Durability none (0/3) Burst none (0/3) Mobility low (1/3) Healing very high (3/3)
-
 Silver
 Silver Two distinct kits means she covers both the mid-range and close-range phases of a fight without itemising for both Durability high (2/3) Burst high (2/3) Mobility high (2/3) Healing high (2/3)
-
 Victor
 Victor Effectively two health bars via Shocking Reanimation, which invalidates the normal 'focus the bruiser' plan Durability very high (3/3) Burst high (2/3) Mobility high (2/3) Healing very high (3/3)
-
 Viscous
 Viscous Single-target save: The Cube is invulnerability, not a shield, so it absorbs any ultimate outright Durability high (2/3) Burst low (1/3) Mobility high (2/3) Healing high (2/3)
-
 Warden
 Warden Binding Word forces a 20m-in-2.8s escape check and silences you through it at T3 Durability high (2/3) Burst low (1/3) Mobility low (1/3) Healing high (2/3)
-
 Wraith
 Wraith Single-target lockdown: Telekinesis disables for over two seconds and then blocks Stamina and movement abilities afterwards Durability low (1/3) Burst high (2/3) Mobility high (2/3) Healing low (1/3)
-
 Yamato
 Yamato 8.2 m/s base movement speed plus a 23-31m grapple gives her strong engagement control Durability high (2/3) Burst very high (3/3) Mobility very high (3/3) Healing high (2/3)
Get this answered for your actual game
Which of these is worth a slot depends on how many of the six enemies really press this. The tool works that out from the lineup.
Open the matchup tool