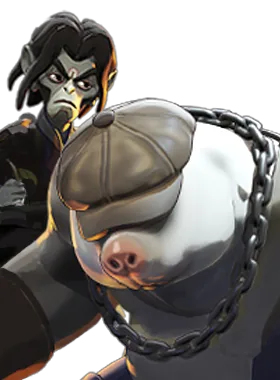

Mo & Krill vs Victor
Mo & Krill's team wins 42.9% Victor's team wins 57.1%, across 29,529 games
Written for the Mo & Krill player. Playing Victor? See Victor vs Mo & Krill →
Victor has the edge
Mo & Krill usually wins 46.4% of games. Against Victor that is 3.5% lower, over 29,529 games.
- Whole match 42.9% −3.5% vs usual 29,529 games
- Sharing a lane 43.2% −3.2% vs usual 9,687 games
- Oracle and above 41.7% −3.3% vs usual 731 games
"Sharing a lane" counts only games where both were assigned the same lane — the laning matchup itself. "Oracle and above" counts only matches whose average rank was Oracle and above, against Mo & Krill's usual win rate at that rank.
The fight at a glance
If you're Mo & Krill
 Shocking Reanimation A passive that fires when Victor would die. Crowd Control Diminishing slow from the death wave, then a 1.5s stun on reanimation (T3… Damage 200 spirit on reanimation; Defensive Rebirth at 50% health base; 1 +15% fire rate and +6 spirit damage per bullet while Shocking Reanimation is on cooldown 2 +50% rebirth health (so he returns much healthier) 5 +175 damage, +1.5s stun duration, and -95s cooldown (240s base down to roughly 145s)
Wait out Shocking Reanimation 240s cooldown
ThenShocking Reanimation first and above everything.
- Watch out
 Aura of Suffering A toggle that radiates escalating spirit damage in roughly an 8m sphere around Victor, hurting enemies and Victor himself. Crowd Control T1 applies a 20% move and dash slow to enemies inside the aura Damage 13 DPS minimum ramping to 58 DPS maximum over roughly 8s of channel; Defensive none — it damages Victor as well 1 +20% move and dash slow on enemies in the aura 2 +6 minimum DPS and +34 maximum DPS 5 +1m radius and enemies inside take +16% damage from all sources Aura of Suffering ramps from 13 to 58+ DPS (up to ~92 at Tier 2) with a 20% move/dash slow, so any fight he drags out inside 8m he wins on attrition.
- Your edge
- Mo & Krill has more crowd control than Victor.
- Buy
 Scourge Scourge +35s Cooldown +10s Duration +0.25s Cast Delay +40% Spirit Resist +100 Bonus Health +20% Debuff Resist Buy it against Victor's Shocking Reanimation.
If you're Victor
Has the edge Burrow Mo & Krill dive underground, moving faster and gaining both spirit and bullet armour while submerged. Crowd Control Slow plus a knockup on everyone near the emergence point. Damage Spirit damage on emergence; Mobility Increased move speed while burrowed (+4 m/s at T3) on a base 8 m/s frame. 1 +45 spin DPS while burrowed. 2 +4s burrow time, +2 radius. 5 -20s cooldown, +4 m/s move speed.
Wait out Burrow 40s cooldown
WhyIt is their only engage and their only real escape; force it on a trooper wave or a fake overextend and they are a slow-approaching shotgun hero for the next 20-40 seconds.
- Watch out
- Burrow lets them travel to you underground with bullet and spirit armour, then surface directly under your feet with a Knockup you cannot dash out of.
- Your edge
- Neither kit has a clear edge here; this one comes down to who uses their cooldowns better.
- Buy
 Unstoppable Unstoppable +60s Cooldown +5.5s Duration +125 Bonus Health +25% Debuff Resist Buy it against Mo & Krill's
 Combo Combo Mo & Krill grab a single enemy, hold them in place stunned while chewing through them for the duration of the channel. Crowd Control Full stun for the 2.4s channel (+0.7s at T3). Damage 35 damage per second over the 2.4s channel; Mobility None — both parties are locked in place, which is the risk. 1 +100% lifesteal. 2 -30s cooldown, +50% bullet resist. 5 +0.7s duration, +35 damage per second with increased scaling. .
The full plan for Mo & Krill, phase by phase, is below. Victor's side in full →
What should I do right now?
Do
- Plan for Scourge Scourge +35s Cooldown +10s Duration +0.25s Cast Delay +40% Spirit Resist +100 Bonus Health +20% Debuff Resist — know which tier it sits in so you are not improvising at the shop.
- Know what Shocking Reanimation looks like. It is the cooldown this lane revolves around.
Avoid
- Walking to lane on the same path every wave against a hero with Victor's engage range.
Do
- Low base move speed (6.3 m/s) outside of the
 Jumpstart Jumpstart Victor shocks himself for a percentage of his current health, then converts that into a large burst of health regeneration and a sharp movement speed boost, both of which decay over the… Damage Self-damage of 15% current health; Mobility +3 m/s base move speed, decaying; Defensive 100 total HP regen base, +70 more at T2 (~170 total); 1 +3 m/s move speed (on top of the base +3 m/s) 2 +70 total HP regen and -8s cooldown (30s base) 5 +1 charge, +50% Debuff Resistance, -50% duration on existing debuffs, and increased… window makes him easy to collapse on
- Both Jumpstart and Aura of Suffering damage him, so he starts most fights below maximum health
- 930 base health gives them a large health pool that is hard to push out of lane.
Avoid
- Jumpstart's 100-170 regen lets him sustain through prolonged health trades without buying sustain items
 Pain Battery Pain Battery A battery that fills passively as Victor takes damage from any source, including his own self-harm abilities. Crowd Control T1 applies a 32% movement slow for 2s on hit Damage 100 base spirit; T2 adds +50 Defensive T3 heals Victor for 15% of his missing health per hero hit, which is the… 1 +32% movement slow for 2s on hit 2 +50 damage 5 heal for 15% of missing health per hero hit, plus increased spirit scaling converts incoming lane harassment into a 100-150 damage counter-punch, so passive poke feeds him
Do
- Their first real spike is ult unlock — respect it from that point, not before.
- Your spike is
 Scorn Scorn A burst of damage to everything close by that converts a portion of the damage dealt into healing, with a substantially larger return when the damage lands on enemy heroes. Crowd Control None at base. T3 adds a stacking 15% damage debuff on enemies hit, lasting… Damage 45 damage base, scaling with spirit at 0.675, with a 13s base cooldown. Defensive The heal is the main defensive layer. 1 +30 damage. 2 -5s cooldown, +1m radius. 5 applies a stacking 15% damage debuff to enemies hit for 16s. first two points (laning 0-10min): The Scorn/Scorn opener front-loads their sustain and wave clear.
Avoid
- Taking an even fight against Victor on their spike timing when you could take the same fight ten minutes later on yours.
Do
- Watch for Shocking Reanimation. Walk away from the corpse. The Stun and the 200-375 damage are centred on where he died — take a few steps and the whole ultimate hits nothing
- Fight him outside the 8m Aura of Suffering radius — Vindicta from
 Flight Flight Vindicta lifts off and flies freely for an extended duration. Damage +10 spirit damage per bullet while airborne (T3 adds +10 more with improved… Mobility 13s of free flight on a 42s cooldown; Defensive Being airborne dodges most ground-targeted abilities and puts her out of… 1 +50% base ammo capacity during Flight 2 +10s duration (13s base up to 23s) 5 hero kills refresh Flight's duration; , Venator's bolts, Wraith's
 Card Trick Card Trick Dealing weapon damage generates cards of a random suit, which she can then throw. Crowd Control none directly Damage 45 spirit base (about 0.55x spirit scaling); Mobility A Club card grants +24% move speed 1 +2 charges 2 +40 damage and increased spirit scaling 5 all suits improved and a higher chance for Jokers and
 Full Auto Full Auto For a short window Wraith's fire rate increases and every bullet carries bonus spirit damage. Damage +2 spirit damage per bullet on top of her weapon damage 1 -20s cooldown (45s base down to 25s) 2 +10% fire rate and +3s duration 5 unlimited ammo and increased scaling on spirit damage per bullet all beat him without ever entering it
Avoid
- Spending your own escape before Shocking Reanimation is on cooldown.
Victor’s abilities
- Shocking Reanimation Ultimate
The cooldown that decides the fight. Diminishing slow from the death wave, then a 1.5s Stun on reanimation (T3 adds +1.5s, so up to 3s).
- Walk away from the corpse. The Stun and the 200-375 damage are centred on where he died — take a few steps and the whole ultimate hits nothing
- Do not commit your own ultimate to 'finish' a low Victor; the kill is going to be undone regardless, so save
 Telekinesis Telekinesis Lifts one enemy hero into the air, holding them helpless for a couple of seconds, then slams them toward a location Wraith chooses. Crowd Control stunned during the 1.25s channel, then the target is airborne and unable to… Damage 100 spirit base (about 1.0x spirit scaling); Mobility none for Wraith — she channels for 1.25s while aiming the throw 1 +100 damage 2 -45s cooldown (150s base down to 105s) 5 +1.5s debuff duration and +6m throw and cast range ,
 Assassinate Assassinate Scopes in for a long-range rifle shot. Damage 90 base spirit plus up to 90 bonus against targets under 50% health (T2 adds… Mobility none — she is scoped and stationary during the charge 1 -15s cooldown (55s base) 2 +80 maximum bonus damage 5 +4% weapon damage per kill (from +6% to +10%) or
 Goo Ball Goo Ball Viscous becomes a large ball of goo that rolls around the map, damaging and briefly stunning any enemy it slams into. Crowd Control 0.5s stun on impact (T3 adds +0.3s); Damage 110 base (about 1.0x spirit scaling); Mobility High-speed rolling with wall bounces and a double jump, for 11s (T3 adds… 1 -25s cooldown (150s base) 2 +70 damage and +20% to both resists 5 +7s duration, +0.3s stun duration, and +0.2 spirit scaling for the reanimated body
- Count the cooldown: 240s base, roughly 145s at T3. A Victor whose Reanimation is spent is a 800 HP brawler with no escape and can be dived freely
- Pain Battery Ability 1
The control here is bought rather than baseline — T1 applies a 32% movement slow for 2s on hit.
- Do not free-hit a low Victor with chip damage — every bullet you land charges the battery he will heal off
- Spread out: the discharge hits each target once, so a group standing on one another all eat a full 100-150
- Apply anti-heal BEFORE he discharges, not after — the heal resolves on hit, so
 Healbane Healbane +8s Duration +7 Spirit Power -35% Incoming Healing or
 Toxic Bullets Toxic Bullets -40% Incoming Healing needs to already be on him
- Jumpstart Ability 2
His engage-and-sustain button in one. The self-damage tops off
Pain Battery, the regen out-heals the cost several times over, and the speed lets him close on a backliner or leave a lost fight.- Anti-heal now holds through Jumpstart at reduced duration — buy Healbane or Toxic Bullets and apply it before he casts, and the 100-170 regen is largely wasted
- Burst him inside the Jumpstart window rather than after: the regen is a heal-over-time, so a single large burst (Vindicta's Assassinate, Yamato's
 Power Slash Power Slash Yamato channels for around a second and a half to build up a sword strike, then releases it as a ranged slash. Crowd Control T1 adds a 32% movement slow for 3s Damage 145 spirit at full charge (about 1.96x spirit scaling), with T3 adding +150… Mobility none — she is channelling 1 +32% movement slow for 3s 2 -4s cooldown (12s base) 5 +8m cast range, +150 damage, and increased Spirit Power scaling , Wraith's Full Auto window) beats a slow drip
- The self-damage means he enters every fight already below max; a ranged poke hero denies him the ability to Jumpstart safely at all
- Anti-heal now holds through Jumpstart at reduced duration — buy
- Aura of Suffering Ability 3
No control at base; the upgrade is what changes that — T1 applies a 20% move and dash slow to enemies inside the aura.
- Leave the 8m bubble and the ramp resets
- Do not contest a Walker, Patron or Urn while standing in the aura; take the objective trade elsewhere or wait him out
- The T1 20% slow also slows dashes, so plan your exit with a Stamina jump or a teleport (Wraith's
 Project Mind Project Mind After a brief channel, Wraith teleports to a chosen location at range. Mobility Teleport up to 25m (T1 adds +15m, so up to 40m) after a 1s interruptible… Defensive T2 grants a 300 barrier for 5s on arrival, scaling with Spirit Power 1 +15m cast range (25m base up to 40m) 2 300 barrier for 5s on arrival, scaling with Spirit Power 5 -32s cooldown (50s base down to 18s) ) rather than a dash
- 1 Shocking Reanimation
Shocking Reanimation first and above everything — force the revive with a cheap commit, then win the real fight during the 145-240s downtime
- 2 Jumpstart
Jumpstart second: make him burn it as an escape rather than an engage, which removes both his mobility and his regen for 22-30s
- 3 Pain Battery
Pain Battery third: it discharges on a short 2s cycle once charged, so the goal is not to bait it but to be spread out and anti-healed when it goes off
The matchup in detail
- Zero ranged threat; everything happens inside 8m Strong evidence
- 6.3 m/s base speed is among the slowest, so outside Jumpstart he cannot chase or flee Strong evidence
- Self-damaging kit means he is frequently low, and burst heroes can execute him before Pain Battery refills Strong evidence
- Neither of you deletes the other, so this matchup is decided by multipliers rather than damage. Resists stack multiplicatively, which means your fourth resist item buys much less percentage than your first; shred is subtracted from the total afterward, which means it is worth more the tankier they get; and healing reduction stacks multiplicatively too, so a second anti-heal source on top of a first is worth far less than the first. The efficient build against Victor is one anti-heal, one shred, and damage after that. Strong evidence
- Aura of Suffering ramps from 13 to 58+ DPS (up to ~92 at T2) with a 20% move/dash slow, so any fight he drags out inside 8m he wins on attrition Strong evidence
- Aura of Suffering at T3 makes everyone inside take +16% damage from all sources — his team's burst is amplified just by his presence Strong evidence
- Pain Battery discharges for 100-150 spirit to everyone around him and, at T3, heals him for 15% of his missing health per hero hit, so chip damage on a low Victor is actively counterproductive Strong evidence
- Shocking Reanimation means killing him near your team stuns you for 1.5-3s and does 200-375 damage before he stands back up at 50-100% health Strong evidence
- Jumpstart gives +3 to +6 m/s of burst speed for a forced engage on a backliner who thought they were out of a 6.3 m/s hero's range Strong evidence
- Fight him outside the 8m Aura of Suffering radius — Vindicta from Flight, Venator's bolts, Wraith's Card Trick and Full Auto all beat him without ever entering it Strong evidence
- Buy anti-heal (Healbane, Toxic Bullets) and apply it BEFORE he Jumpstarts; as of the 03-26-2026 patch he no longer purges it, he only resists it, so the debuff sticks Strong evidence
- When he dies, immediately step away from the corpse — the Reanimation Stun and 200-375 damage are centred on the death location and hit nothing if you leave Strong evidence
- Save your Hard CC and your ultimate for the reanimated Victor, not the first health bar; a Warden
 Binding Word Binding Word Curses a targeted enemy hero. Crowd Control 1.75s immobilise (T2 adds +0.75s, so up to 2.5s) if the target fails the… Damage 110 (about 2.44x spirit scaling) when it lands Defensive Rooting a diver in place is a strong self-peel 1 Warden deals +20% bullet damage to trapped heroes for 5s 2 +0.75s immobilise duration 5 -14s cooldown (34s base) and silences the target until they escape or are immobilised or Viscous Cube on the rebirth ends him for good Strong evidence
- Punish the cooldown gap: 240s base (about 145s at T3). Track it and force the next objective while Reanimation is down Strong evidence
- Victor contributes through abilities, which makes a hard Silence worth more against them than any amount of resist.
 Focus Lens Focus Lens +40s Cooldown +4.5s Duration +0.1s Cast Delay +35% Damage On Expire +10% Fire Rate -9% Spirit Resist -30 Spirit Power +12s Resist Reduction Duration Builds from Spirit Sap is the sharpest version: 4.5 seconds of single-target Silence at 20m, plus 30% of all damage dealt during the window applied when it expires, on a 45-second cooldown. Against a caster that is not a defensive purchase — it deletes their entire fight participation and then charges them for it. Strong evidence
- Any moment Shocking Reanimation is on cooldown (240s base, ~145s at T3) — he is an 800 HP hero with no escape and no second life Strong evidence
- The channel between the death wave and the reanimation: enemies who walk out during it take zero and he comes back alone Strong evidence
- Immediately after Jumpstart is spent — he is back to 6.3 m/s and can be kited by anything with a dash or a gap-close Strong evidence
- Right after he self-damages with Jumpstart, before Pain Battery refills: that is the lowest-HP, no-heal, no-counter-punch state in his loop Strong evidence
- Any long-range trade at all; he has no ranged ability in the kit Strong evidence
- Jumpstart's 100-170 regen lets him sustain through prolonged health trades without buying sustain items Strong evidence
- Pain Battery converts incoming lane harassment into a 100-150 damage counter-punch, so passive poke feeds him Strong evidence
- Low base move speed (6.3 m/s) outside of the Jumpstart window makes him easy to collapse on Strong evidence
- Both Jumpstart and Aura of Suffering damage him, so he starts most fights below maximum health Strong evidence
- 930 base health gives them a large health pool that is hard to push out of lane. Strong evidence
- The first Unstable Rift lands around 11:00 and then every 7 minutes, and Victor beats you in exactly the fight it creates. Use the telegraph: a world-only visual appears on a random side-lane bridge roughly 60 seconds before the global announcement and map marker, which is the single biggest piece of free information in the mid game. Spend those 60 seconds either grouping or deliberately taking something elsewhere — the one thing you cannot afford is arriving at a Rift bridge late and alone. Strong evidence
- Your kit is built around lockdown and that is worth less on the Mid Boss than on Victor — it carries 35% Debuff Resist as of 03-06-2026, so your disables run roughly two-thirds as long on it. Plan the take around damage and positioning rather than a CC chain, and spend the chain on Victor if they contest. The payoff is worth the trip: 3,000 souls + 50 per minute, two permanent buffs each, and a Rejuvenator crystal giving up to three single-use revives that return a player at full health after 3 seconds, for 3 minutes. Documented
- Shocking Reanimation unlock — Makes him effectively unkillable in a single commit, which flips lane 1v1s and early ganks Strong evidence
- Pain Battery T3 — 15% missing-health heal per hero hit turns a losing brawl into a sustainable one Strong evidence
- Aura of Suffering T3 — +16% damage taken for everyone in the aura converts him from a solo brawler into a teamfight amplifier Strong evidence
- Late 35min+ — Shocking Reanimation T3 (roughly 145s cooldown, 3s Stun, 375 damage) gives him a revive with a Stun in teamfights Strong evidence
- Shocking Reanimation is a channel, which means the fight is decided by whether you can break it. Hold one interrupt — a Stun, a Silence, or a displacement — specifically for that cast rather than spending it on the opening trade. If you have no interrupt, the answer is line of sight: leave the area entirely rather than trying to out-heal it. Strong evidence
- You are not going to kill Victor in a normal teamfight and trying to is how fights are lost. Treat them as terrain: fight around them, spend your damage on whoever is behind them, and only commit to killing them once anti-heal and shred are actually online. Strategic
- Victor wins by choosing where the fight happens. Take your position before the zoning goes down, not after — once the area is committed you are fighting on their terms, and walking in to contest it is exactly the mistake the kit is built to farm. Strategic
- You deal Spirit Damage, so Healbane is the cheaper and more reliable anti-heal against Victor — it lands off your abilities at T2 rather than asking you to sustain gunfire you are not built for. Strong evidence
- Victor is a durability check, and the maths favours shred over raw damage here. Resistances stack multiplicatively, but shred is pooled and then subtracted from total resist — so the higher their resist climbs, the more each point of shred is worth. Against a stacked tank, resist reduction outperforms another flat damage item. Documented
- Scourge (spirit T4) — Buy on supports to harden a focused ally against a caster team while adding pressure damage. What you are answering here: Victor's Shocking Reanimation. Documented
-
 Majestic Leap Majestic Leap +45s Cooldown +5s Interrupt Cooldown +100% Air Control +50% Air Control +32% Move Speed +2.5s Slow Duration +8s Barrier Duration (vitality T3) — Buy to escape ground-based lockdown and to rotate across the map quickly. That matters here because of the zoning and area denial from Victor. Documented
-
 Stamina Mastery Stamina Mastery +2 Stamina +18% Stamina Recovery +23% Air Jump/Dash Distance Builds from Extra Stamina (vitality T3) — Victor's Shocking Reanimation — that is the stuns and Hard CC this answers. Buy when dodging telegraphed abilities and disengaging is how you survive. Strong evidence
- Anti-heal against Victor is bought correctly and applied at the wrong moment. Healbane's reduction runs for 8 seconds from your Spirit Damage and Toxic Bullets' runs while the bleed is up — both are windows, and re-applying the same source before it expires does not stack a second instance. The mistake is opening the fight clean and reaching for anti-heal once they start healing; by then you have spent the fight. Land it before they commit, then keep the window refreshed rather than re-triggering it. Strong evidence
- The reflex buy against a hero who keeps deleting you is
 Metal Skin Metal Skin +24s Cooldown +5s Duration +12% Bullet Resist -20% Dash Distance +20% Gravity Scale , and against Victor it does nothing. Metal Skin is bullet-damage immunity only — Spirit Damage, abilities and every status effect pass straight through it, and you pay −1.5 m/s move speed and −20% dash distance for the privilege. The three big defensive actives are deliberately orthogonal: Metal Skin stops bullets, Unstoppable Unstoppable +60s Cooldown +5.5s Duration +125 Bonus Health +25% Debuff Resist Builds from Debuff Reducer stops statuses,
 Ethereal Shift Ethereal Shift +37s Cooldown +4s Duration +5s Buff Duration +30% Spirit Resist +20 Spirit Power stops everything but disables you. Victor is a spirit threat, so it is the last two you are choosing between. Documented
- The finishing heavy melee on Victor is worse than it feels. Melee Damage is mitigated twice — once by Bullet Resist and again by Melee Resist — so it is the single worst damage channel to point at a stacked-resist target, and the wind-up is long enough for a parry that stuns you for 3 seconds with no Debuff Resist reduction available. Finish with your gun or an ability, not with melee. Strong evidence
- The Unstable Rift capture point is a 20m circle on a bridge, capture only progresses when no enemy is inside it, and everyone standing in it is revealed on the minimap. That is a purpose-built trap for Victor. The mistake is treating the circle as the objective: you do not need to stand in it, you need them not to. Contest from outside the radius, deny with a single body at the edge, and let their Area Damage land on empty bridge. Strategic
Next
Mo & Krill’s other hard matchups
All of Victor
Who beats Victor, the items that shut Victor down, and every ability.
Facing more than Victor?
Add the other five enemies: who to focus first and what to buy against the whole team.
Sources and method for this page
Everything on this page is generated for Deadlock patch 10-30-2026 from Victor's current kit, measured match results and a mechanics rule base. Each line carries its own confidence label.
Data-supported Measured: you win 42.9% of these, which is 3.5% below your overall win rate (29,529 matches). The kit-based model reads this as low instead — treat the measured number as primary and the gap as a sign this matchup is more about execution than kit.
Victor's kit and counterplay were compiled from 11 sources, cross-checked for patch 10-30-2026. Threat ratings compare this pairing against Mo & Krill's own baseline win rate rather than a flat 50%, because ranking by raw win rate produces the wrong answer for heroes whose overall win rate is not 50%.
- https://deadlock.one/en/heroes/victor
- https://deadlock.io/en/heroes/victor
- https://deadlock.wiki/Victor
- https://dramalock.org/guides/victor-deadlock-guide-build-abilities/
- https://www.deadlockpatchnotes.com/spells/jumpstart
- https://forums.playdeadlock.com/threads/victor-bypasses-all-healing-reduction.81220/