Objective pressure
“They take towers and objectives too fast.”
Start with  Monster Rounds Monster Rounds +25% Weapon Damage vs. NPCs +1 Out of Combat Regen +25% Bullet Resist vs. NPCs — the cheapest answer, at 800 souls . 5 more below, by tier.
Items that answer this
6 itemsTier 1 800 souls each
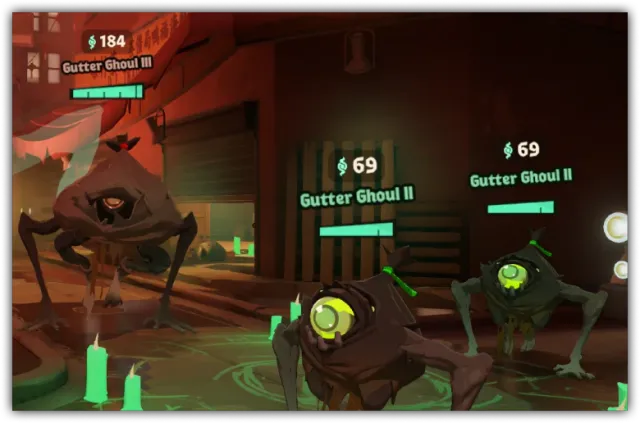
- Monster Rounds Monster Rounds +25% Weapon Damage vs. NPCs +1 Out of Combat Regen +25% Bullet Resist vs. NPCs Buy when you need to clear Haunt camps Haunts Lanes and Districts across the map Haunts replace the old neutral camps. They are not a reskin: each type behaves differently, and the health bar now shows a camp's soul value and how hard it is, so you can decide whether a camp is worth your time before you start shooting. Three eye colours mark the tier — teal for tier I, yellow for tier II, red for tier III. Souls 4168181 souls tier I / II / III a creep +0.44 / +0.73 / +1.95 a minute and waves quickly.
-
 Sprint Boots Sprint Boots +2 Out of Combat Regen Buy when the game is decided by rotations and objective contests.
Tier 2 1,600 souls each
-
 Split Shot Split Shot +27s Cooldown +5 Weapon Multishot +12s Bonus Duration +8% Weapon Damage per Stack +5 Max Stacks Buy when enemies fight bunched together, or for faster wave clear.
Tier 3 3,200 souls each
-
 Veil Walker Veil Walker +15s Cooldown +16s Duration +0.25s Fade Time +125 Bonus Health +6 Spirit Power +8s Invisibility Duration Buy to reposition safely, sneak objectives and reset after a trade. Watch out: Enemies within 20m can still spot you
Tier 4 6,400 souls each
-
 Magic Carpet Magic Carpet +32s Cooldown +12s Duration +0.2s Cast Delay +14 Spirit Power +1.3s Summon Duration +15% Ability Duration +25% Air Control -15% Gravity Scale +125 Bonus Health Buy when map rotations and split-push response are deciding the game, or as an escape from ground-locked fights. Watch out: Flying makes you a prime target for Knockdown's airborne bonus stun and +100% gravity
-
 Ricochet Ricochet +65% Ricochet Damage +18% Fire Rate Buy on a gun carry in a team-fight-heavy game or when you need to dominate wave clear.
Hover an item's name for its exact numbers, or open it for the full write-up.
Heroes who cause this
7 heroesIf you are up against one of these, expect to need an item from the list above. Pick a hero for everything else about beating them.
-
 Bebop
 Bebop Pick potential — a landed Grapple Arm sets up his Sticky Bomb and Exploding Uppercut combo Durability high (2/3) Burst very high (3/3) Mobility low (1/3) Healing low (1/3)
-
 Calico
 Calico Fast farming and map mobility: she turns a quiet map into a soul lead Durability low (1/3) Burst very high (3/3) Mobility very high (3/3) Healing high (2/3)
-
 Drifter
 Drifter A heavy 20.10-damage-per-bullet shotgun, with burst on top from Rend Durability low (1/3) Burst very high (3/3) Mobility high (2/3) Healing low (1/3)
-
 Graves
 Graves Map pressure while away from the fight via Borrowed Decree Ghouls marching at objectives Durability low (1/3) Burst low (1/3) Mobility none (0/3) Healing low (1/3)
-
 McGinnis
 McGinnis Defines zone control: Spectral Wall plus Heavy Barrage can make an entire lane or objective unenterable. Durability high (2/3) Burst low (1/3) Mobility none (0/3) Healing high (2/3)
-
 Mirage
 Mirage Global-teleport split pressure: Traveler means he is rarely out of position on the macro map. Durability low (1/3) Burst high (2/3) Mobility high (2/3) Healing very high (3/3)
-
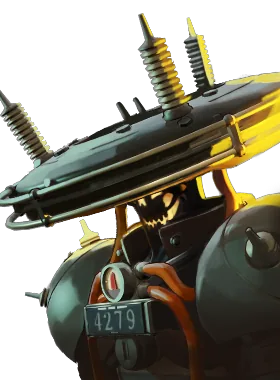 Seven
 Seven Wave and jungle clear through Lightning Ball and Power Surge, which helps him reach item breakpoints sooner Durability low (1/3) Burst high (2/3) Mobility none (0/3) Healing none (0/3)
Get this answered for your actual game
Which of these is worth a slot depends on how many of the six enemies really press this. The tool works that out from the lineup.
Open the matchup tool